Previously…
Well now, mates. Let’s keep putting this monster together!
I don’t call it monster because it’s ugly though. It’s not! It’s a beauty. I call it a monster because it’s… Wow. So big ![]() I mean, just look. I was thinking of adding it to my Titanic, but it almost won’t fit and it doesn’t even have the supporting platform yet, so… I don’t believe that’s gonna be the place
I mean, just look. I was thinking of adding it to my Titanic, but it almost won’t fit and it doesn’t even have the supporting platform yet, so… I don’t believe that’s gonna be the place ![]()

Yeah, it won’t fit there. Period. I don’t want any accidents happening.

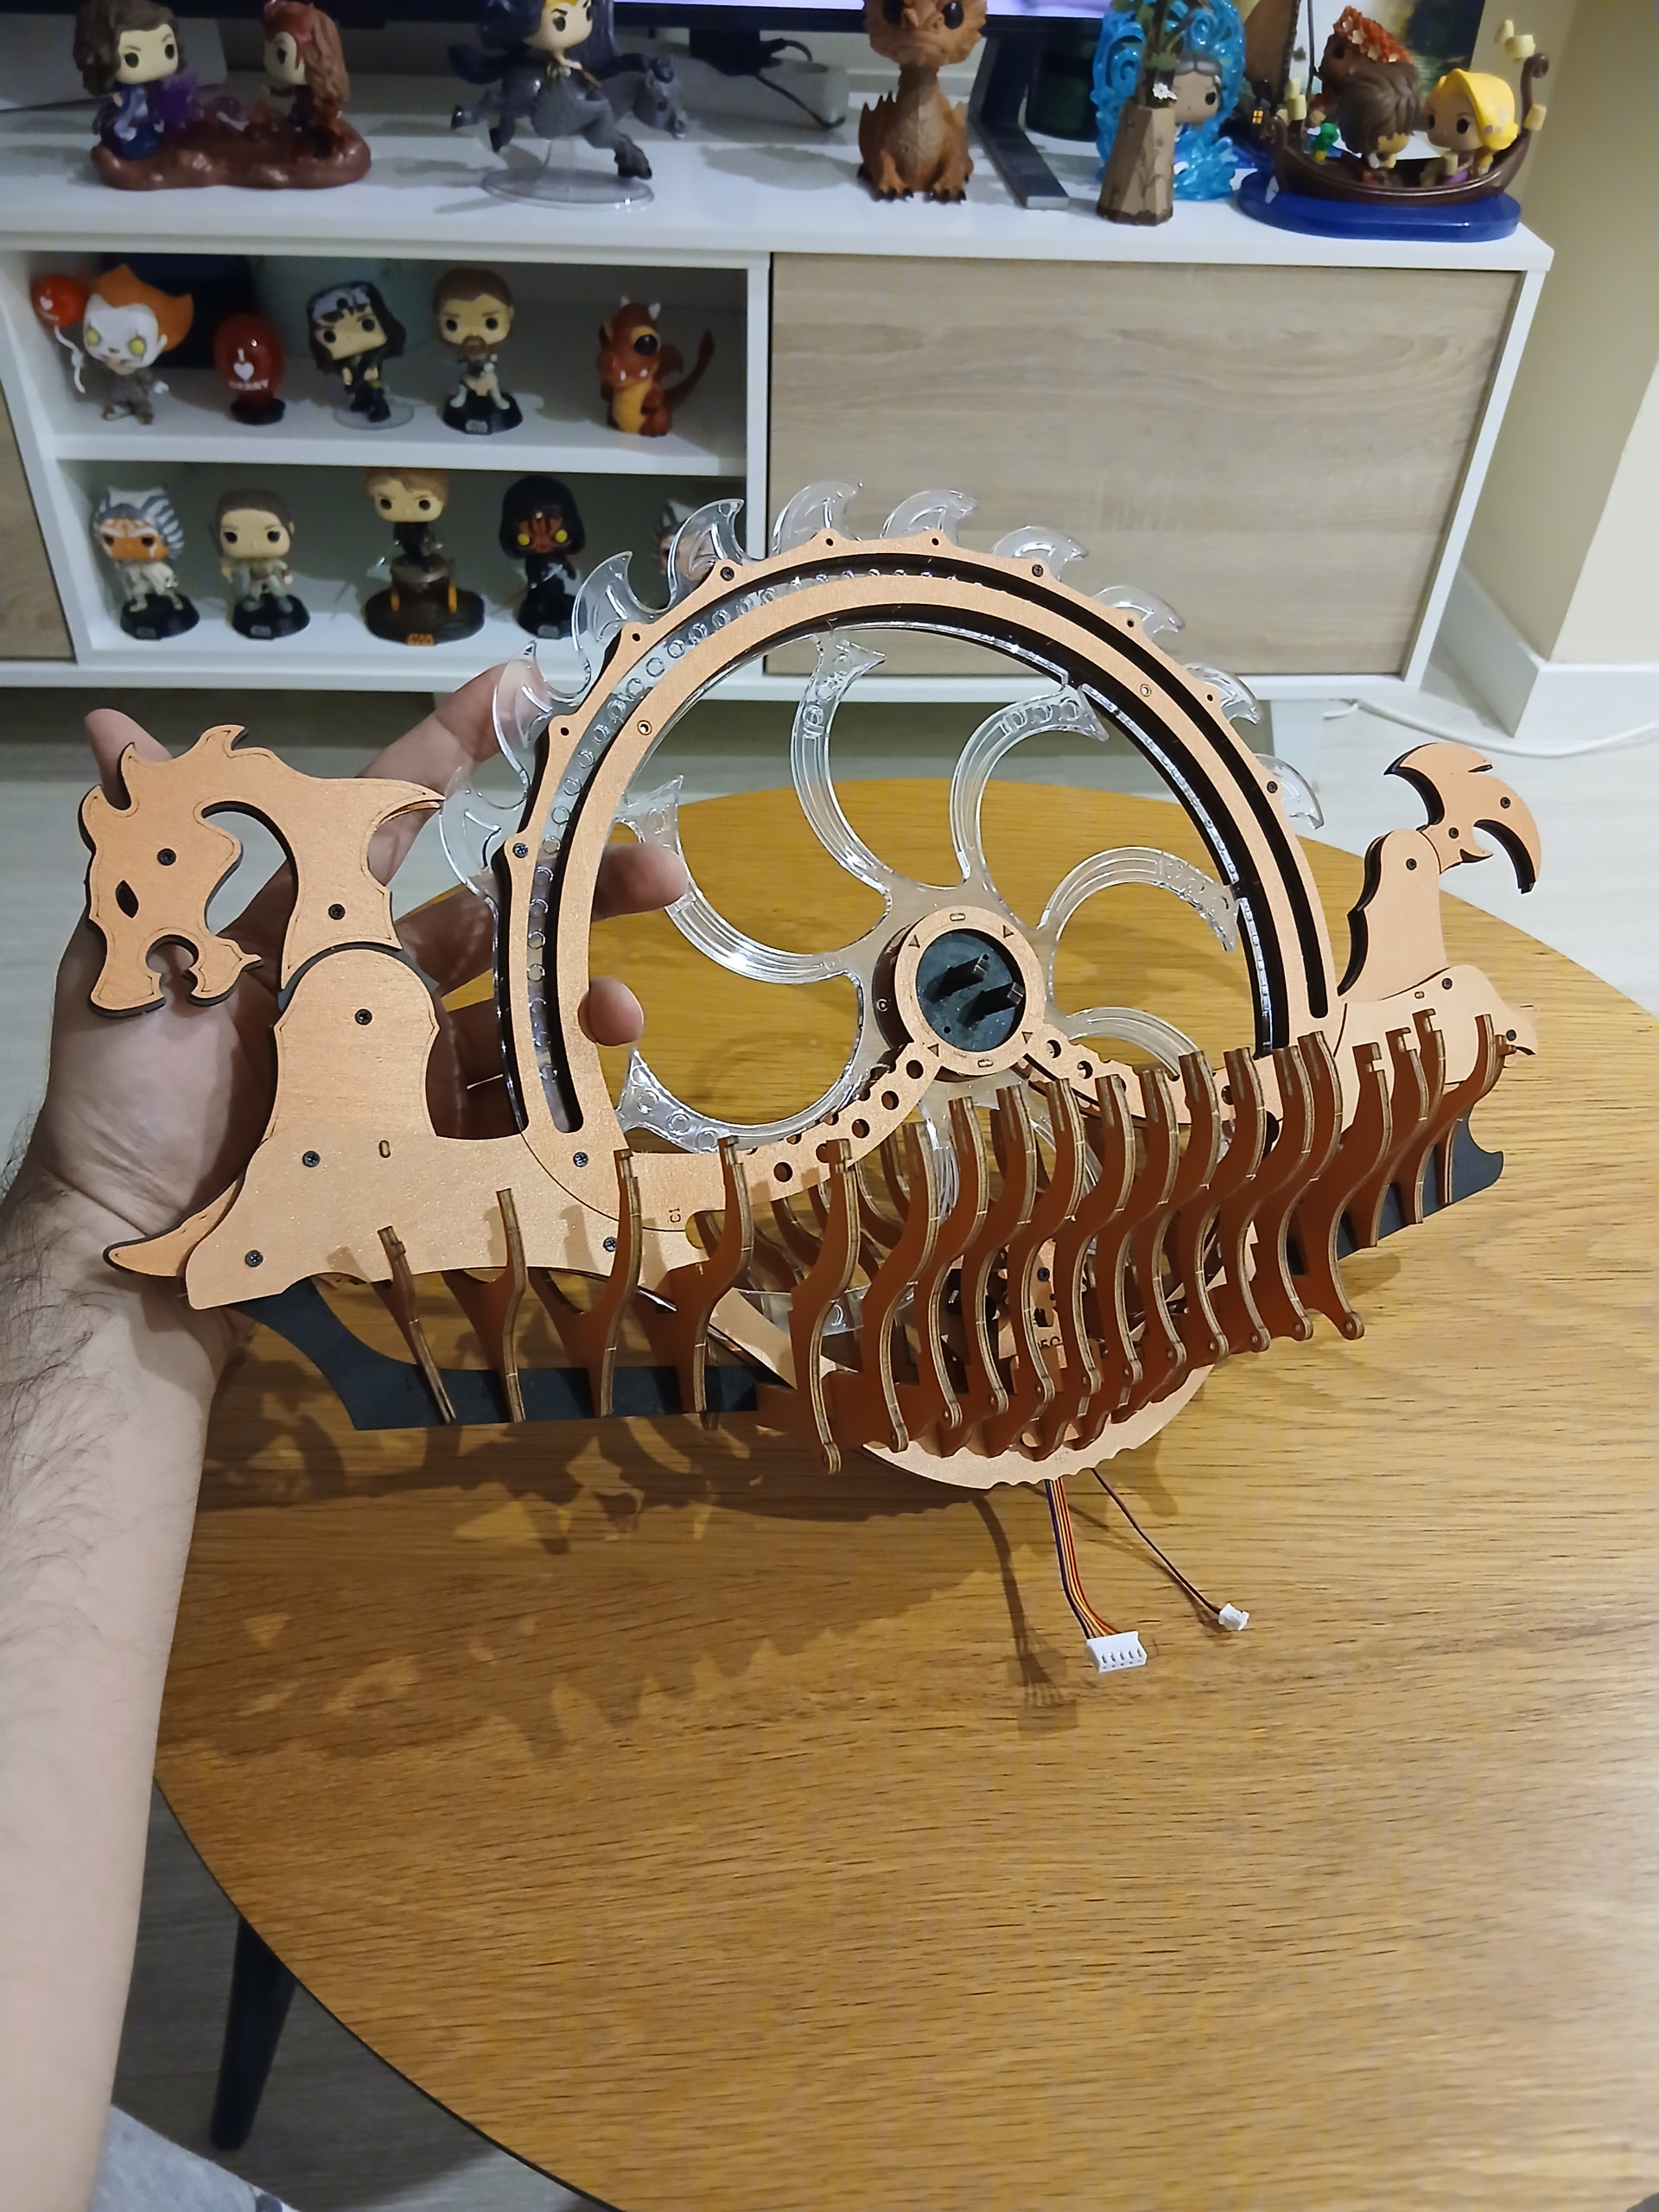
Anyway! Let’s get into business. Today I was adding the hull to my beautiful dragon not-yet-a-ship. This is how we ended up last time:

For the previous ships I’ve built (Seahorse Barque, Titanic and Sailing Ship) the hull was the first thing I had to put together for the ship itself. It was interesting this time to kind of do it the opposite way! So I was wondering how I was gonna fit both things together. And it’s tricky! But not that complicated and not that long. For this whole process I may have taken an hour or so.

First I had to take the engine section I’ve built last time and add some hull parts to it, what wasn’t complicated at all. Look, my engine has long arms now! Or are they happy tentacles? You never know.
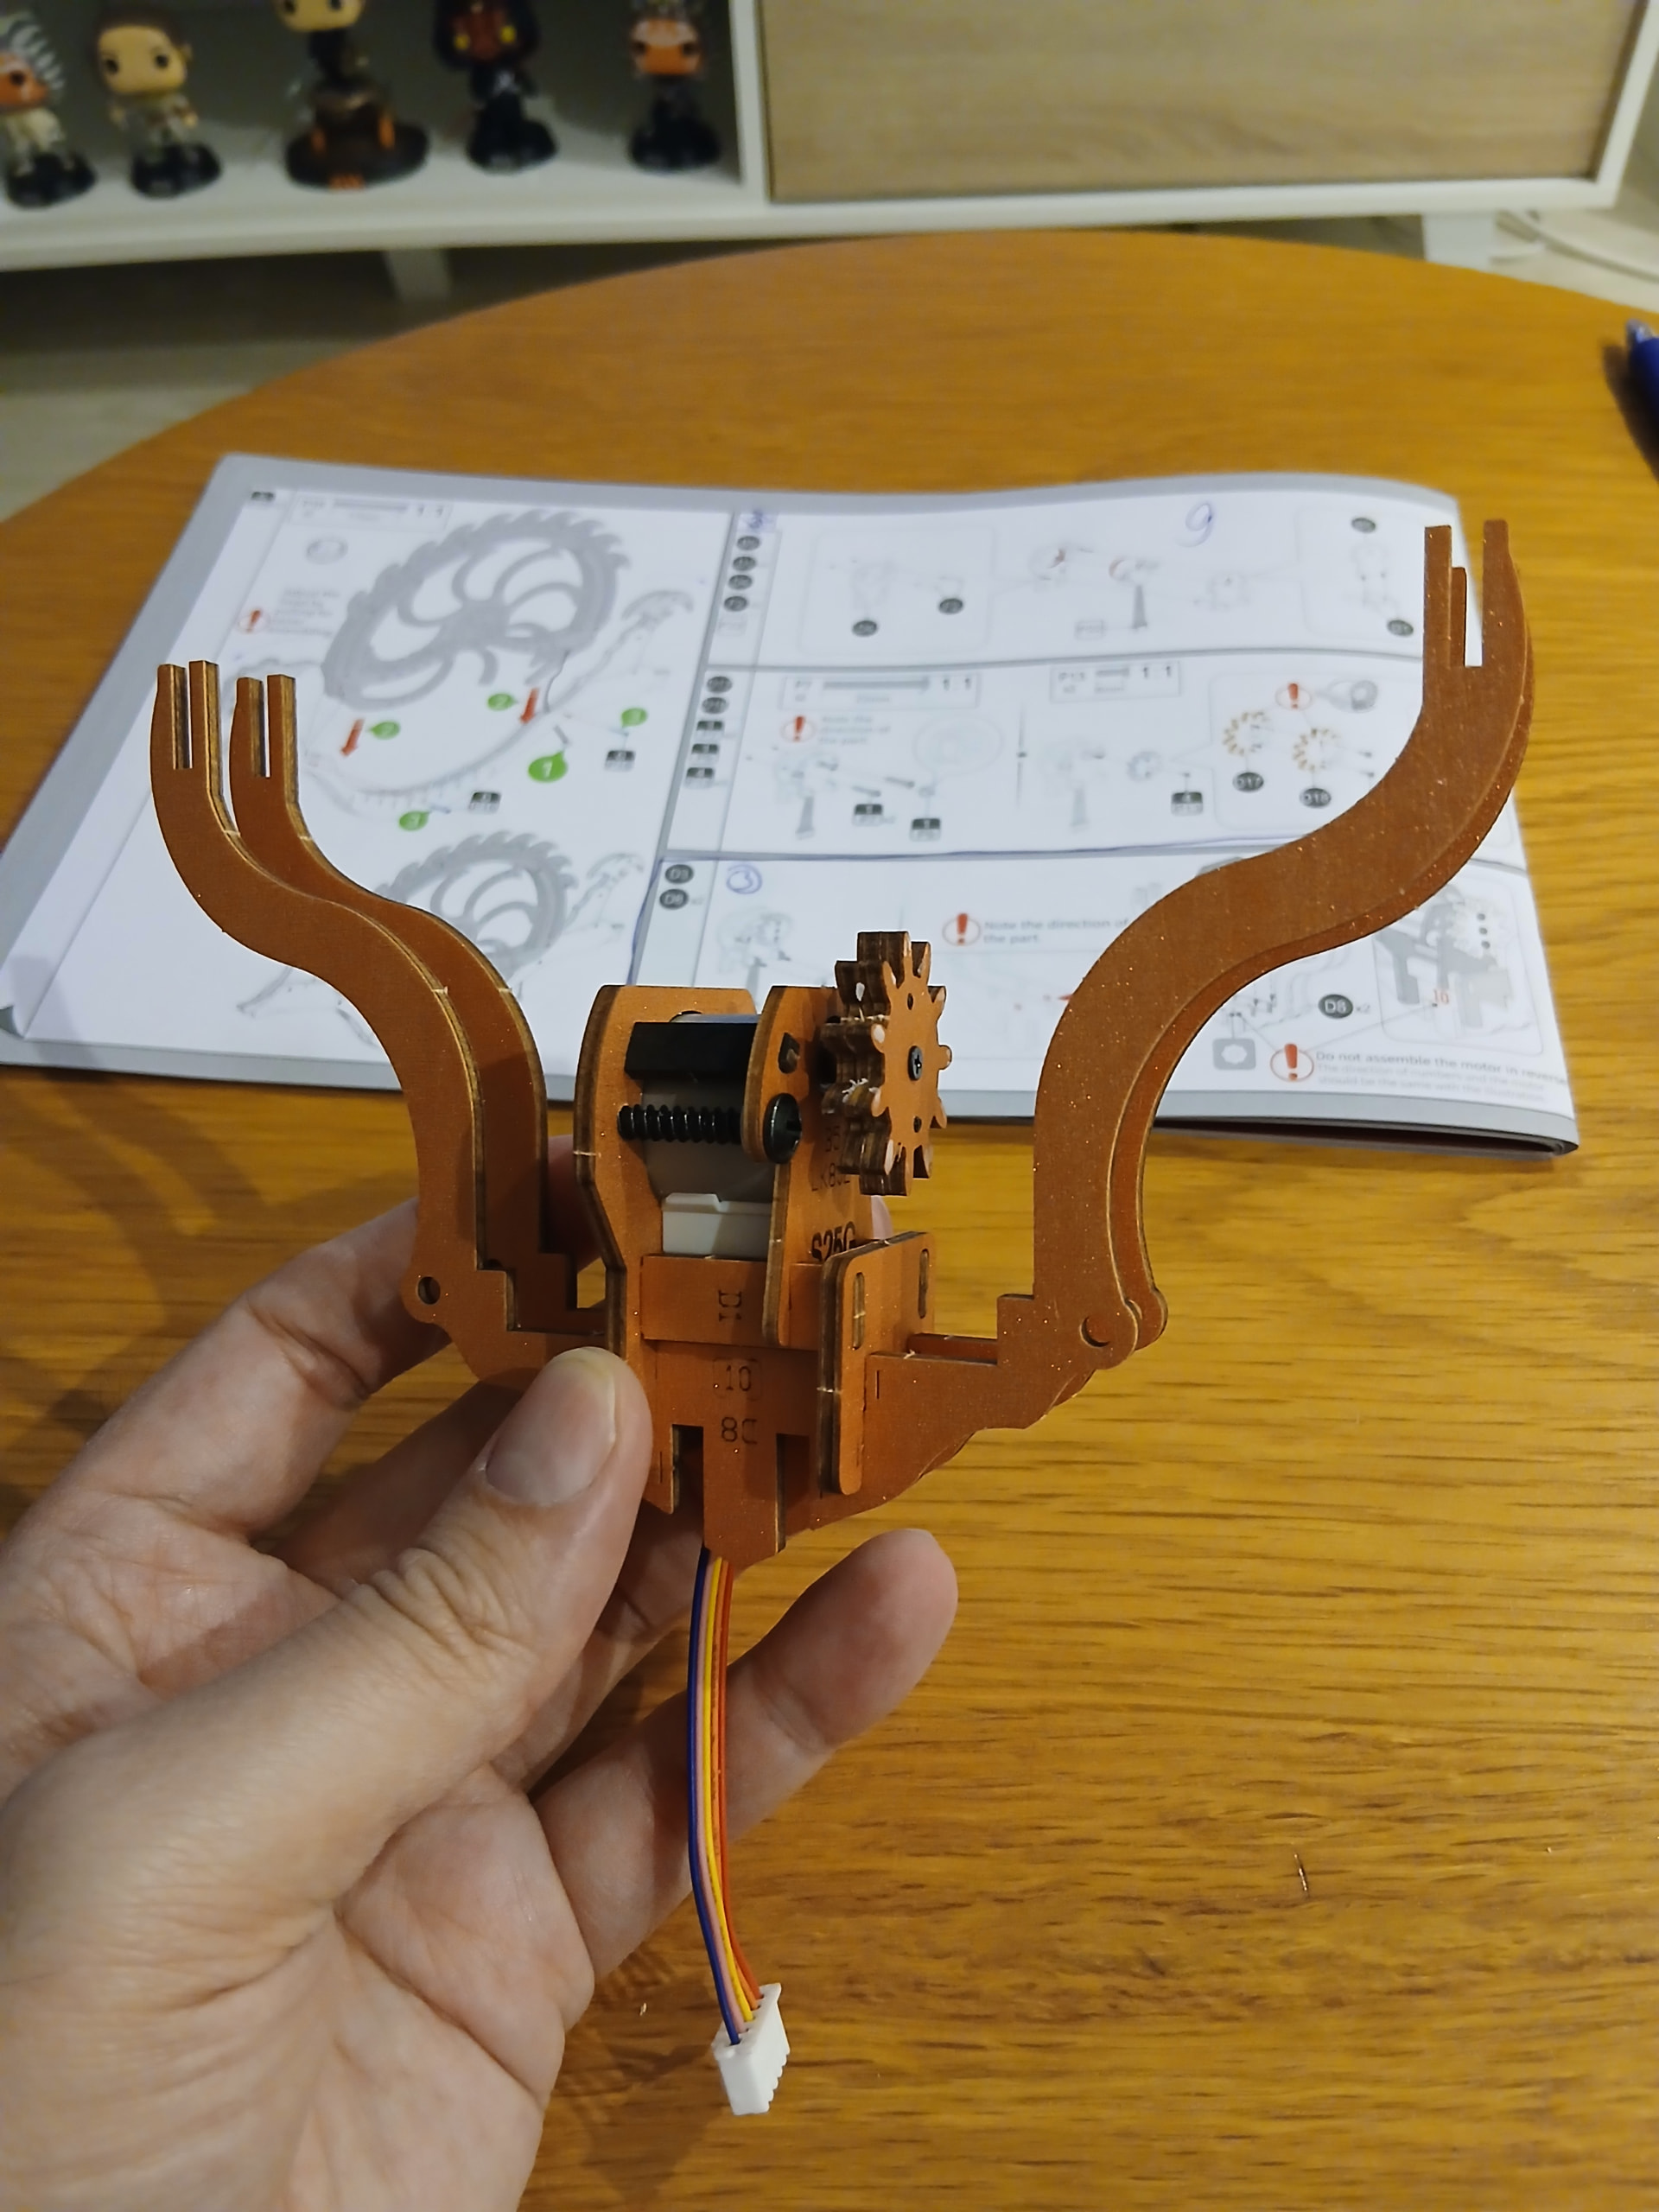
But my engine is happy, and that gear kind of looks like a flower on its ear! Didn’t you notice?

Okay, okay, I’ll stop with my stupid jokes ![]()
Anyway.
I soon found out I had to build the hull in two similar separate sections that would fit into the dragon I’ve already built. So the engine part would go in the very center of it, and each hull section would go on each side of it, one for the front, one for the back. It’s a pretty straightforward and easy assembling process, let me tell you that! So far I haven’t encountered any true challenges during this build, so it’s a chilly thing so far. And gosh, how did I need a chilly build!
Basically, this is what you need for each of the two hull sections (the screw will be used to hold the end of the hull section to the dragon so both things will stay together properly):
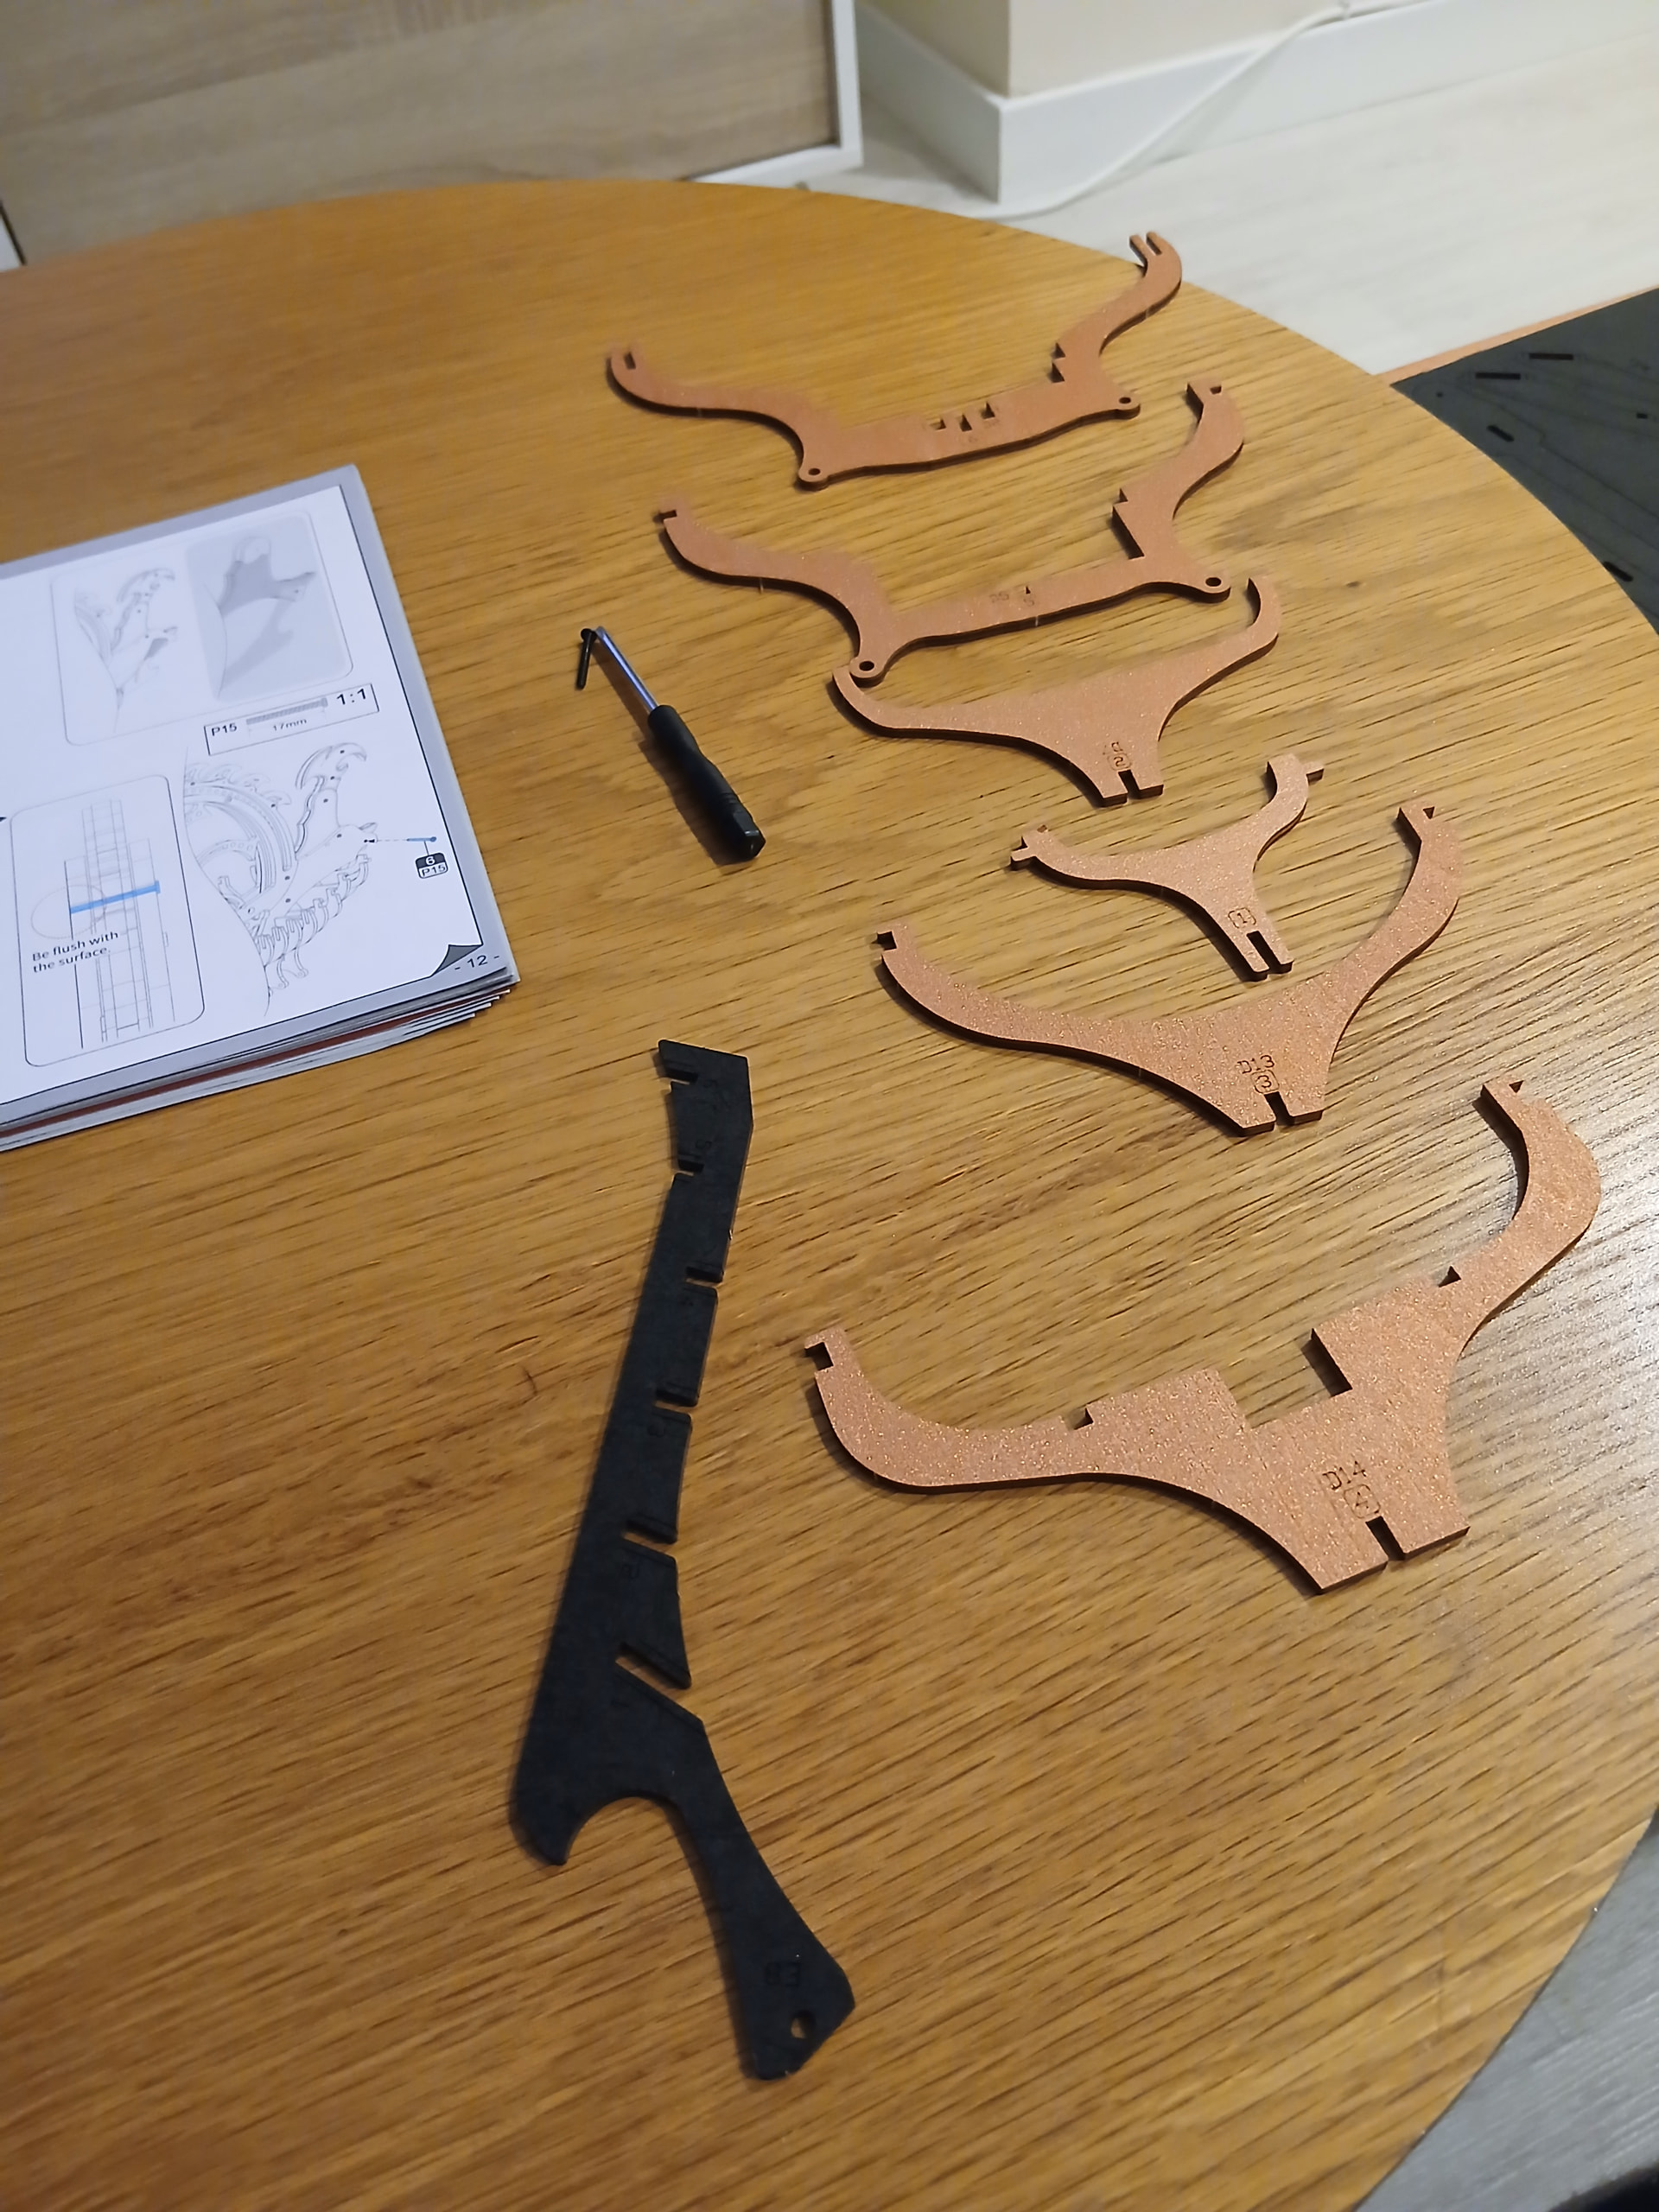
This is how a hull section will look:
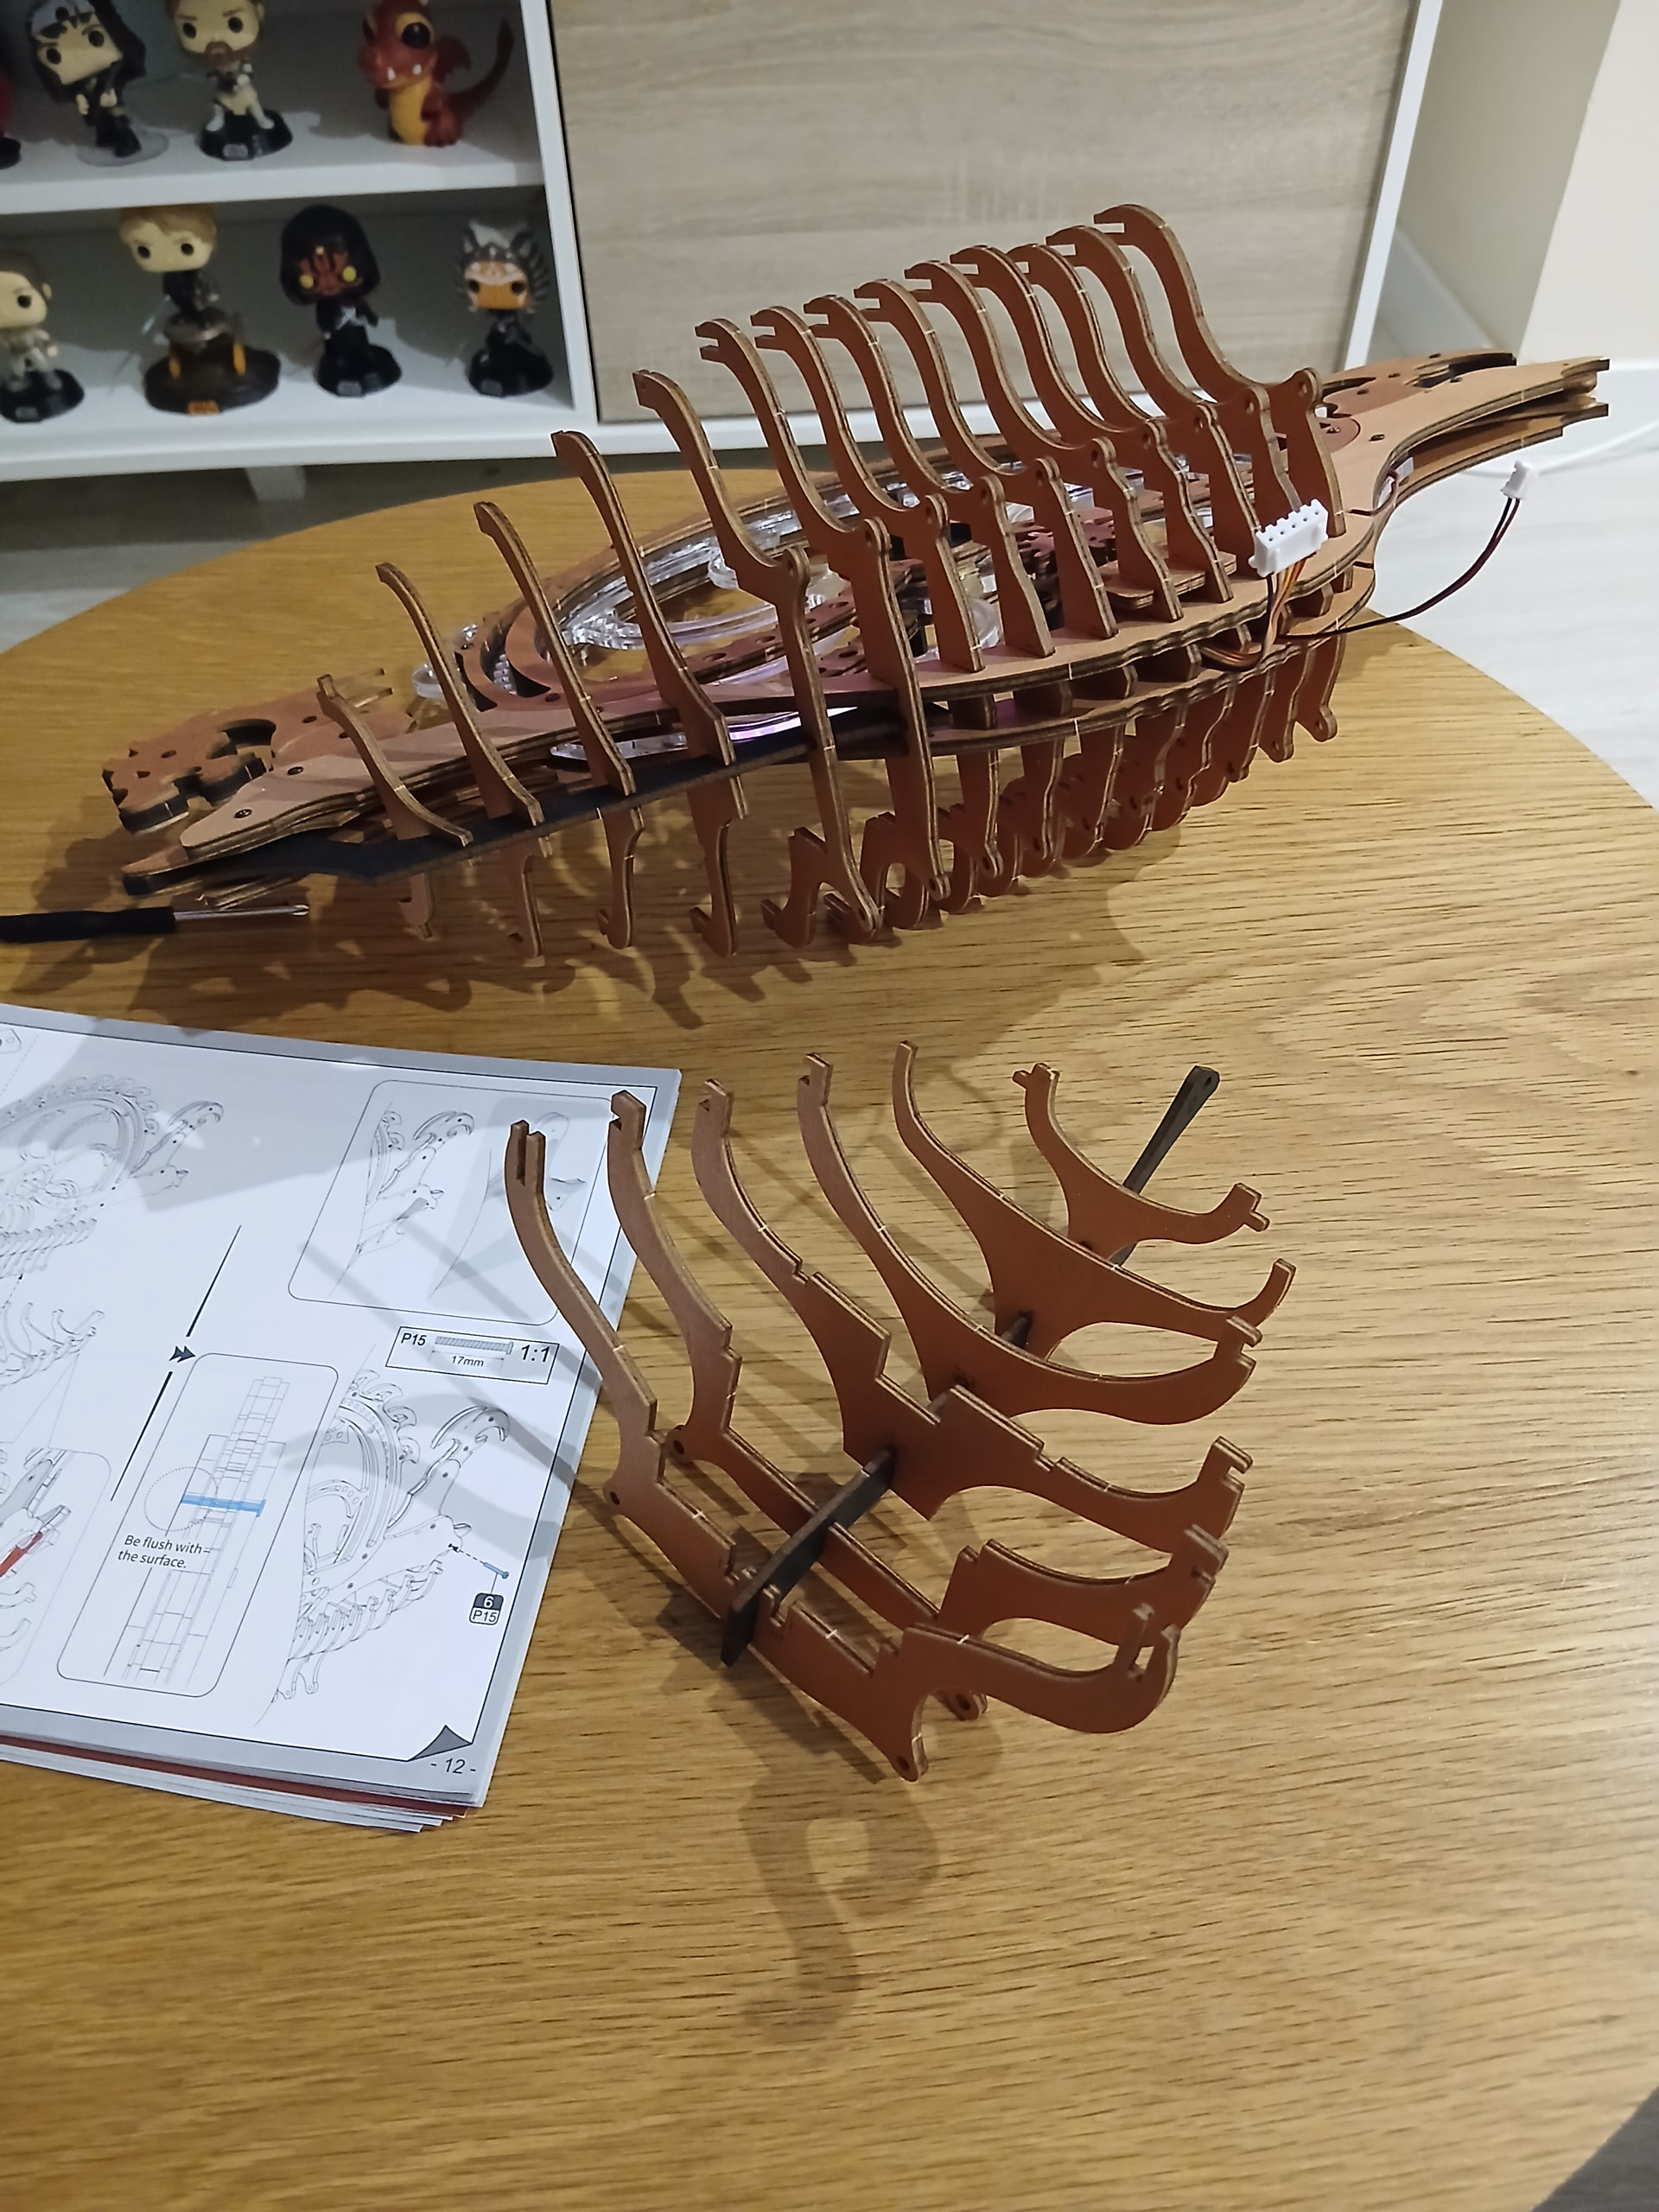
And this is the whole thing with the hull installed under the dragon!
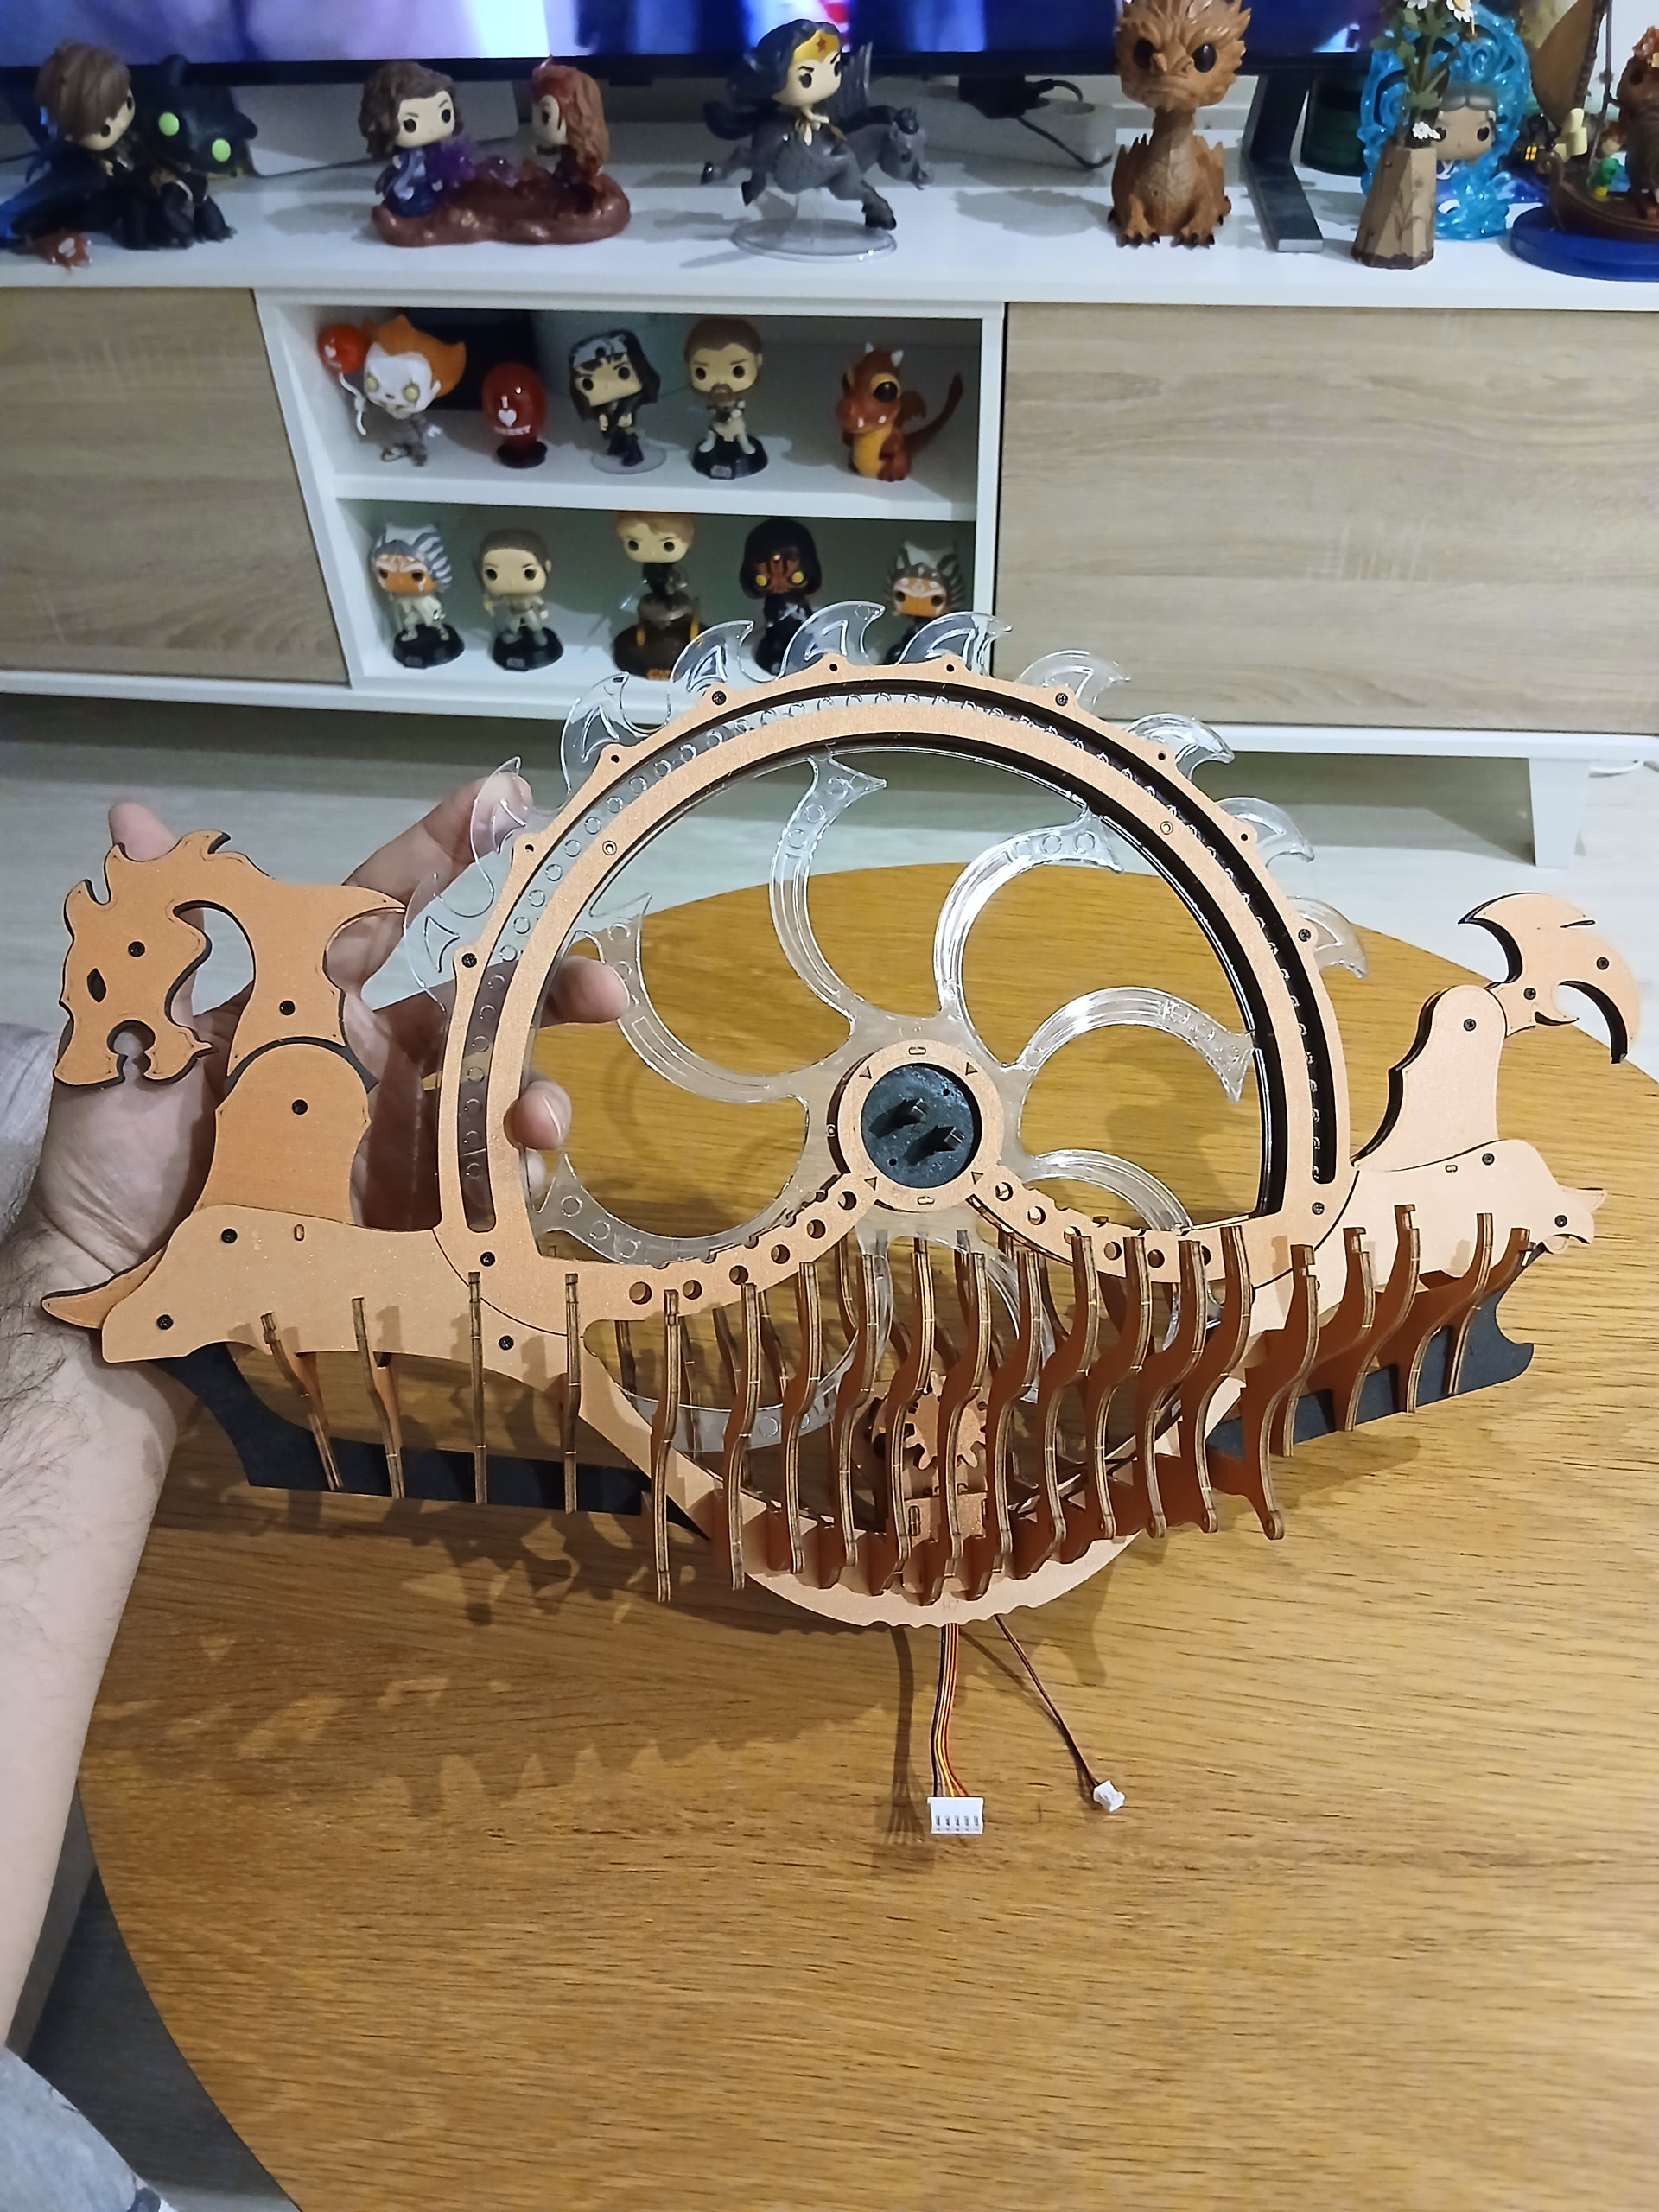
This is looking like something nice already, huh? Ragnar himself would be proud.
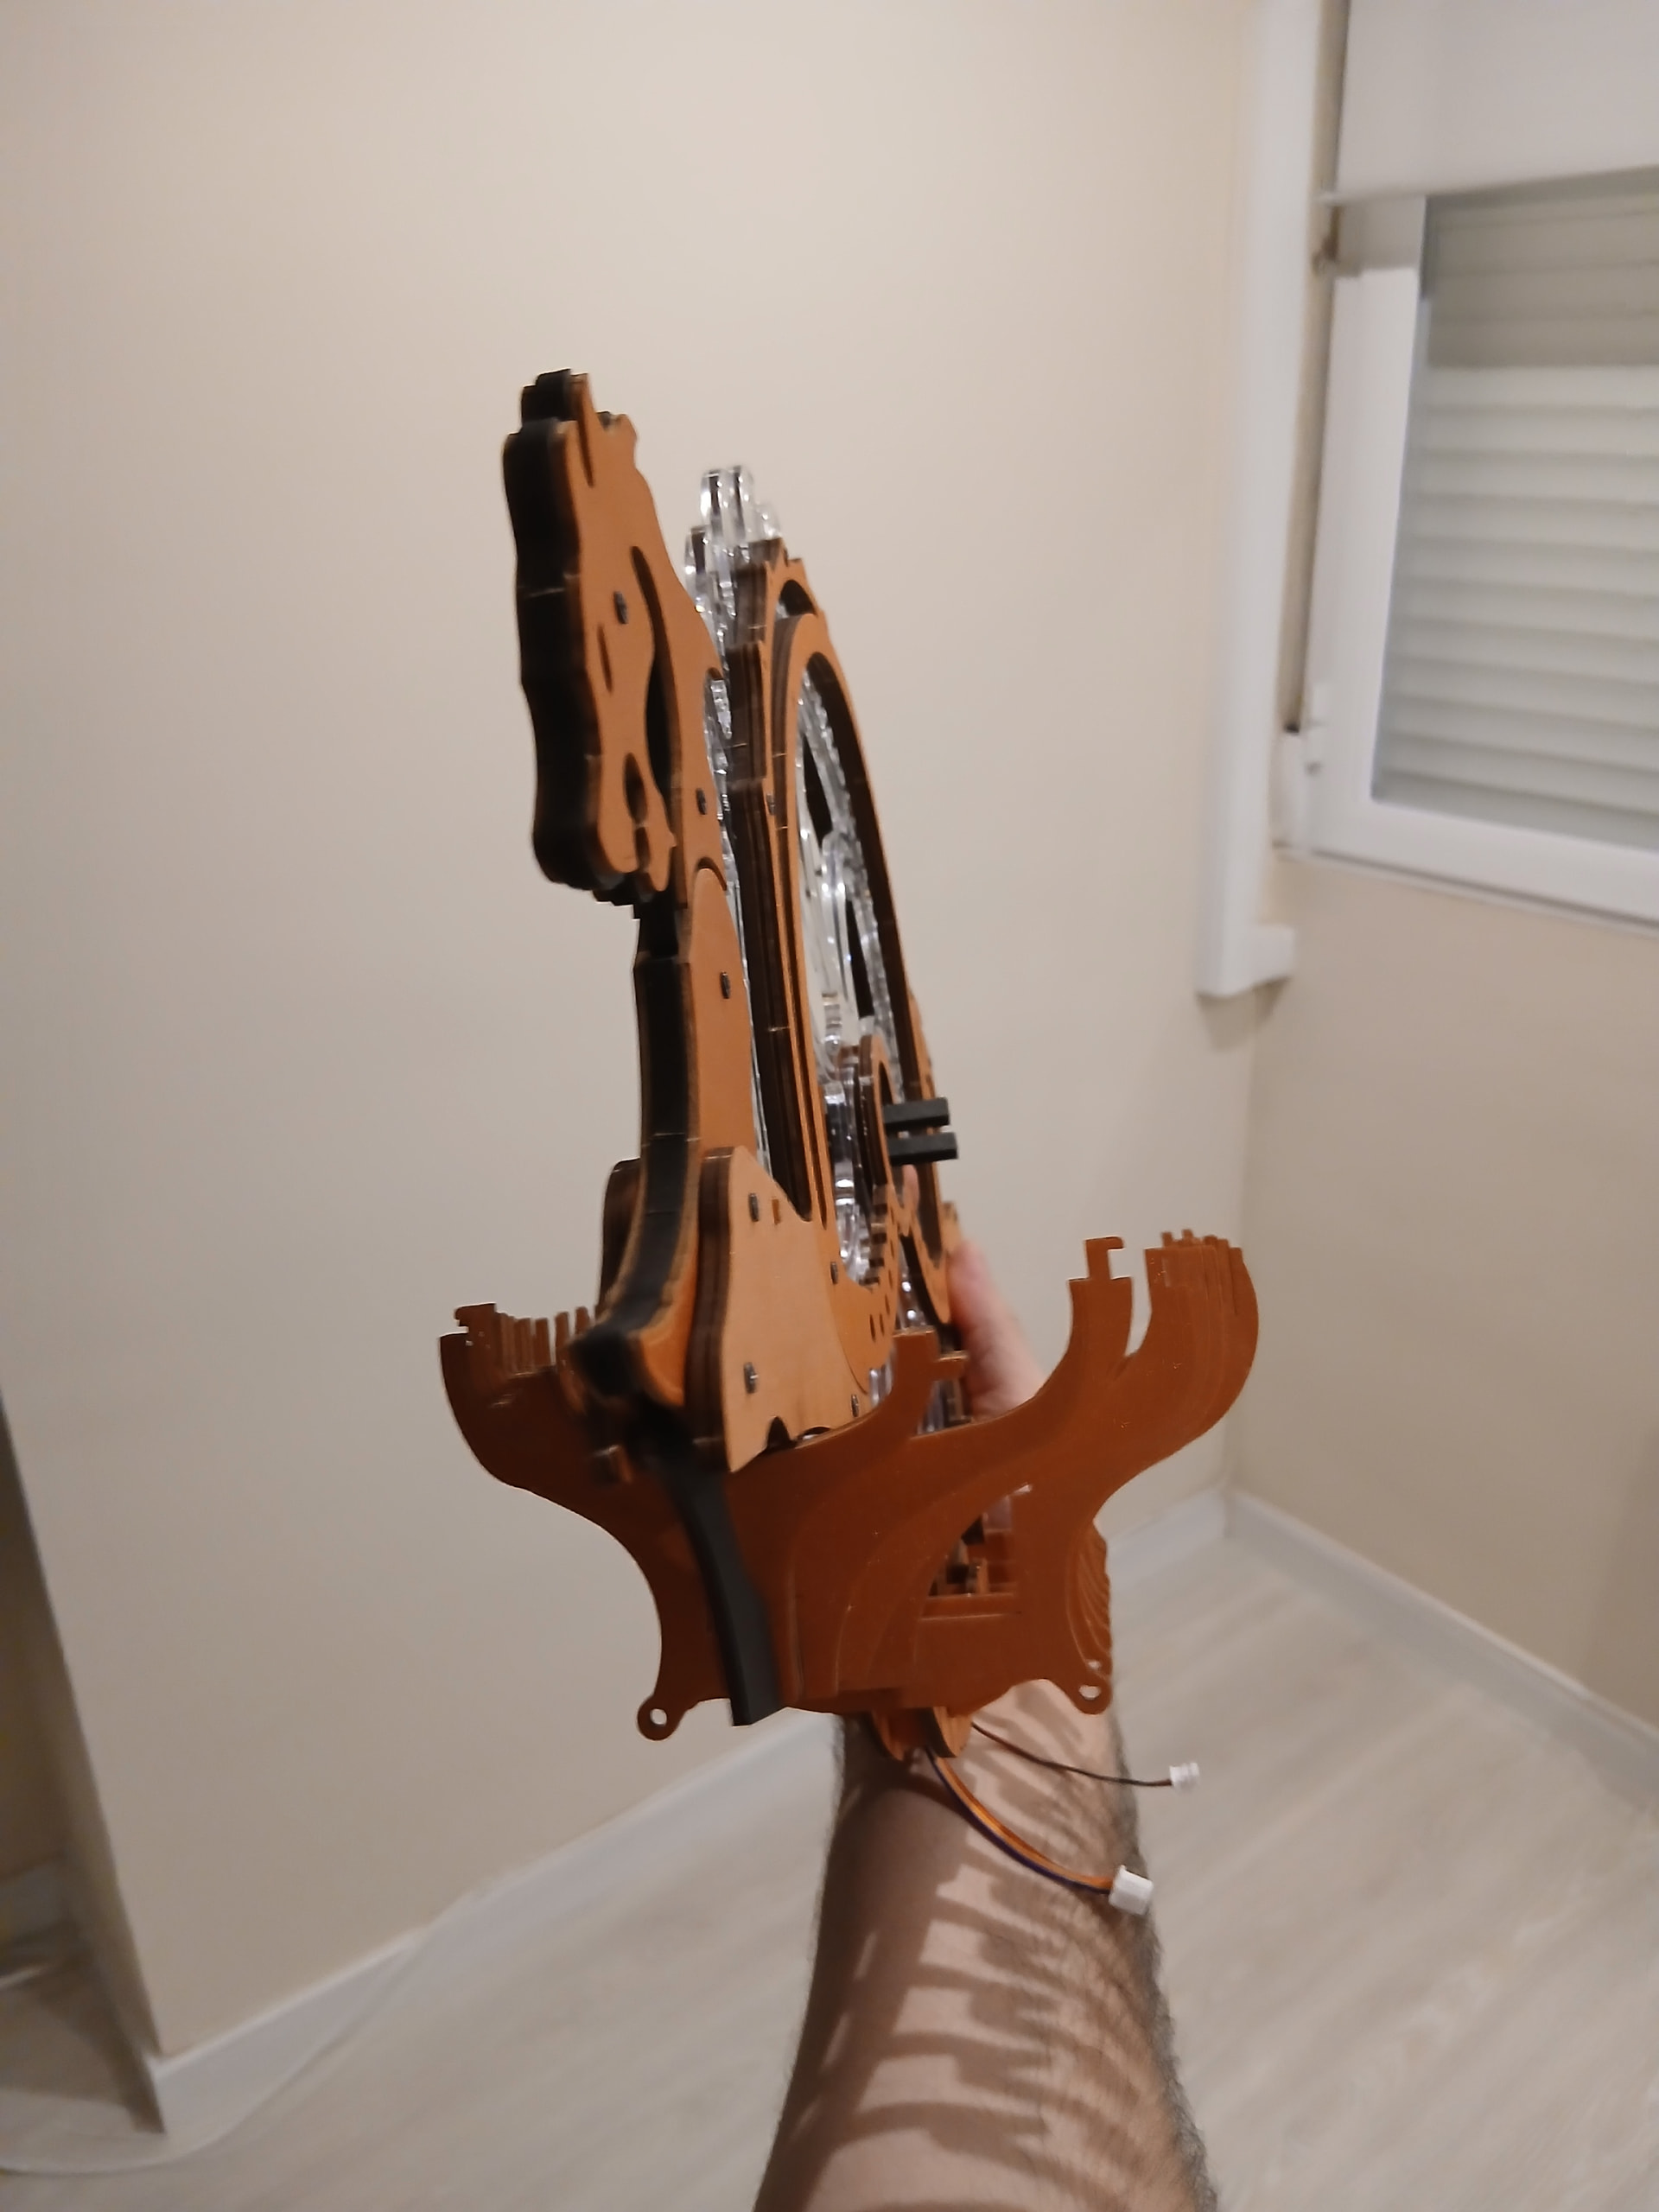
You know what the problem is now? I don’t know how to guard/protect this until it has a base to hold it ![]()
The obvious thing to do would be to just let it be lying on a side, but I’m a bit scared the hull parts on that side could break or be crooked if they’re supporting the whole weight of it. I don’t want any accidents ![]() (or any parts flying away and ending up in some other random part of the build… Am I right @Jerry_Boswijk?). So what did I do? I just added a blanket to it. That should do the job
(or any parts flying away and ending up in some other random part of the build… Am I right @Jerry_Boswijk?). So what did I do? I just added a blanket to it. That should do the job ![]()
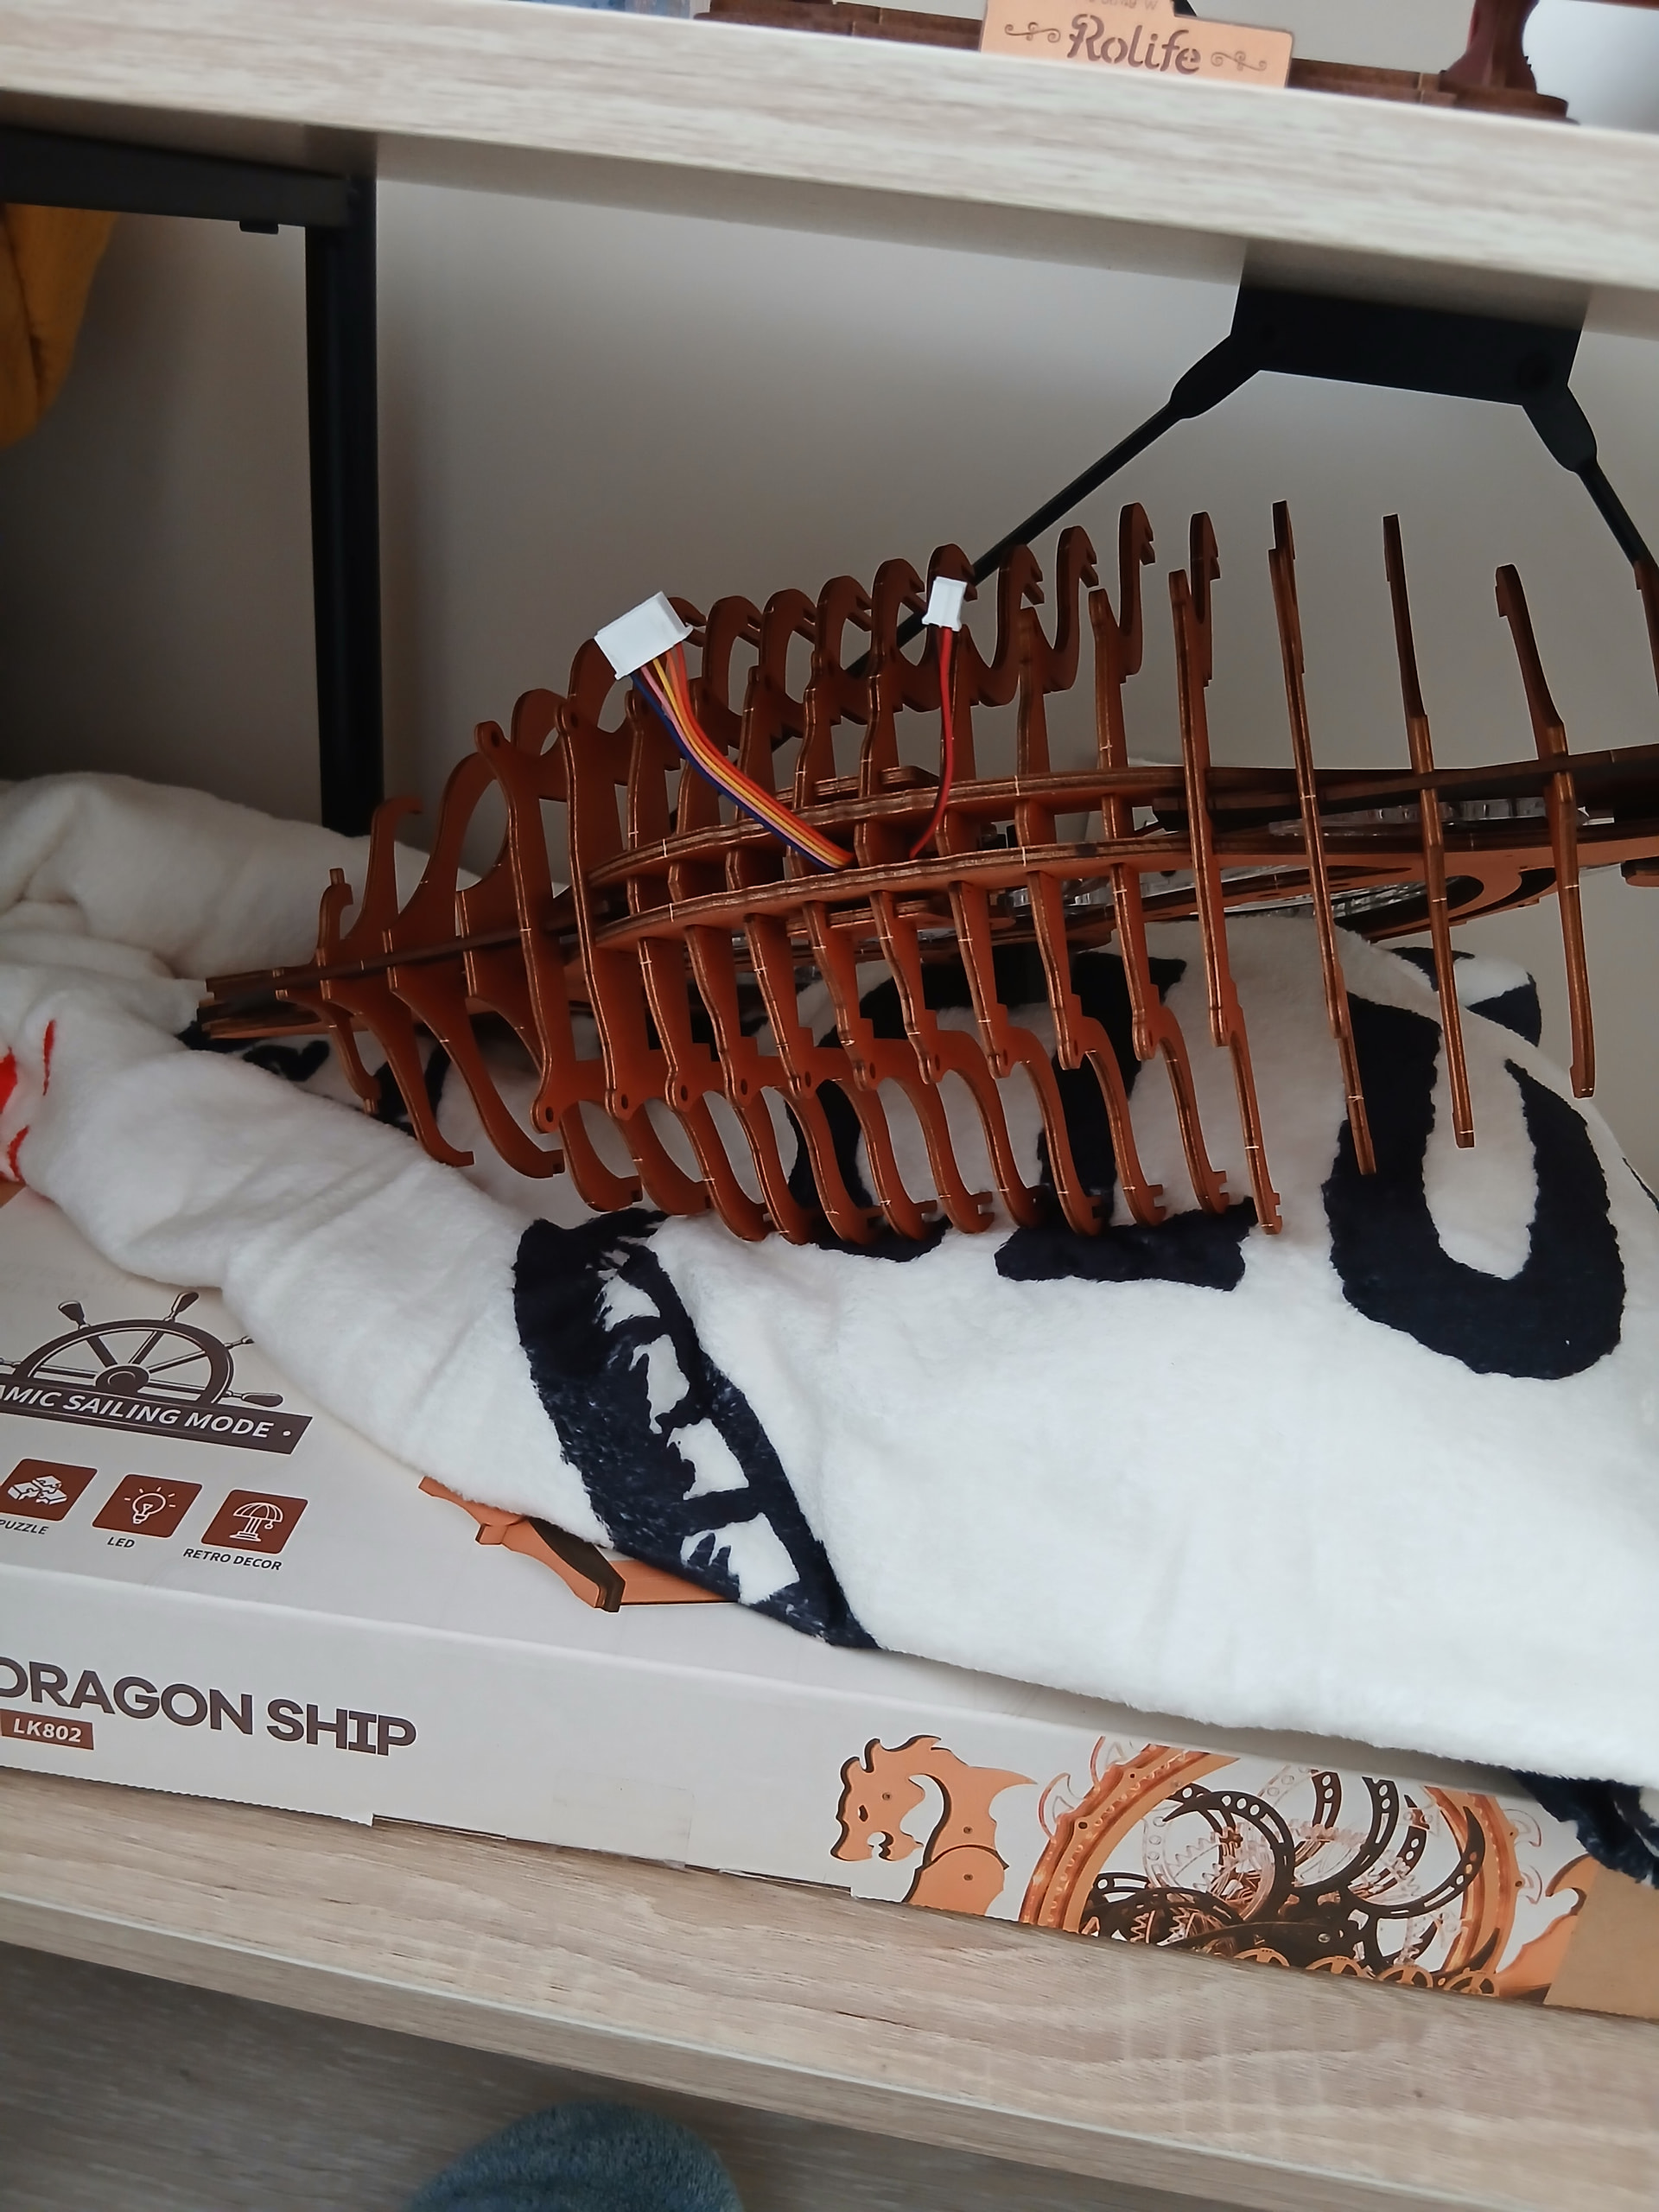
Gladly, I’ve checked the next pages and the support base is coming as the next step to build, so this won’t be happening for long lol.
See you/read you around!