Previously…
Well, well, well!
I was thinking on building and posting yesterday, since it was my birthday and I didn’t really have anything planned, but my family surprised me so I spent the day out ![]() there were many interesting gifts! No kits to build among them though
there were many interesting gifts! No kits to build among them though ![]() maybe next time.
maybe next time.
So! Since I didn’t do anything yesterday, I stepped up and built a bit more today. After all, steps 4 and 5 of the manual are pretty short, just a couple of pages each. The last two ones will be the longest! But we’ll get there. Now, let’s keep going from where we left it! Which was the whole hull completed:
Step 4/7 is pretty easy, and it finally means to build the support base and fit the ship on it. It won’t be resting on my blankets anymore, yay!

The base is SO big, guys. It even comes with a couple of backing parts to make it stronger. I guess there’s a lot to hold ![]()
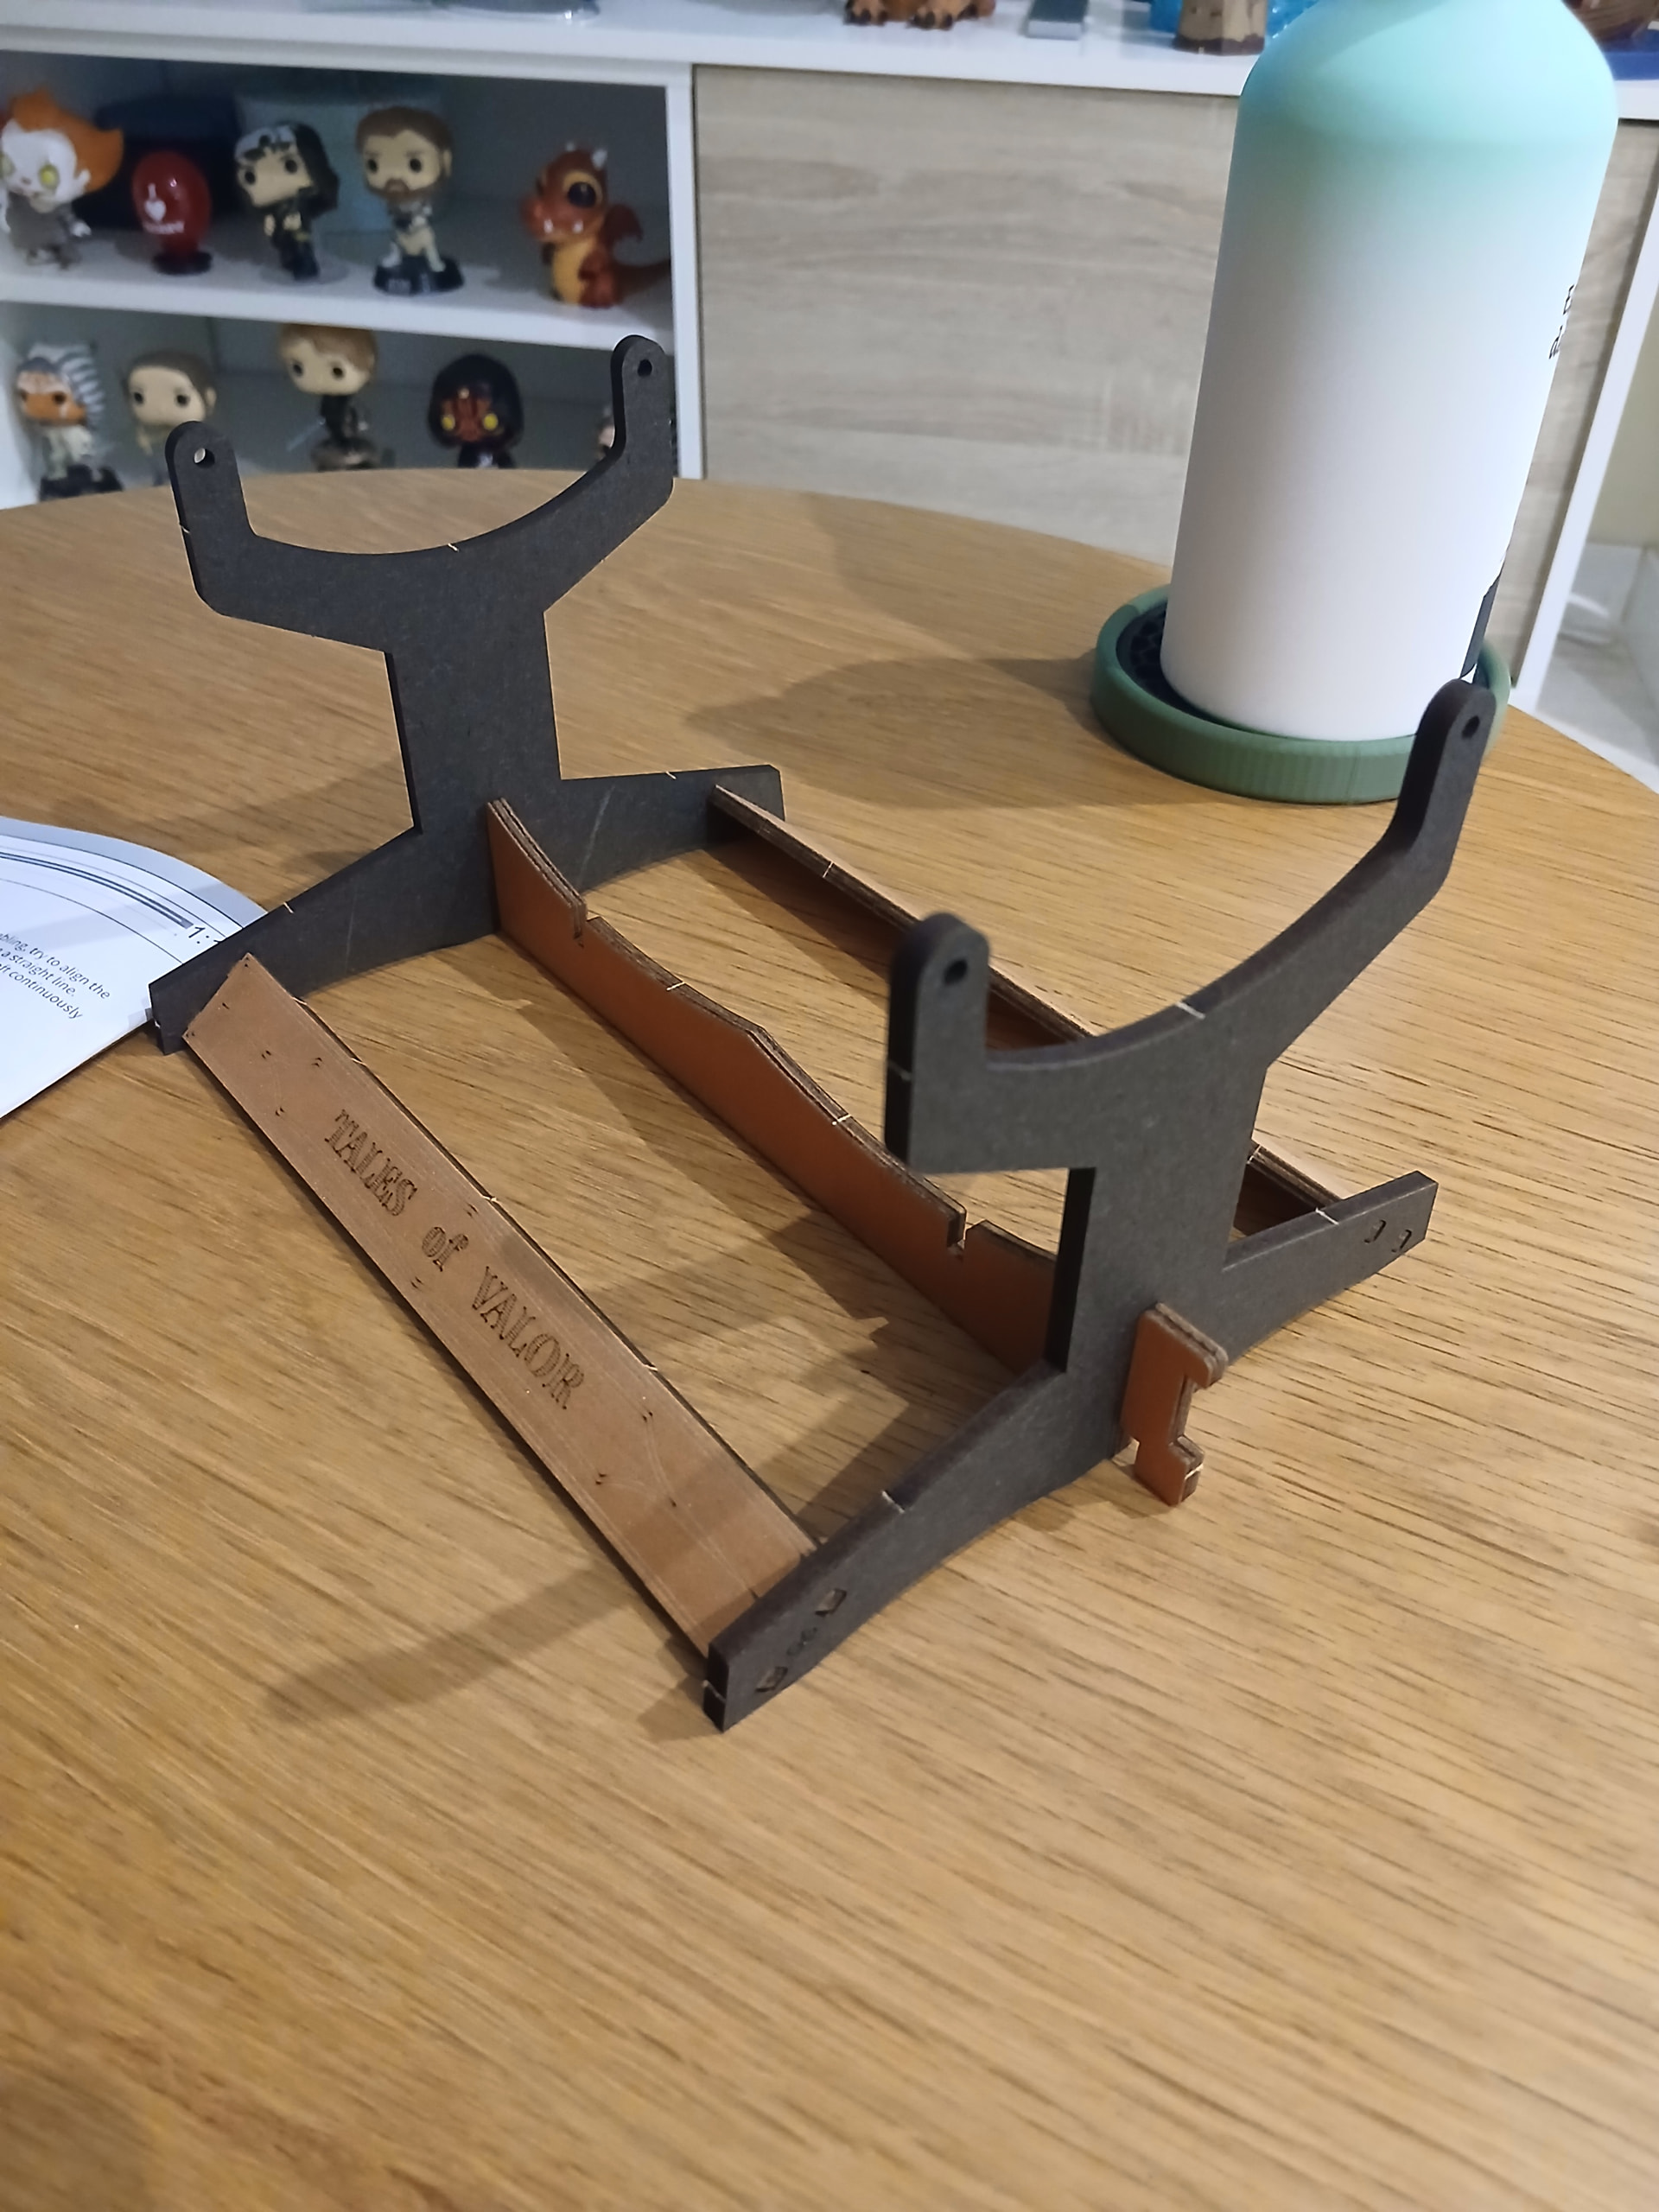
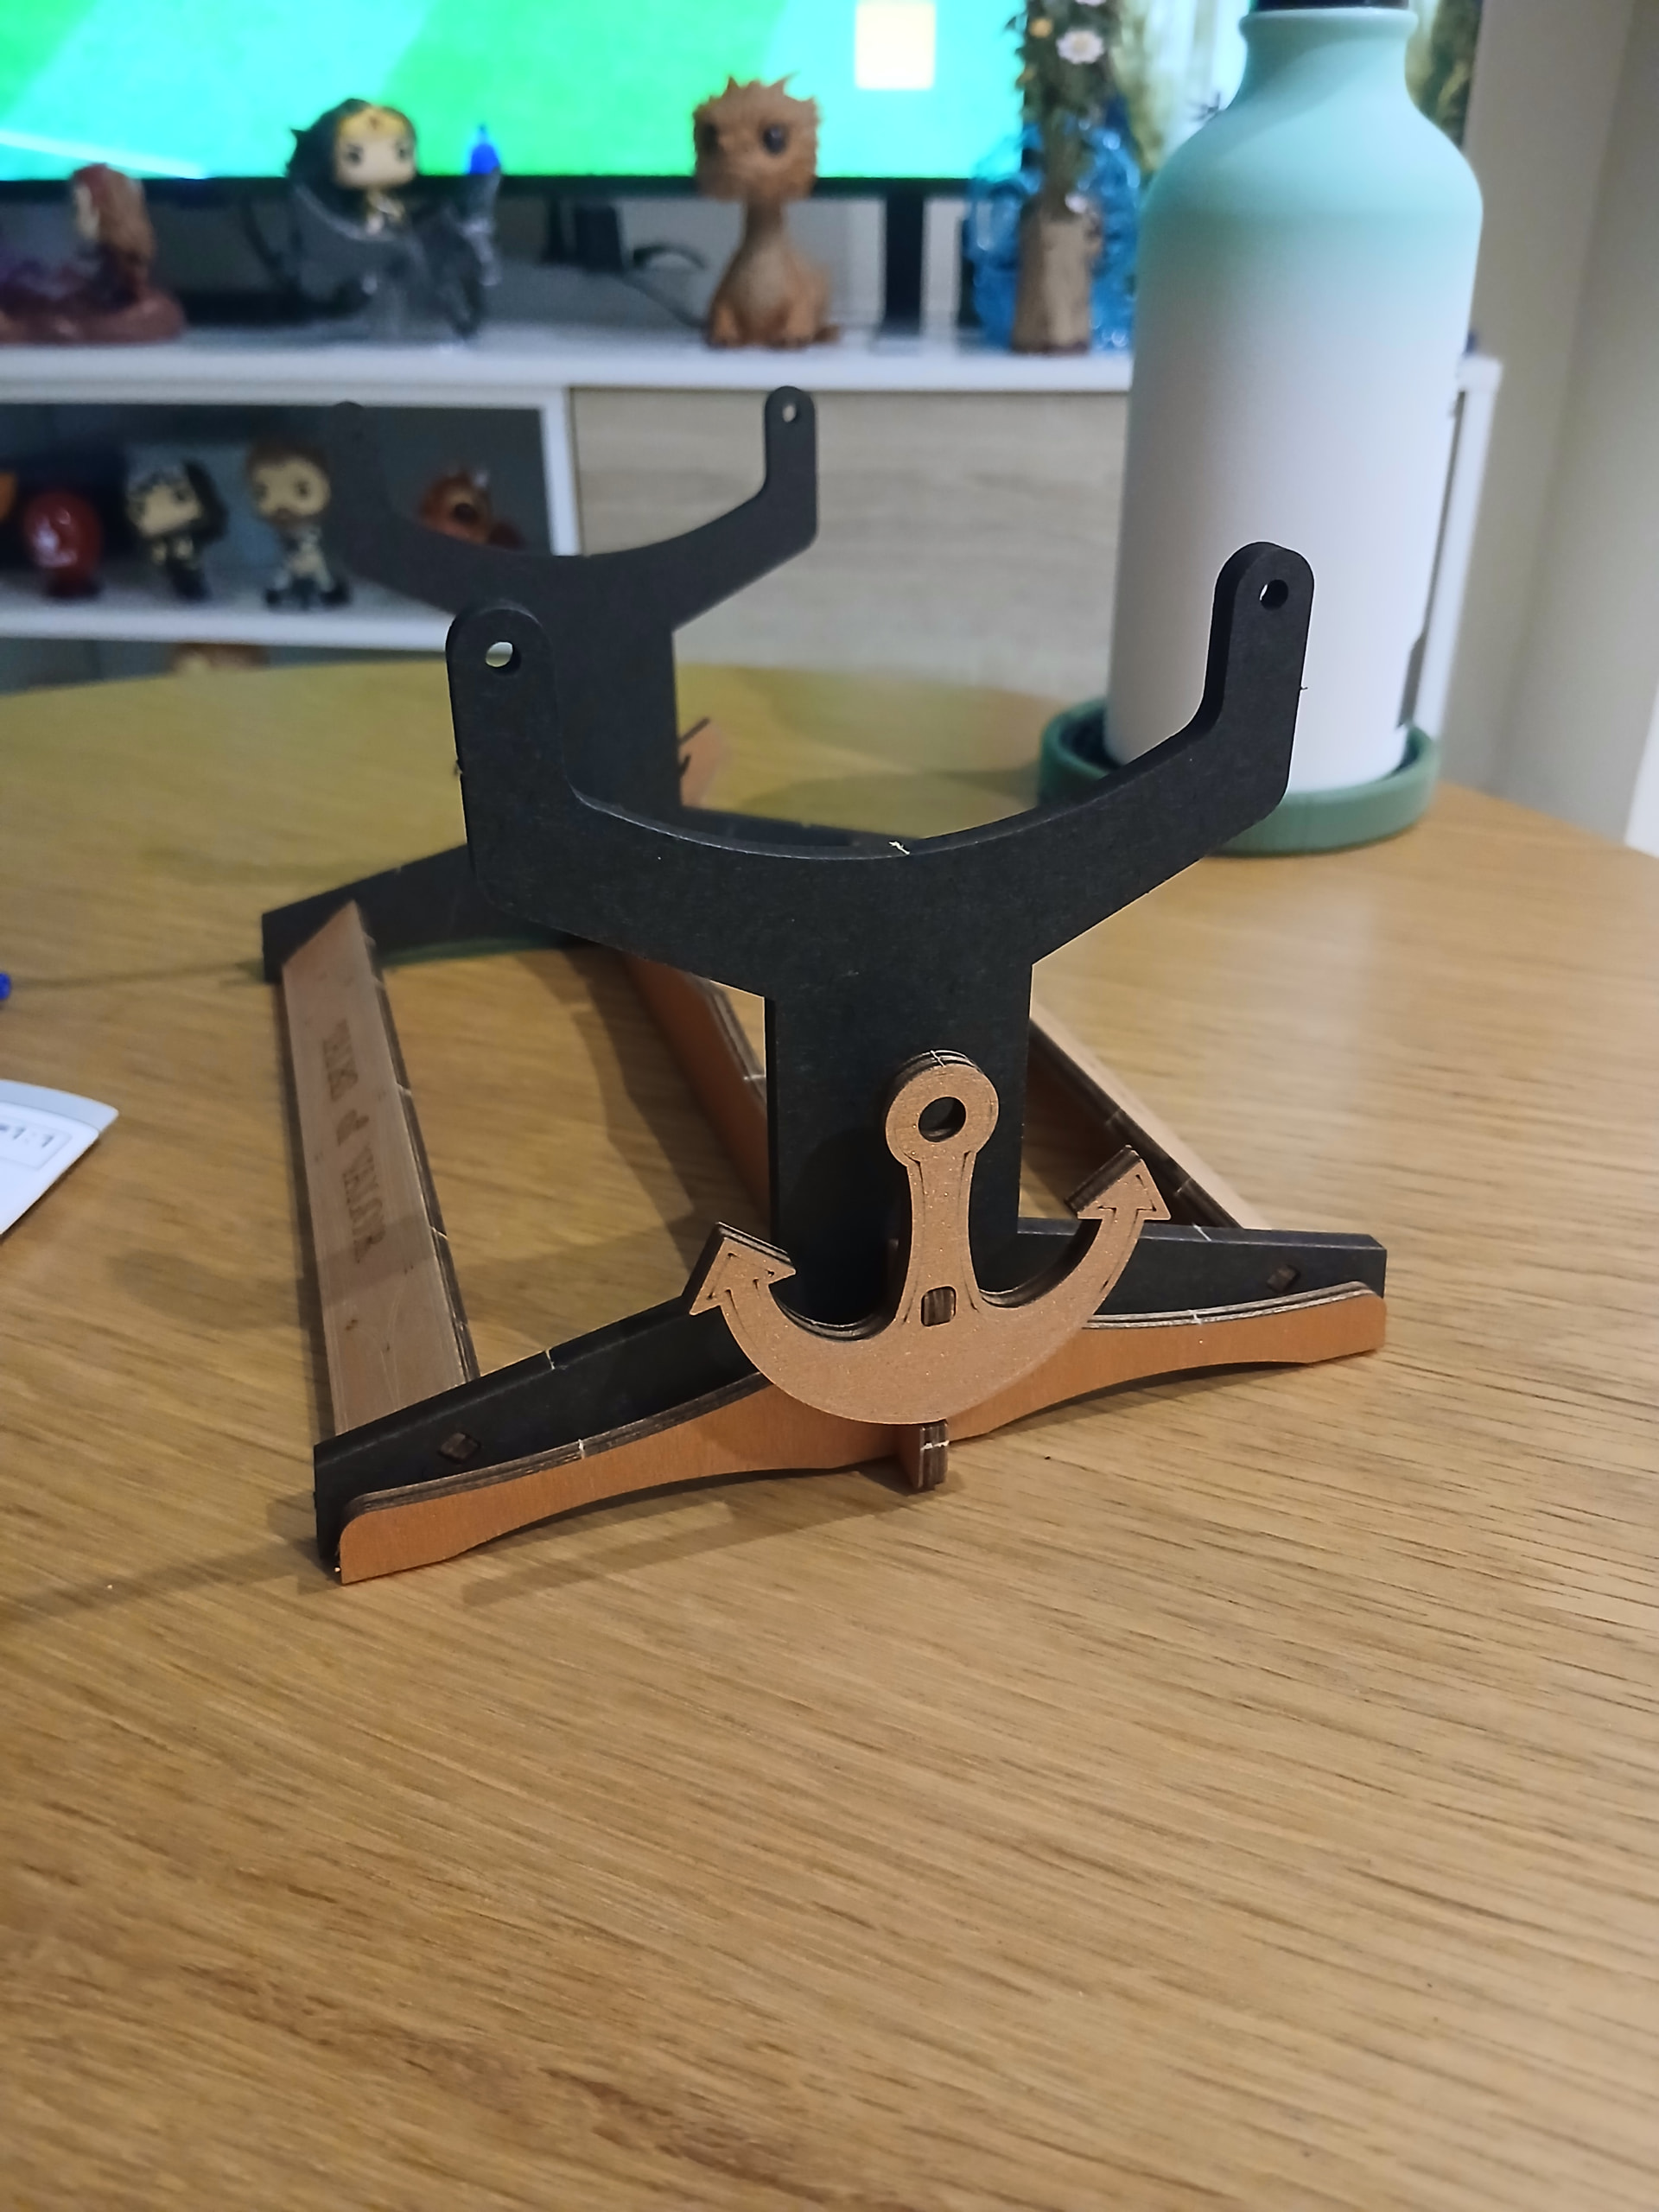
It also comes with a couple of details, like the Tales of Valor printed on both sides, and a couple of anchors holding from it!
Now for the tricky part, this time it won’t work like the previous ships I’ve built, such as the Titanic (which was kind of “part” of the base in terms of building process) or the Seahorse Barque (which you directly fit on the base and can remove from it any time you want).
No, this time you have to take two long metal bars and fit each of them through all the little holes in the hull wooden parts of that side and the two placed on the base ends, then secure them with two of those tiny transparent little circles with holes in the middle. It’s a bit complicated to do, specially for the second one since the first one is already fixed together ![]() but it’s not thaaat challenging. It also made me realize that my hull parts weren’t properly aligned! So I had to re-align them on the way for the metal bars to properly fit through all of them.
but it’s not thaaat challenging. It also made me realize that my hull parts weren’t properly aligned! So I had to re-align them on the way for the metal bars to properly fit through all of them.
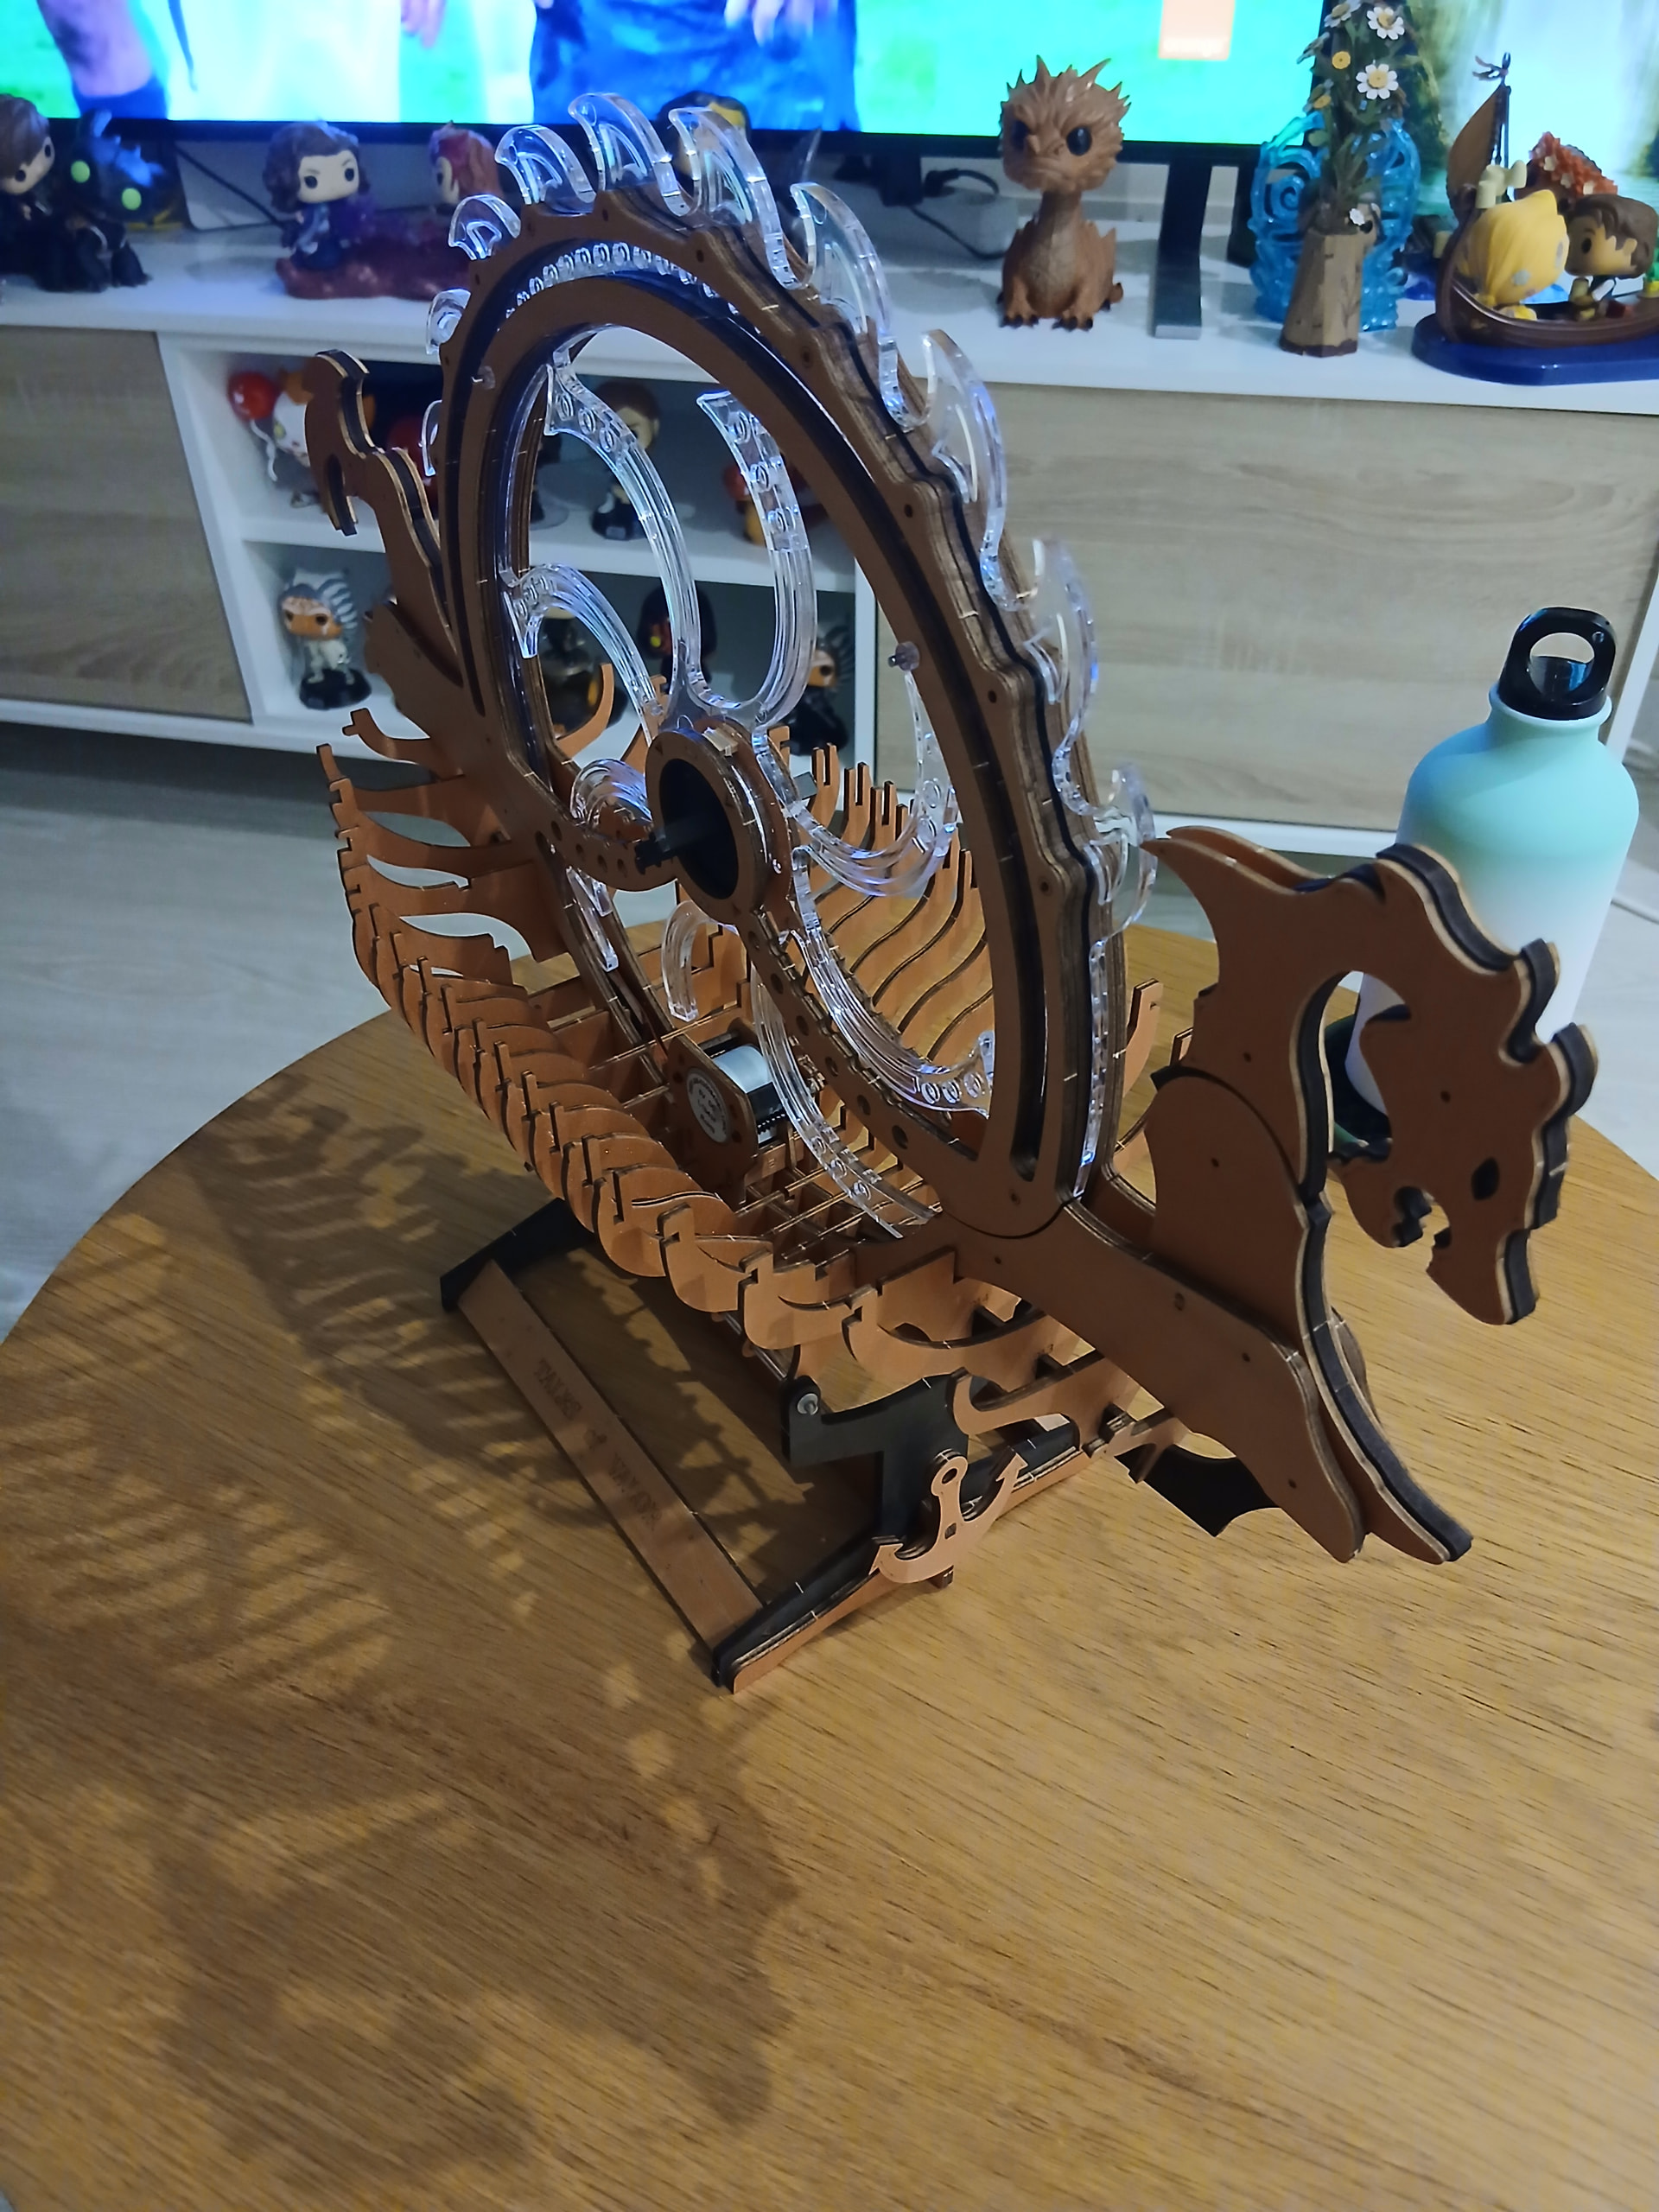
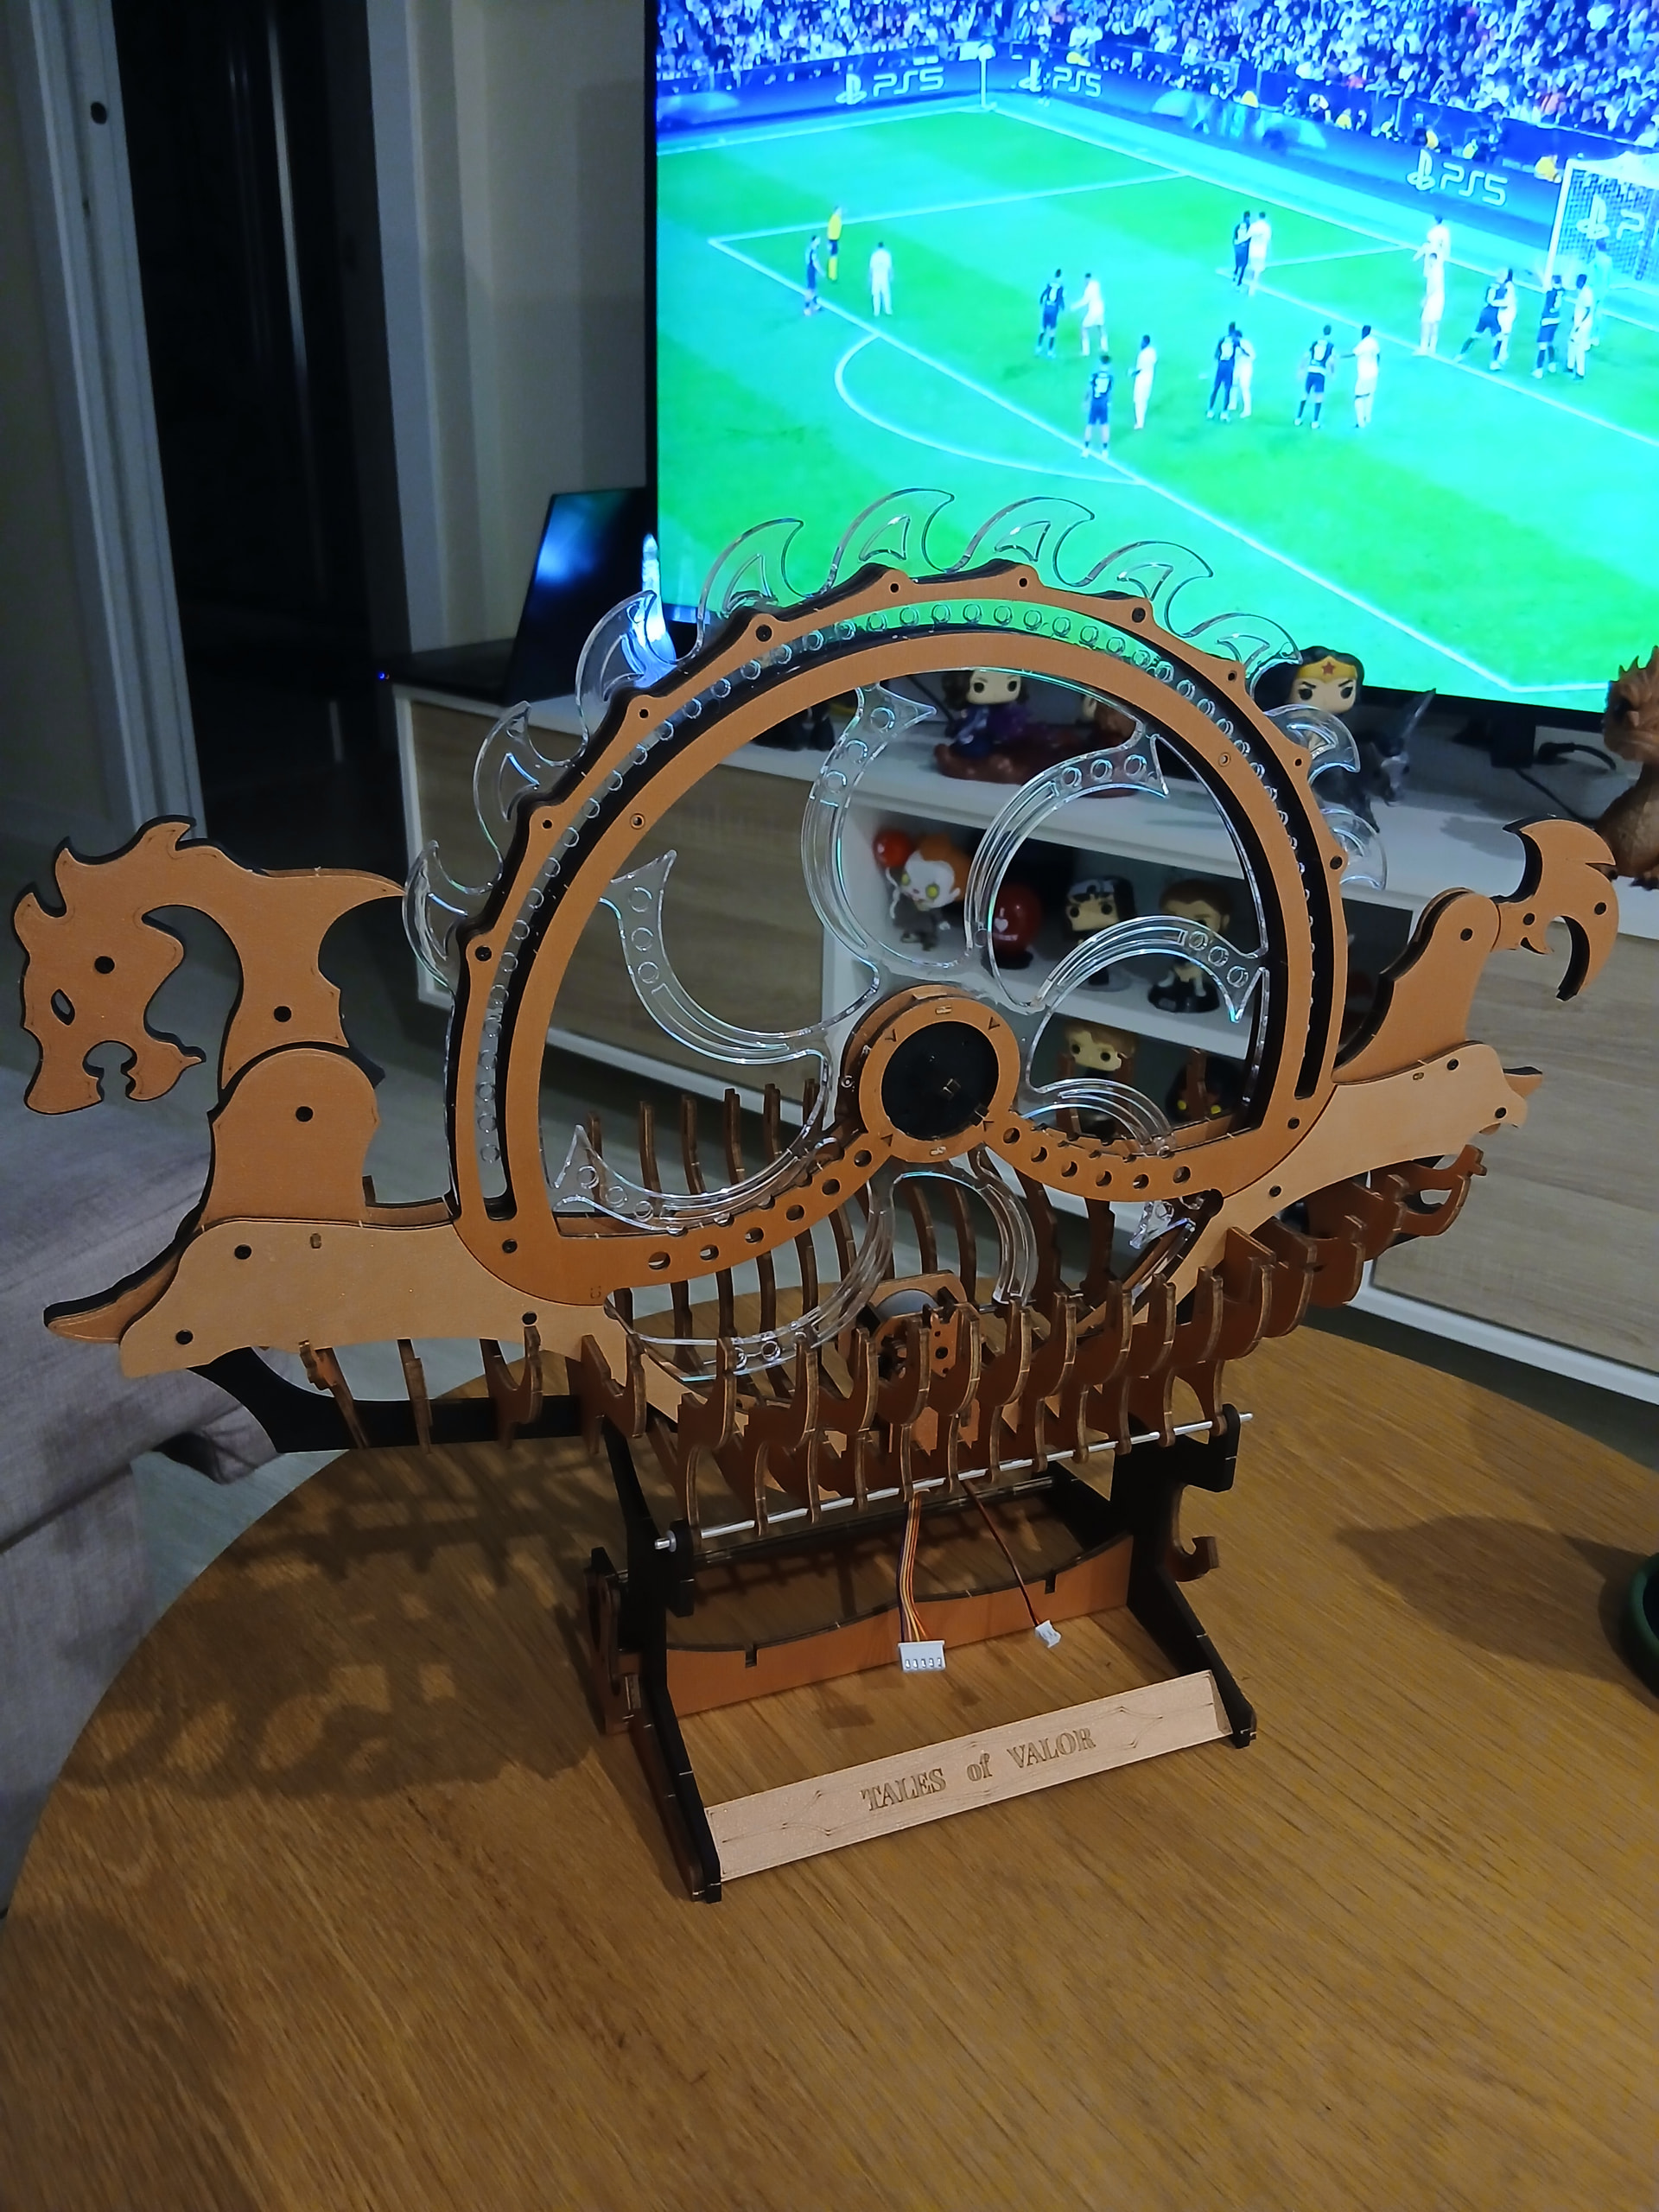
And that’s basically it for the base! It looks pretty cool (and, again, gigantic) now that’ it’s properly standing. I have to keep it on my table in the living room for now until I decide how to rearrange things, it just won’t fit on my shelters ![]() But that problem will be taken care of by future Eloy, not me.
But that problem will be taken care of by future Eloy, not me.

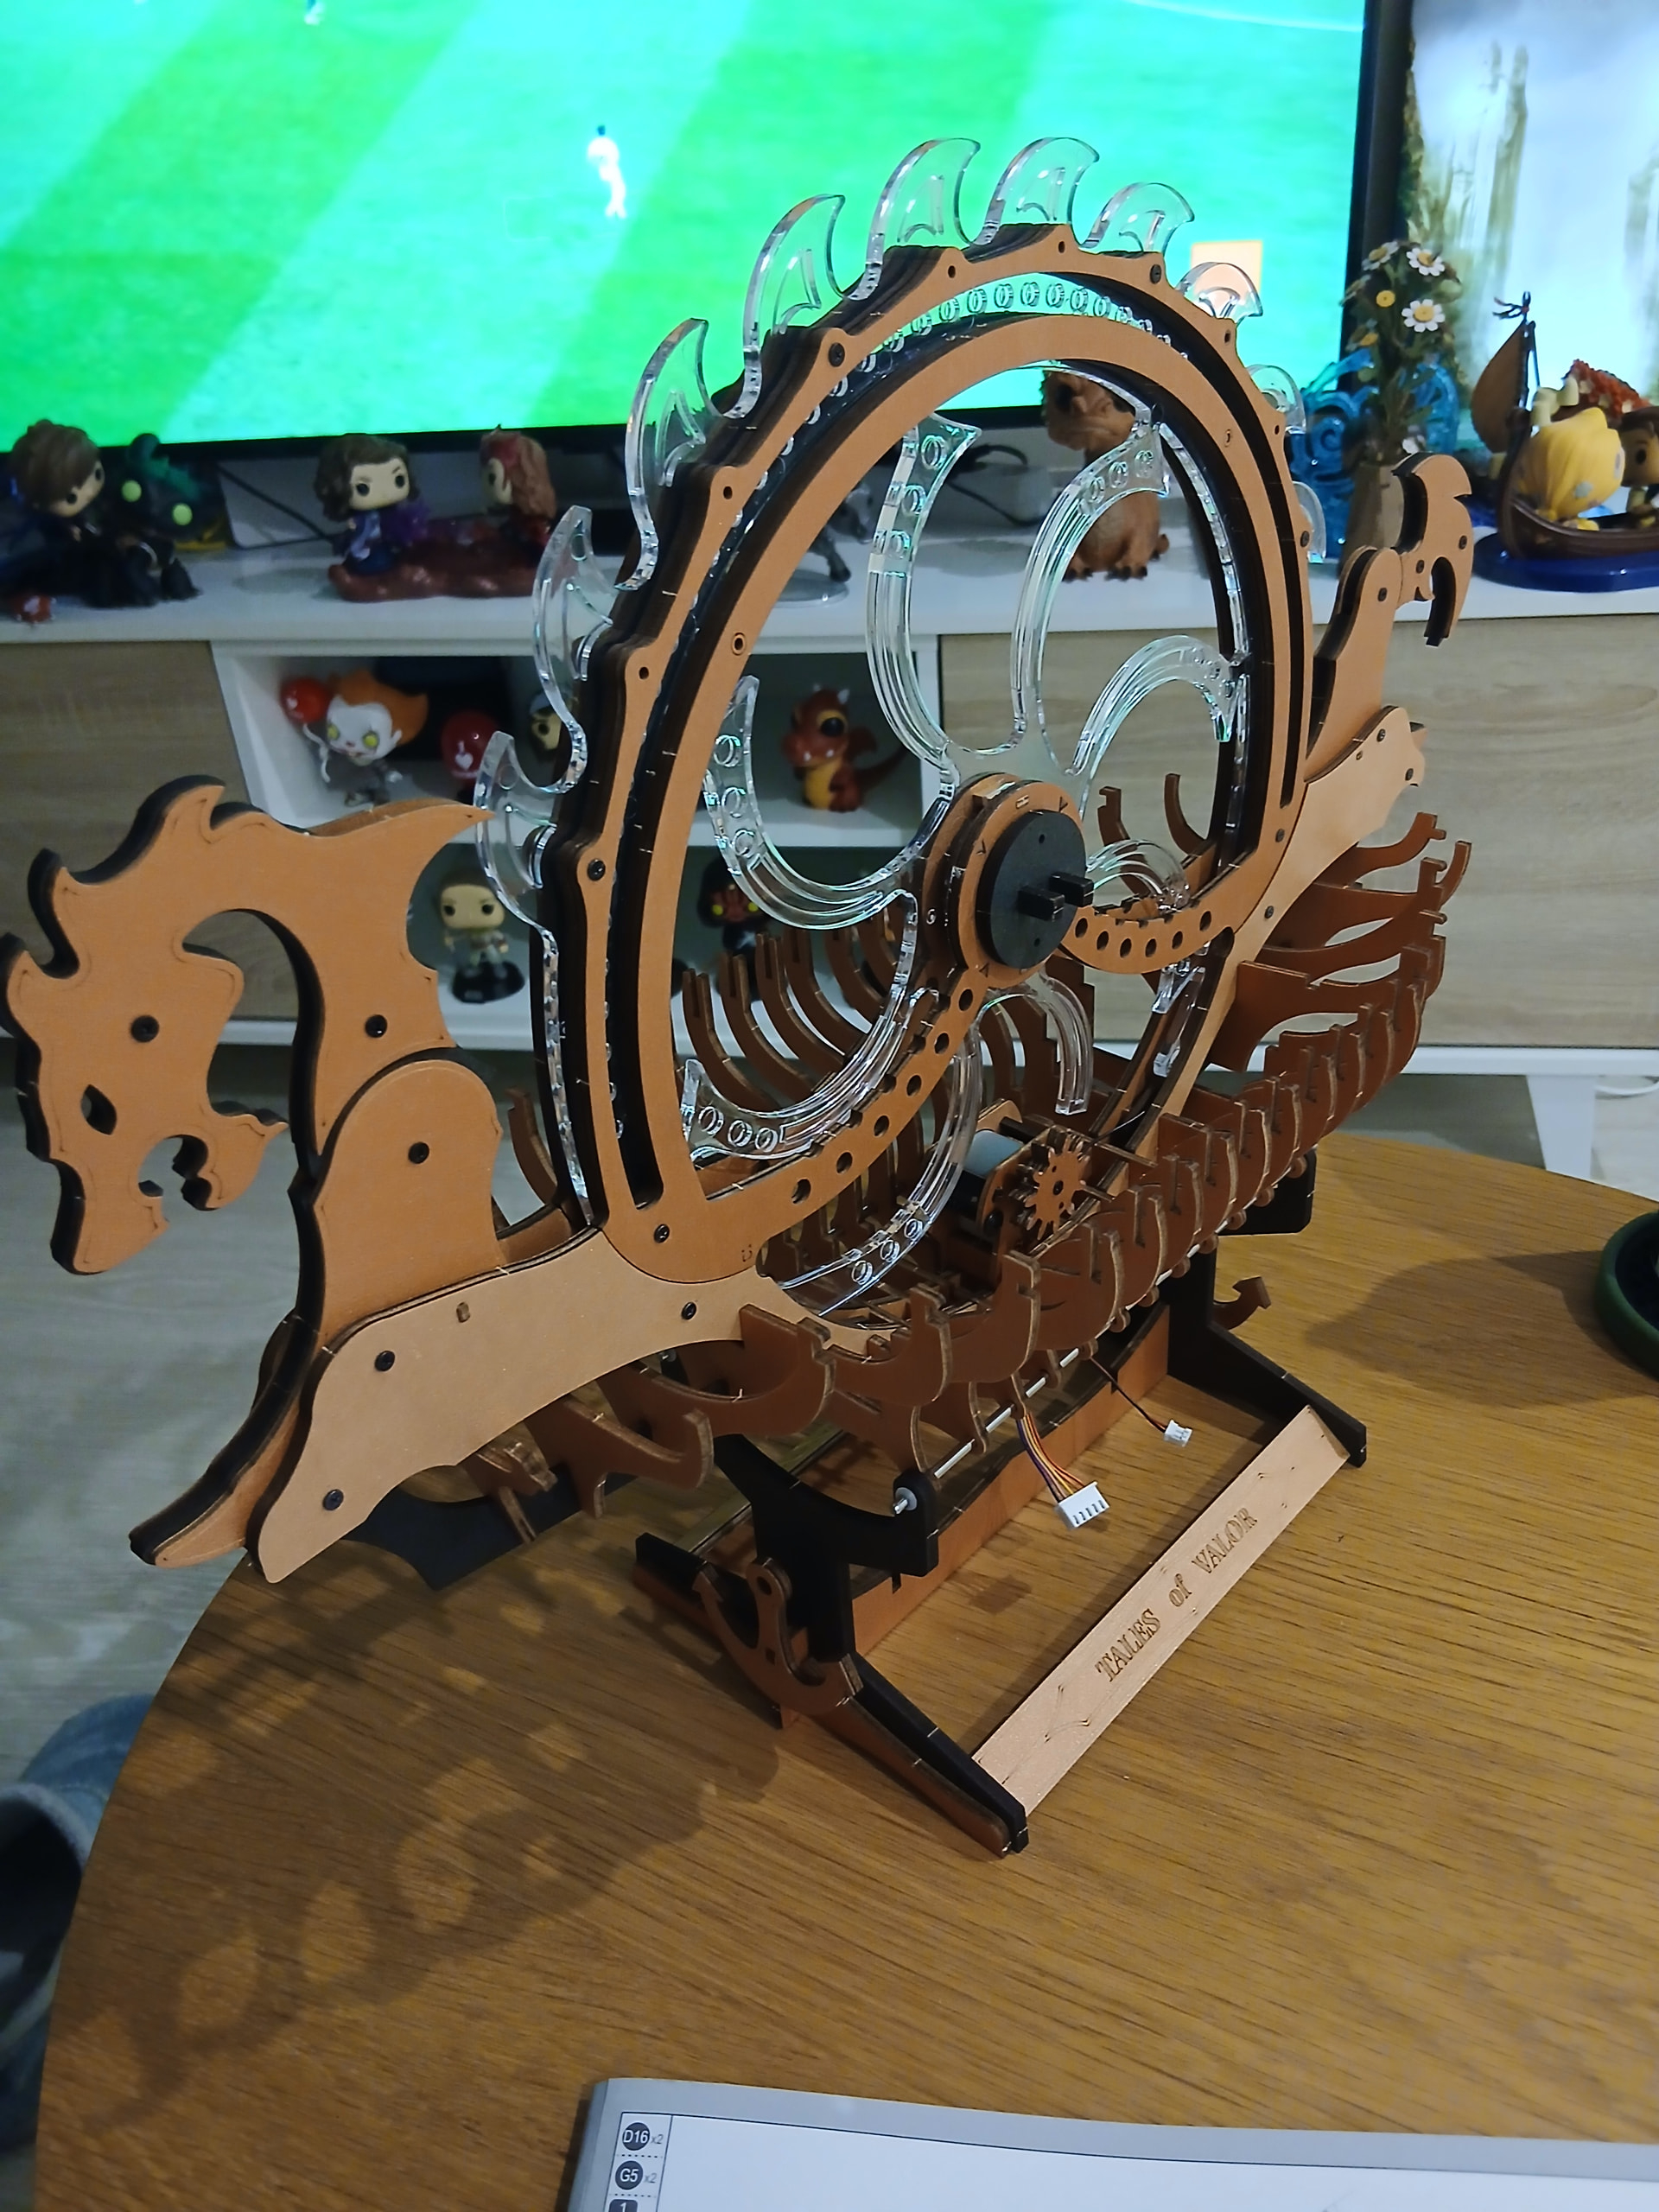
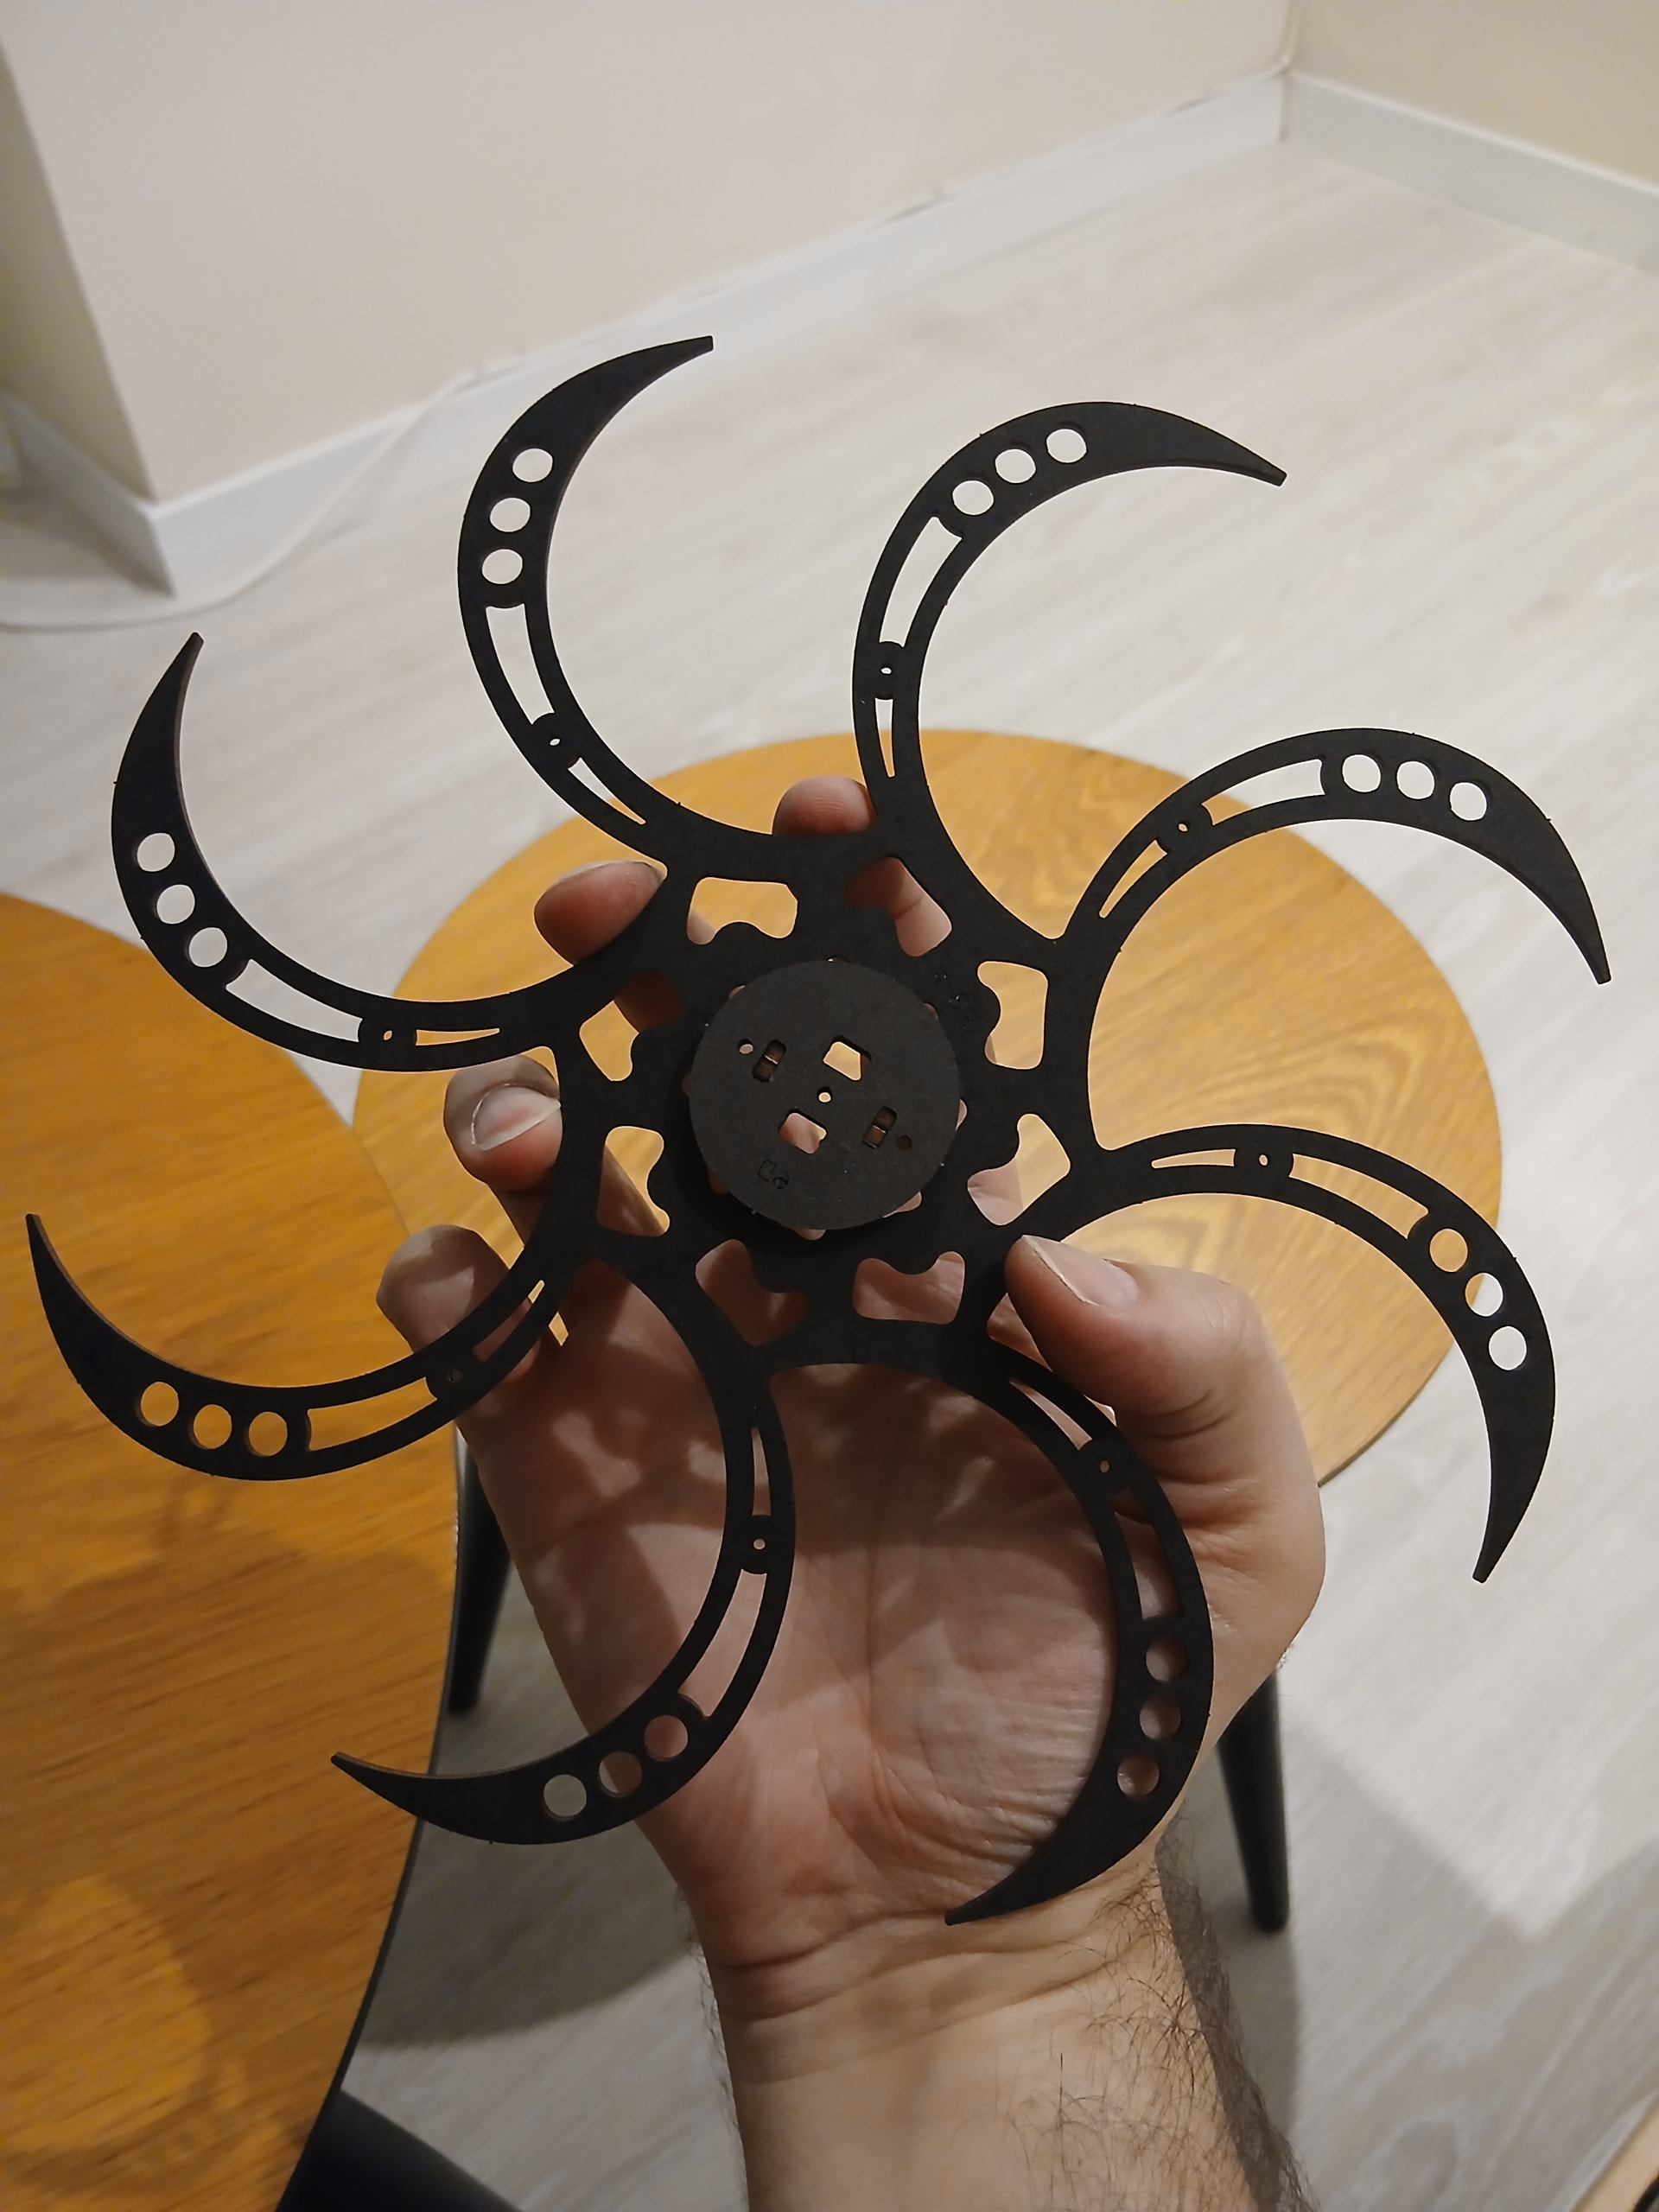
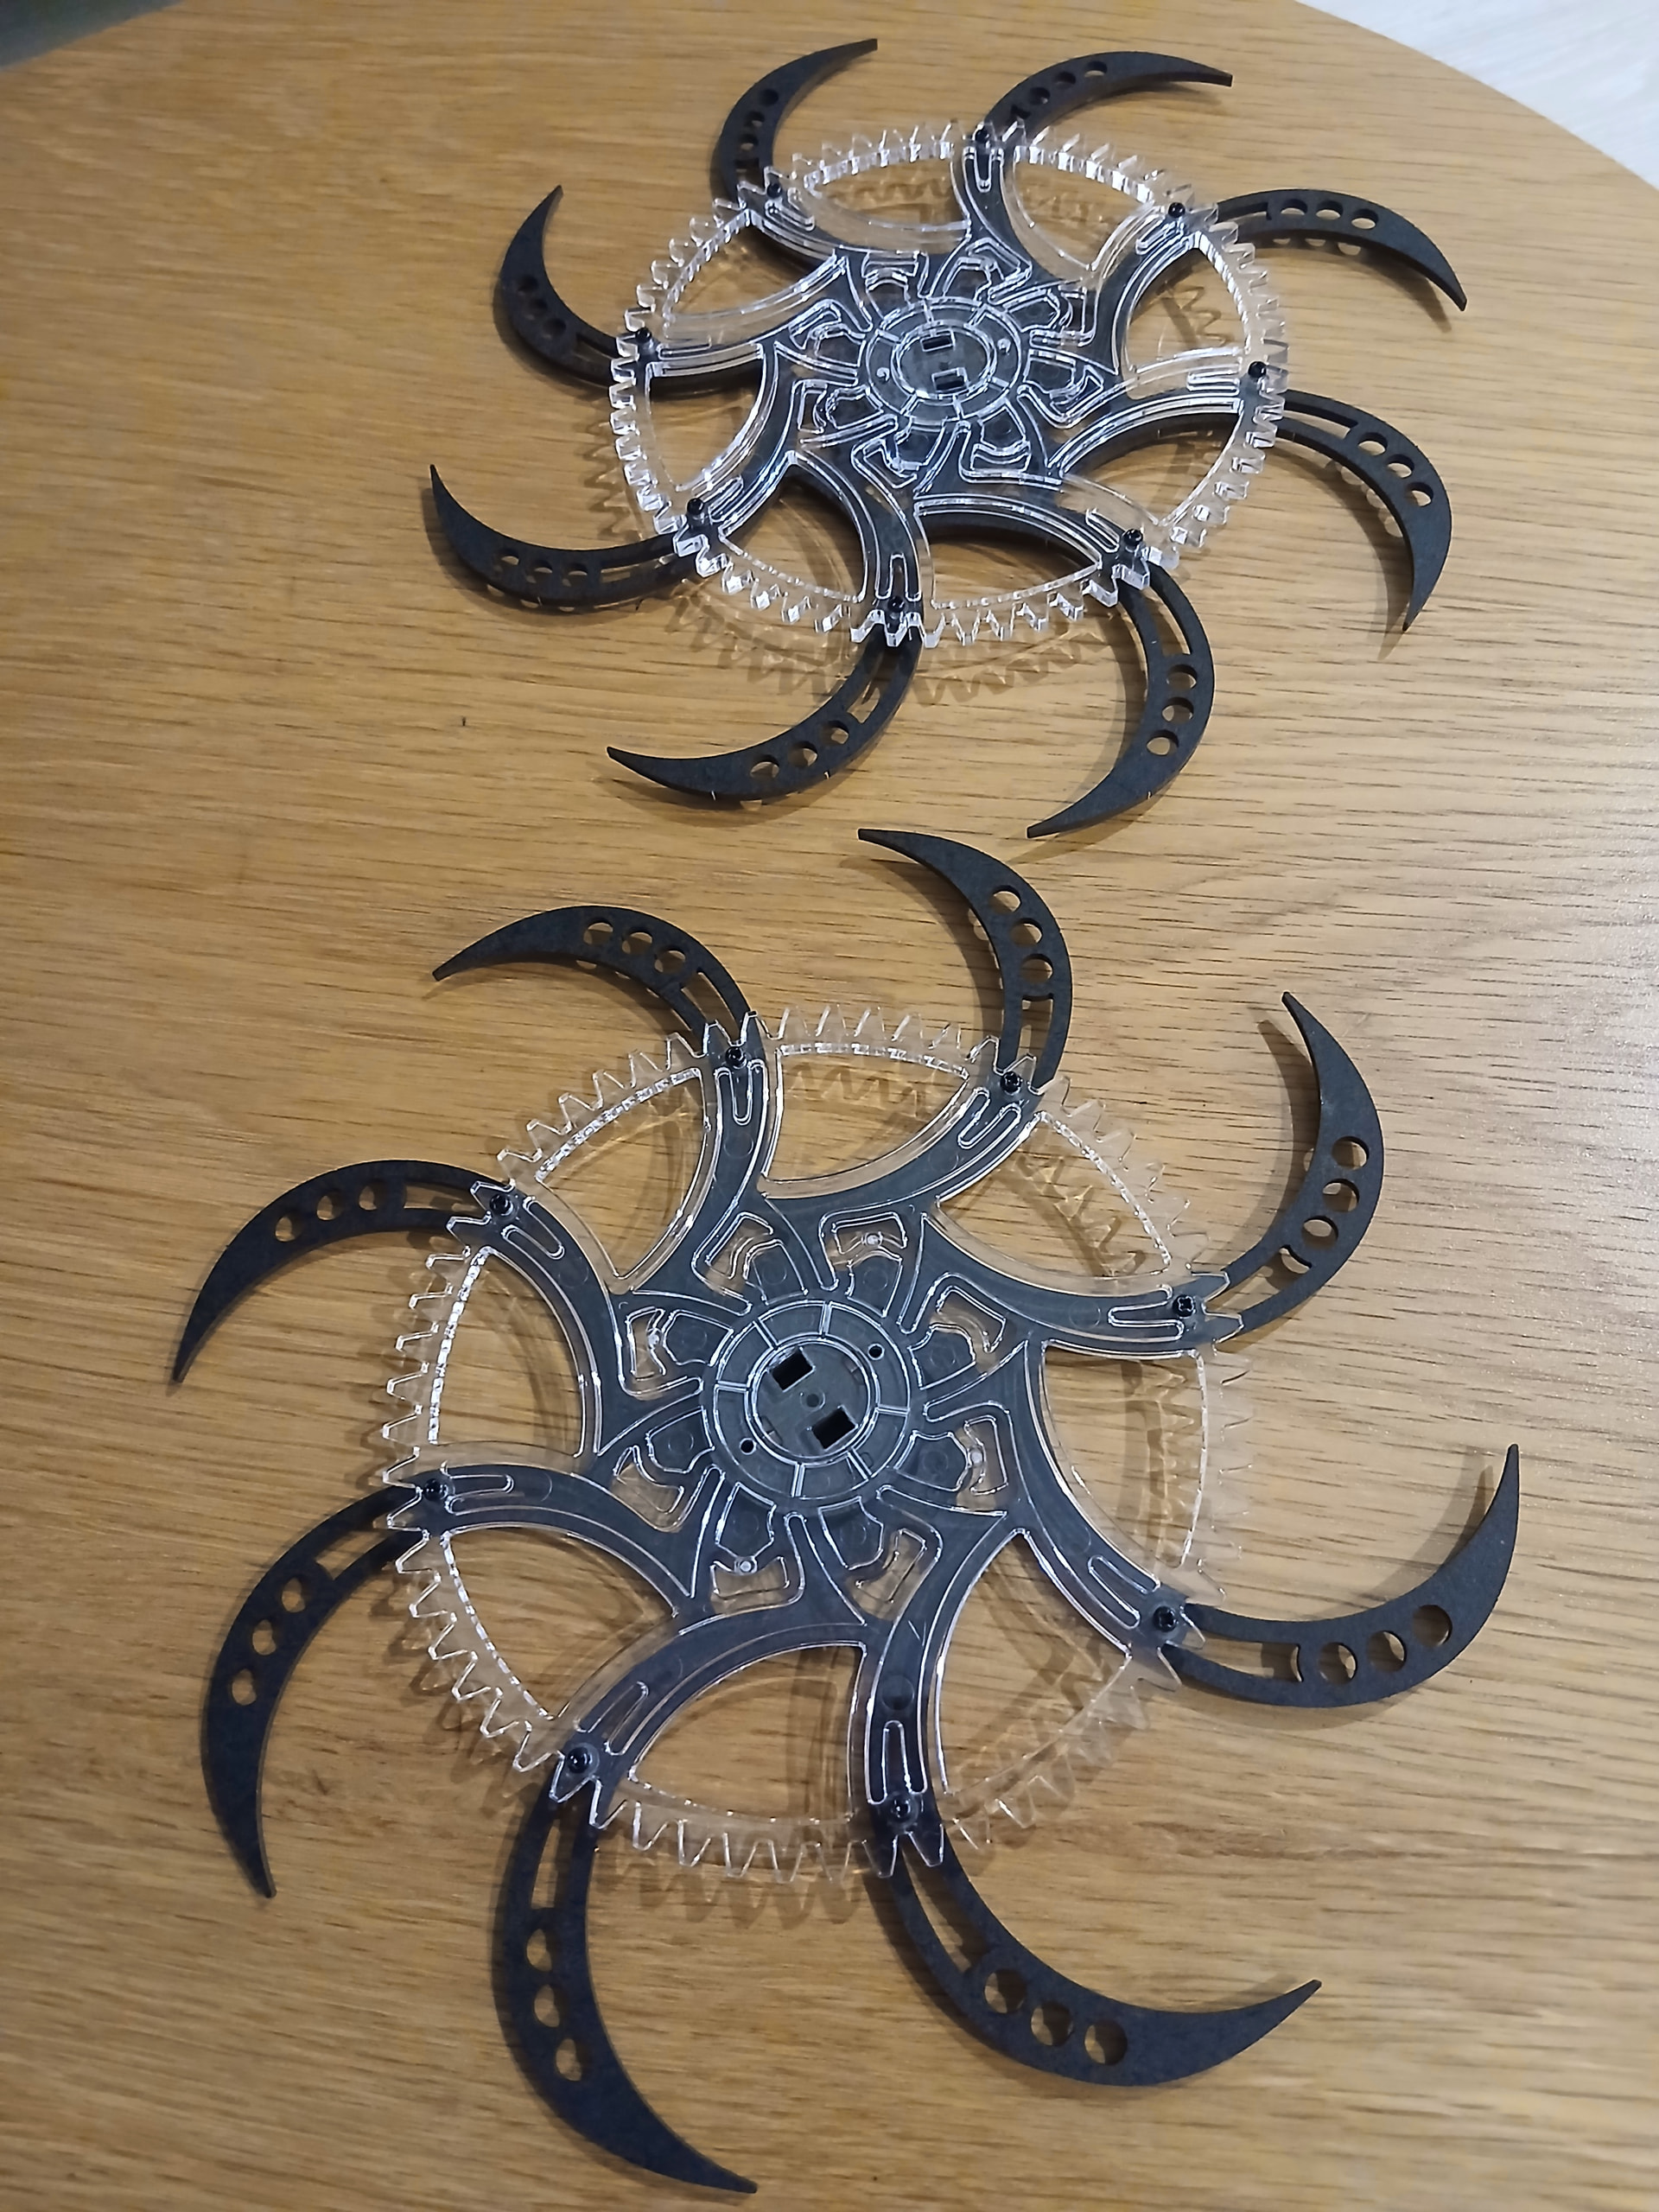
Now, for step 5/7, it’s time to build two smaller wheels, which I guess will be the ones turning around and moving the oars when the ship is plugged in. So first I had to assemble the black circle… Spyral? I’m not sure how to call that shape ![]() although I sent a picture to my mum and she called it “one of those star-like killer weapons ninjas use in asian movies”
although I sent a picture to my mum and she called it “one of those star-like killer weapons ninjas use in asian movies” ![]()
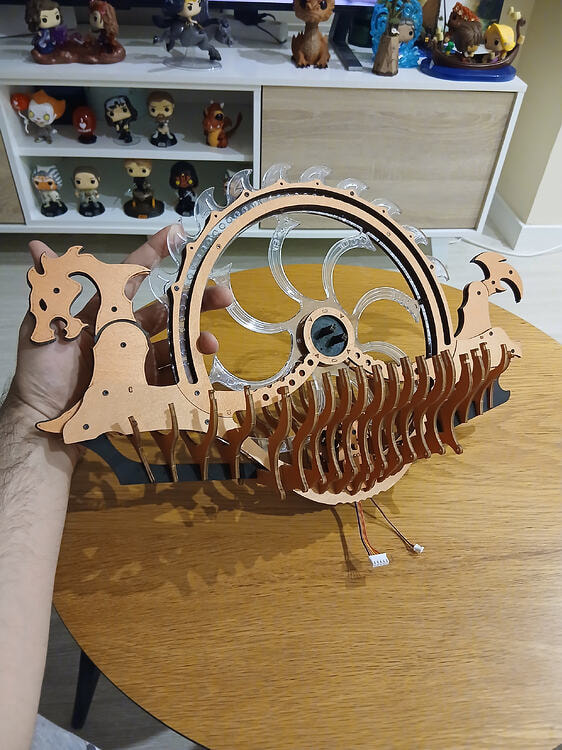
Then, and for another tricky part, for this glass-like circled part, I had to screw eight… Screws ![]() through the holes into eight small circled-shape wooden parts. This part made me also screw my brain, since those circled-shape wooden parts won’t stay there once screwd and would keep falling on the table lol. It took me a little bit of time and try-not-to-get-frustrated-about-it mindset to realize I could just hold the transparent circle vertically while doing so. Yay!
through the holes into eight small circled-shape wooden parts. This part made me also screw my brain, since those circled-shape wooden parts won’t stay there once screwd and would keep falling on the table lol. It took me a little bit of time and try-not-to-get-frustrated-about-it mindset to realize I could just hold the transparent circle vertically while doing so. Yay!
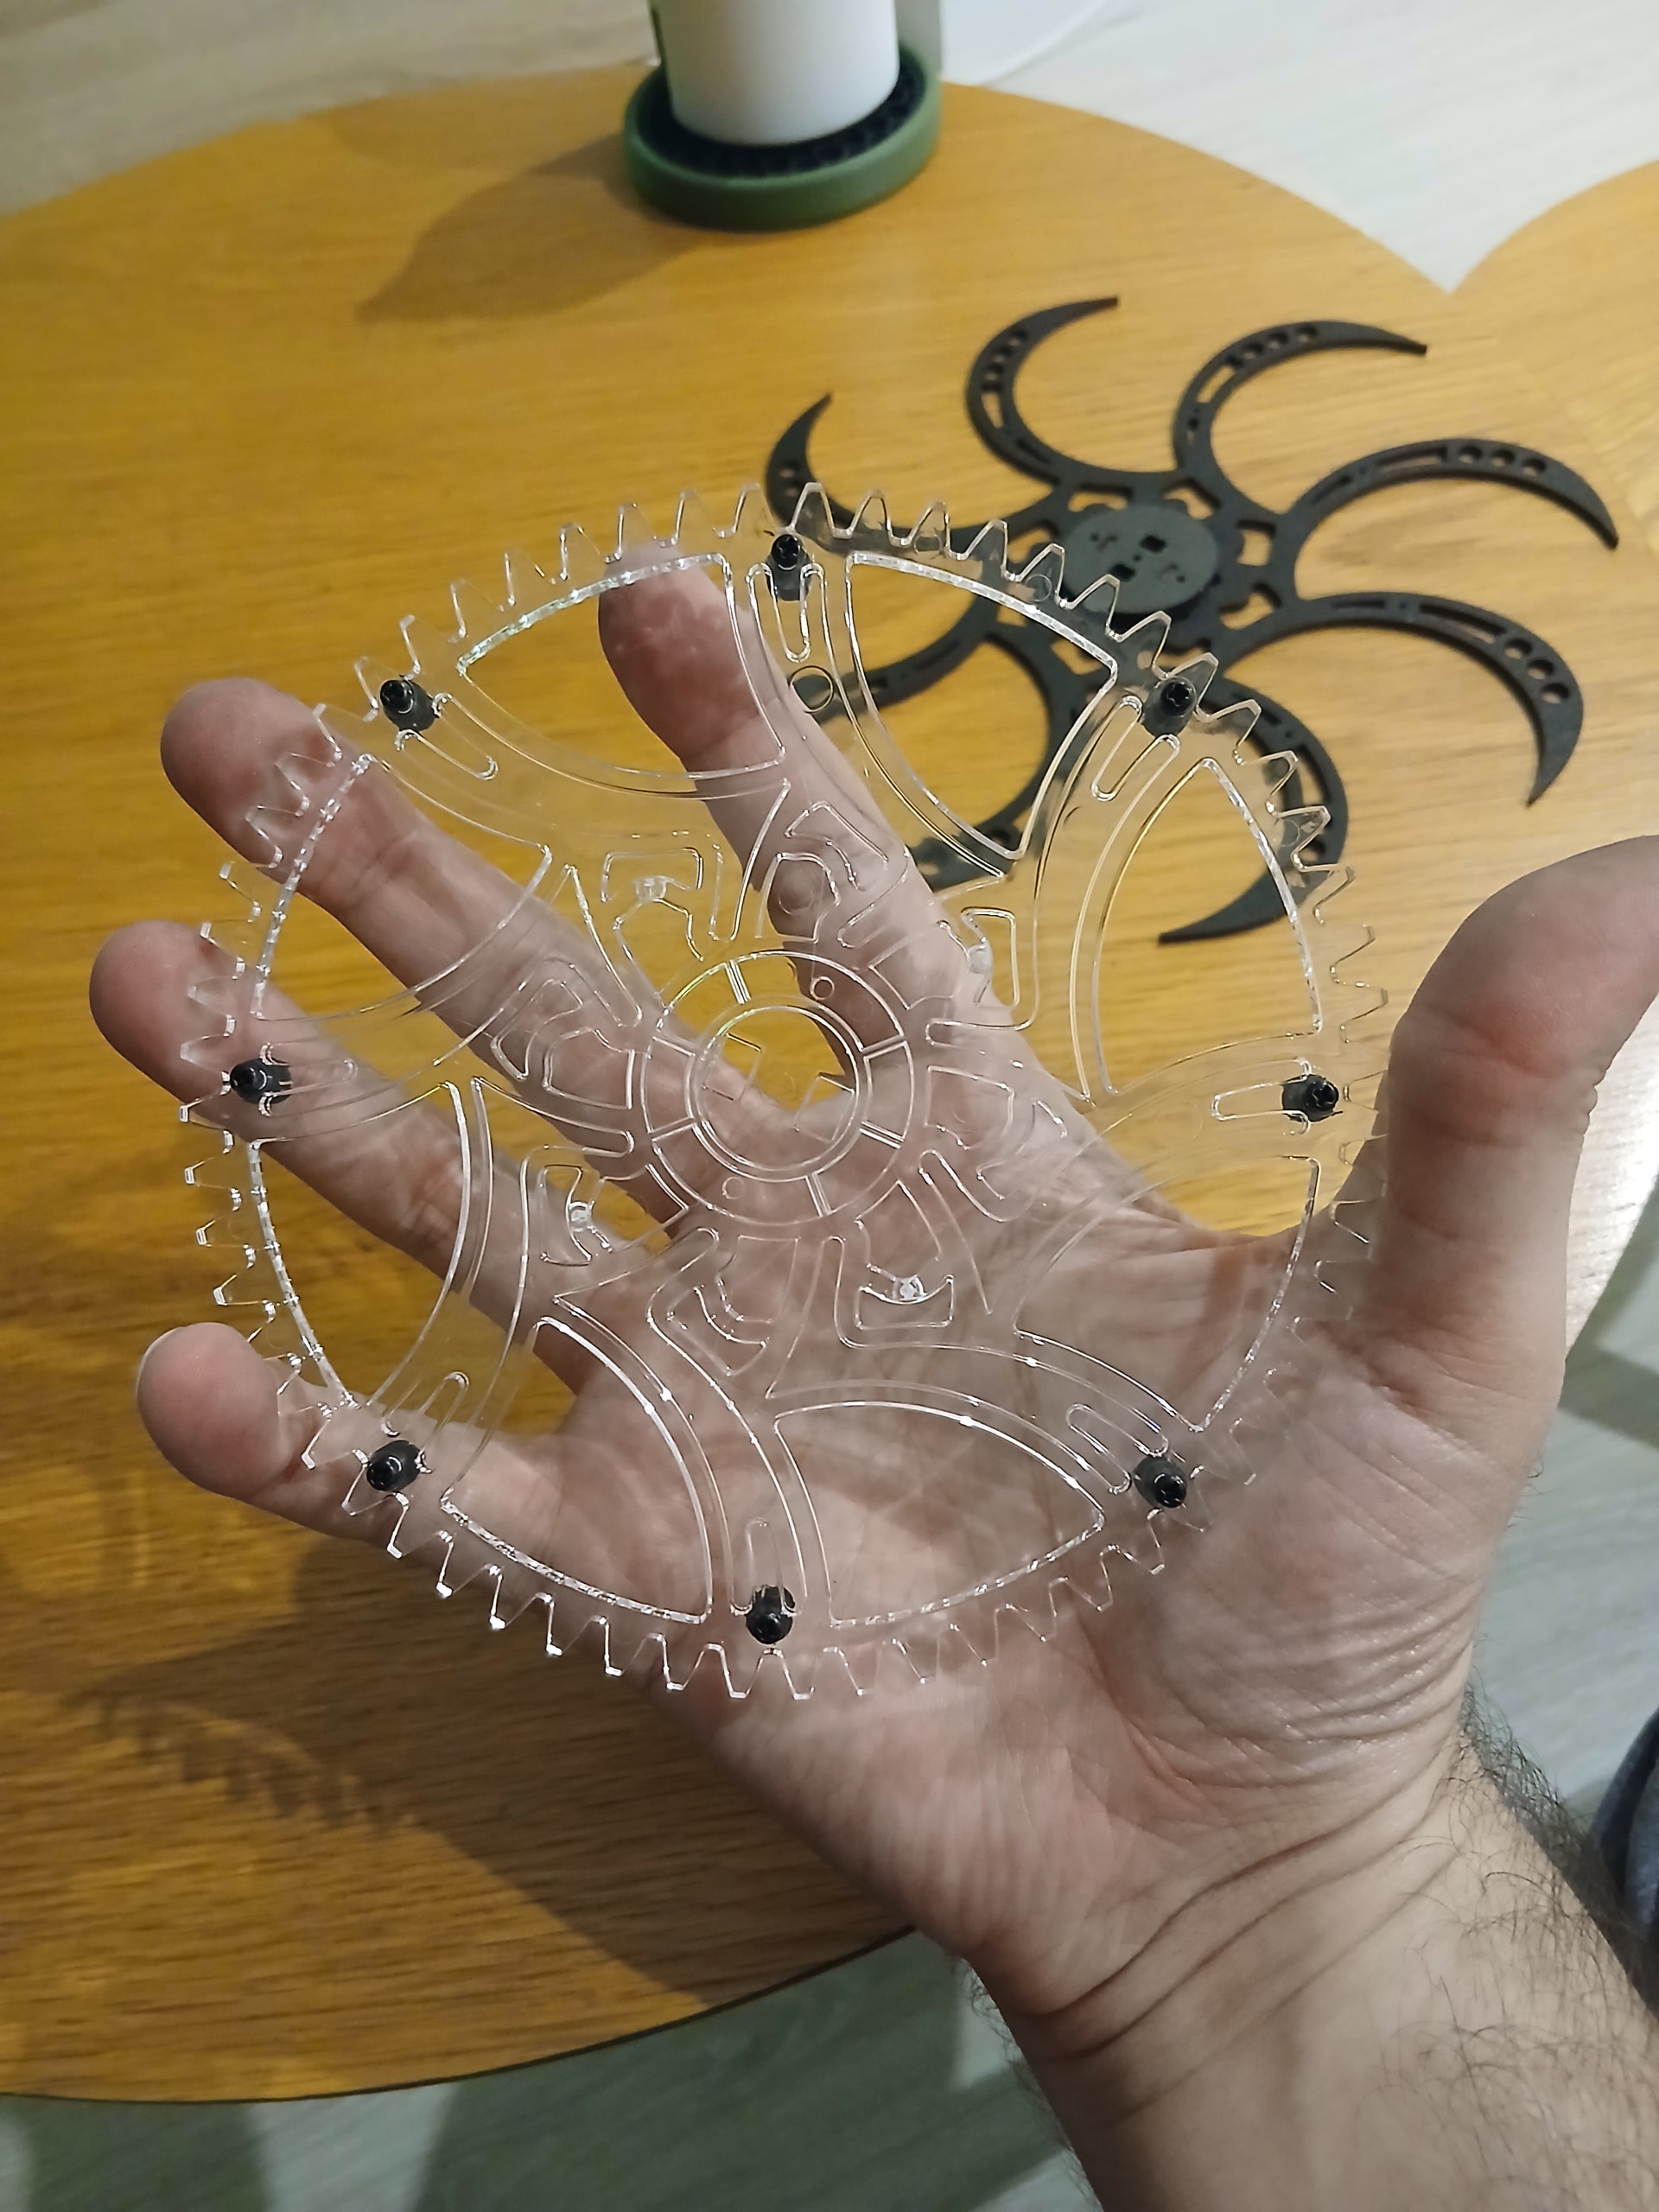
And then I just had to put those two things together (the circled-glass-like part and the ninja star weapon) and… Voilà! Just do it once more in order to have two of them, each of them looking to one different direction.
I’m still a bit tired from my “work to home to birthday to dinner to bed to work” latest 24 hours, I need some sleep ![]()
I may be working on step 6/7 this weekend, who knows. It’s a longer one since I’ll almost finish the ship in that one! And for the last one, 7/7, it’s all about putting the mechanism together and adding the oars to the ecuation. Looking forward to it!
I hope you guys have the best of weekends ![]() I’ll be surely and properly celebrating my Birthday with friends this time, whichever misterious plans they’ve came up with lol.
I’ll be surely and properly celebrating my Birthday with friends this time, whichever misterious plans they’ve came up with lol.
See you/read you around!
