
This is it, folks! My Wooden Blooming Book is finally finished. And not without a harsh journey! But I’ve enjoyed the journey a lot in the end and this may be my favourite flower-related build to date, despite the issues I’ve found through it. Let’s dig into it, shall we?
The Meetup Kits Journey
-
Wooden Flower Basket
Let’s go then!

This is what I had ready last time:

And this is what I still had to work with:

This was gonna take a while! ![]() lucky enough I’m not working today so I was able to go all in.
lucky enough I’m not working today so I was able to go all in.

This time I was finally gonna build the book itself and then add all the flowers and plants to it! So let’s go. First some butterflies:
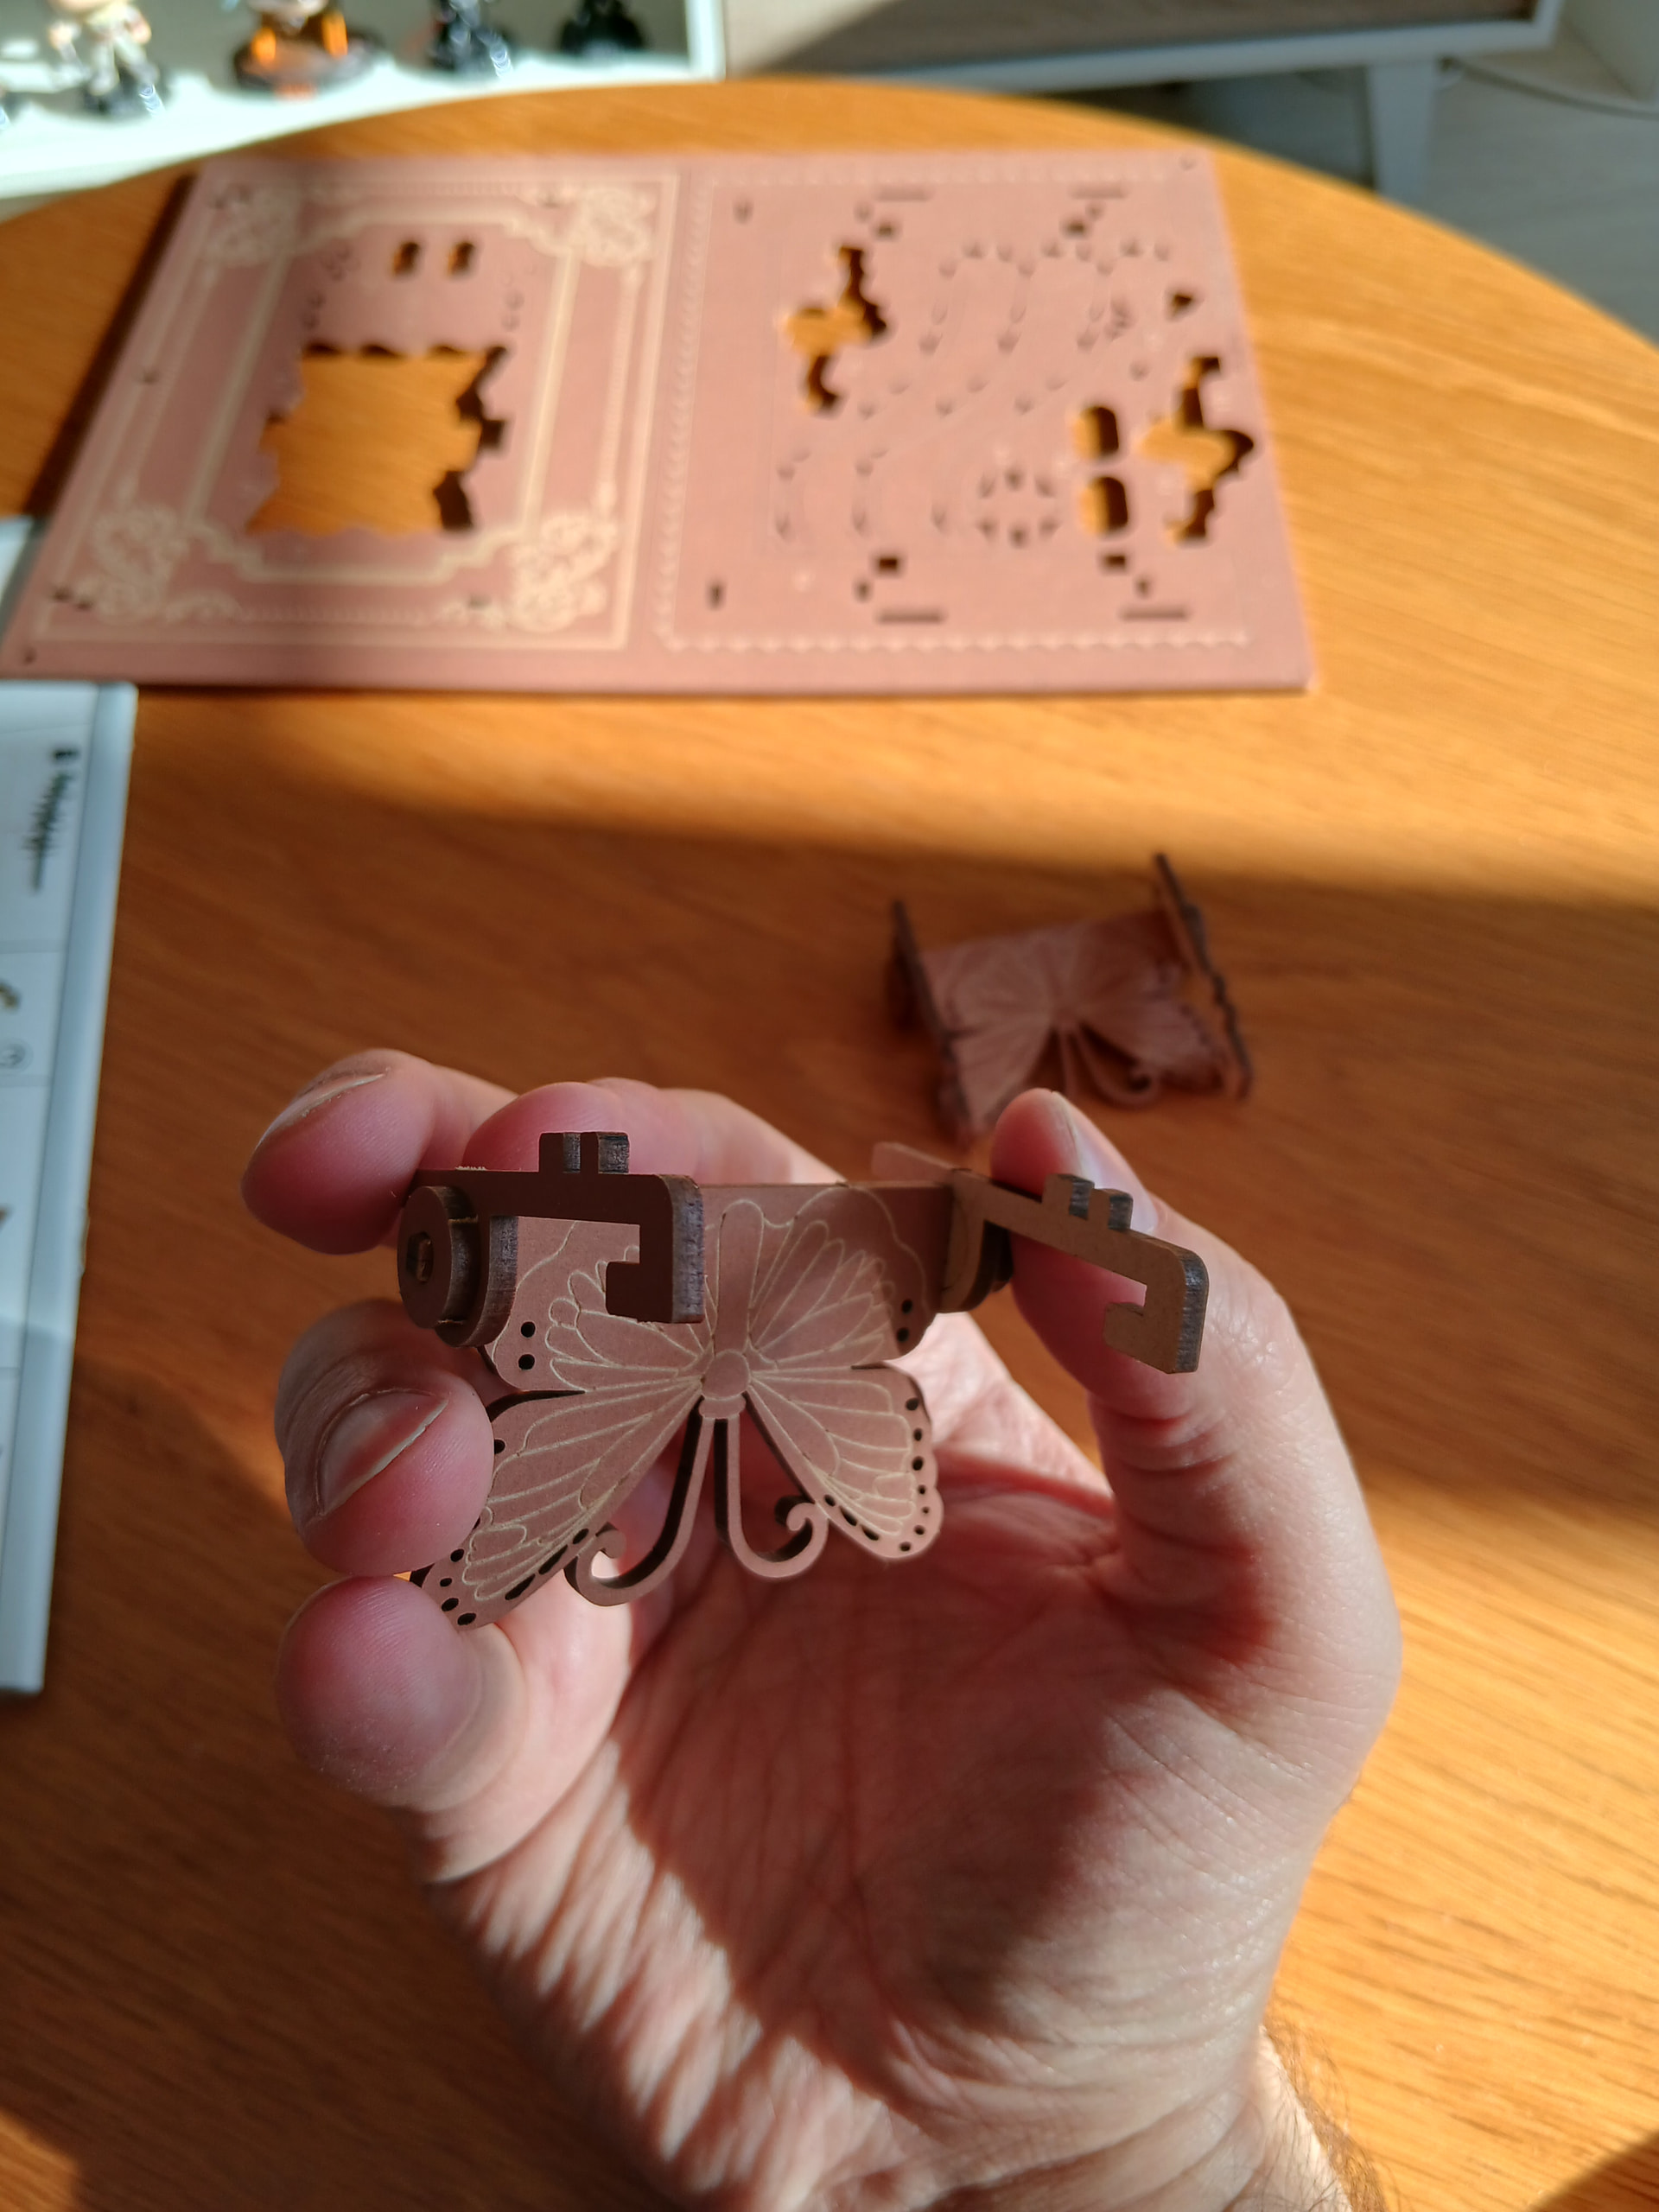
Those were cute enough! Those were gonna be the “legs” of the book that you can open or close depending if you want it to be higher. Not too high though! That could be dangerous.

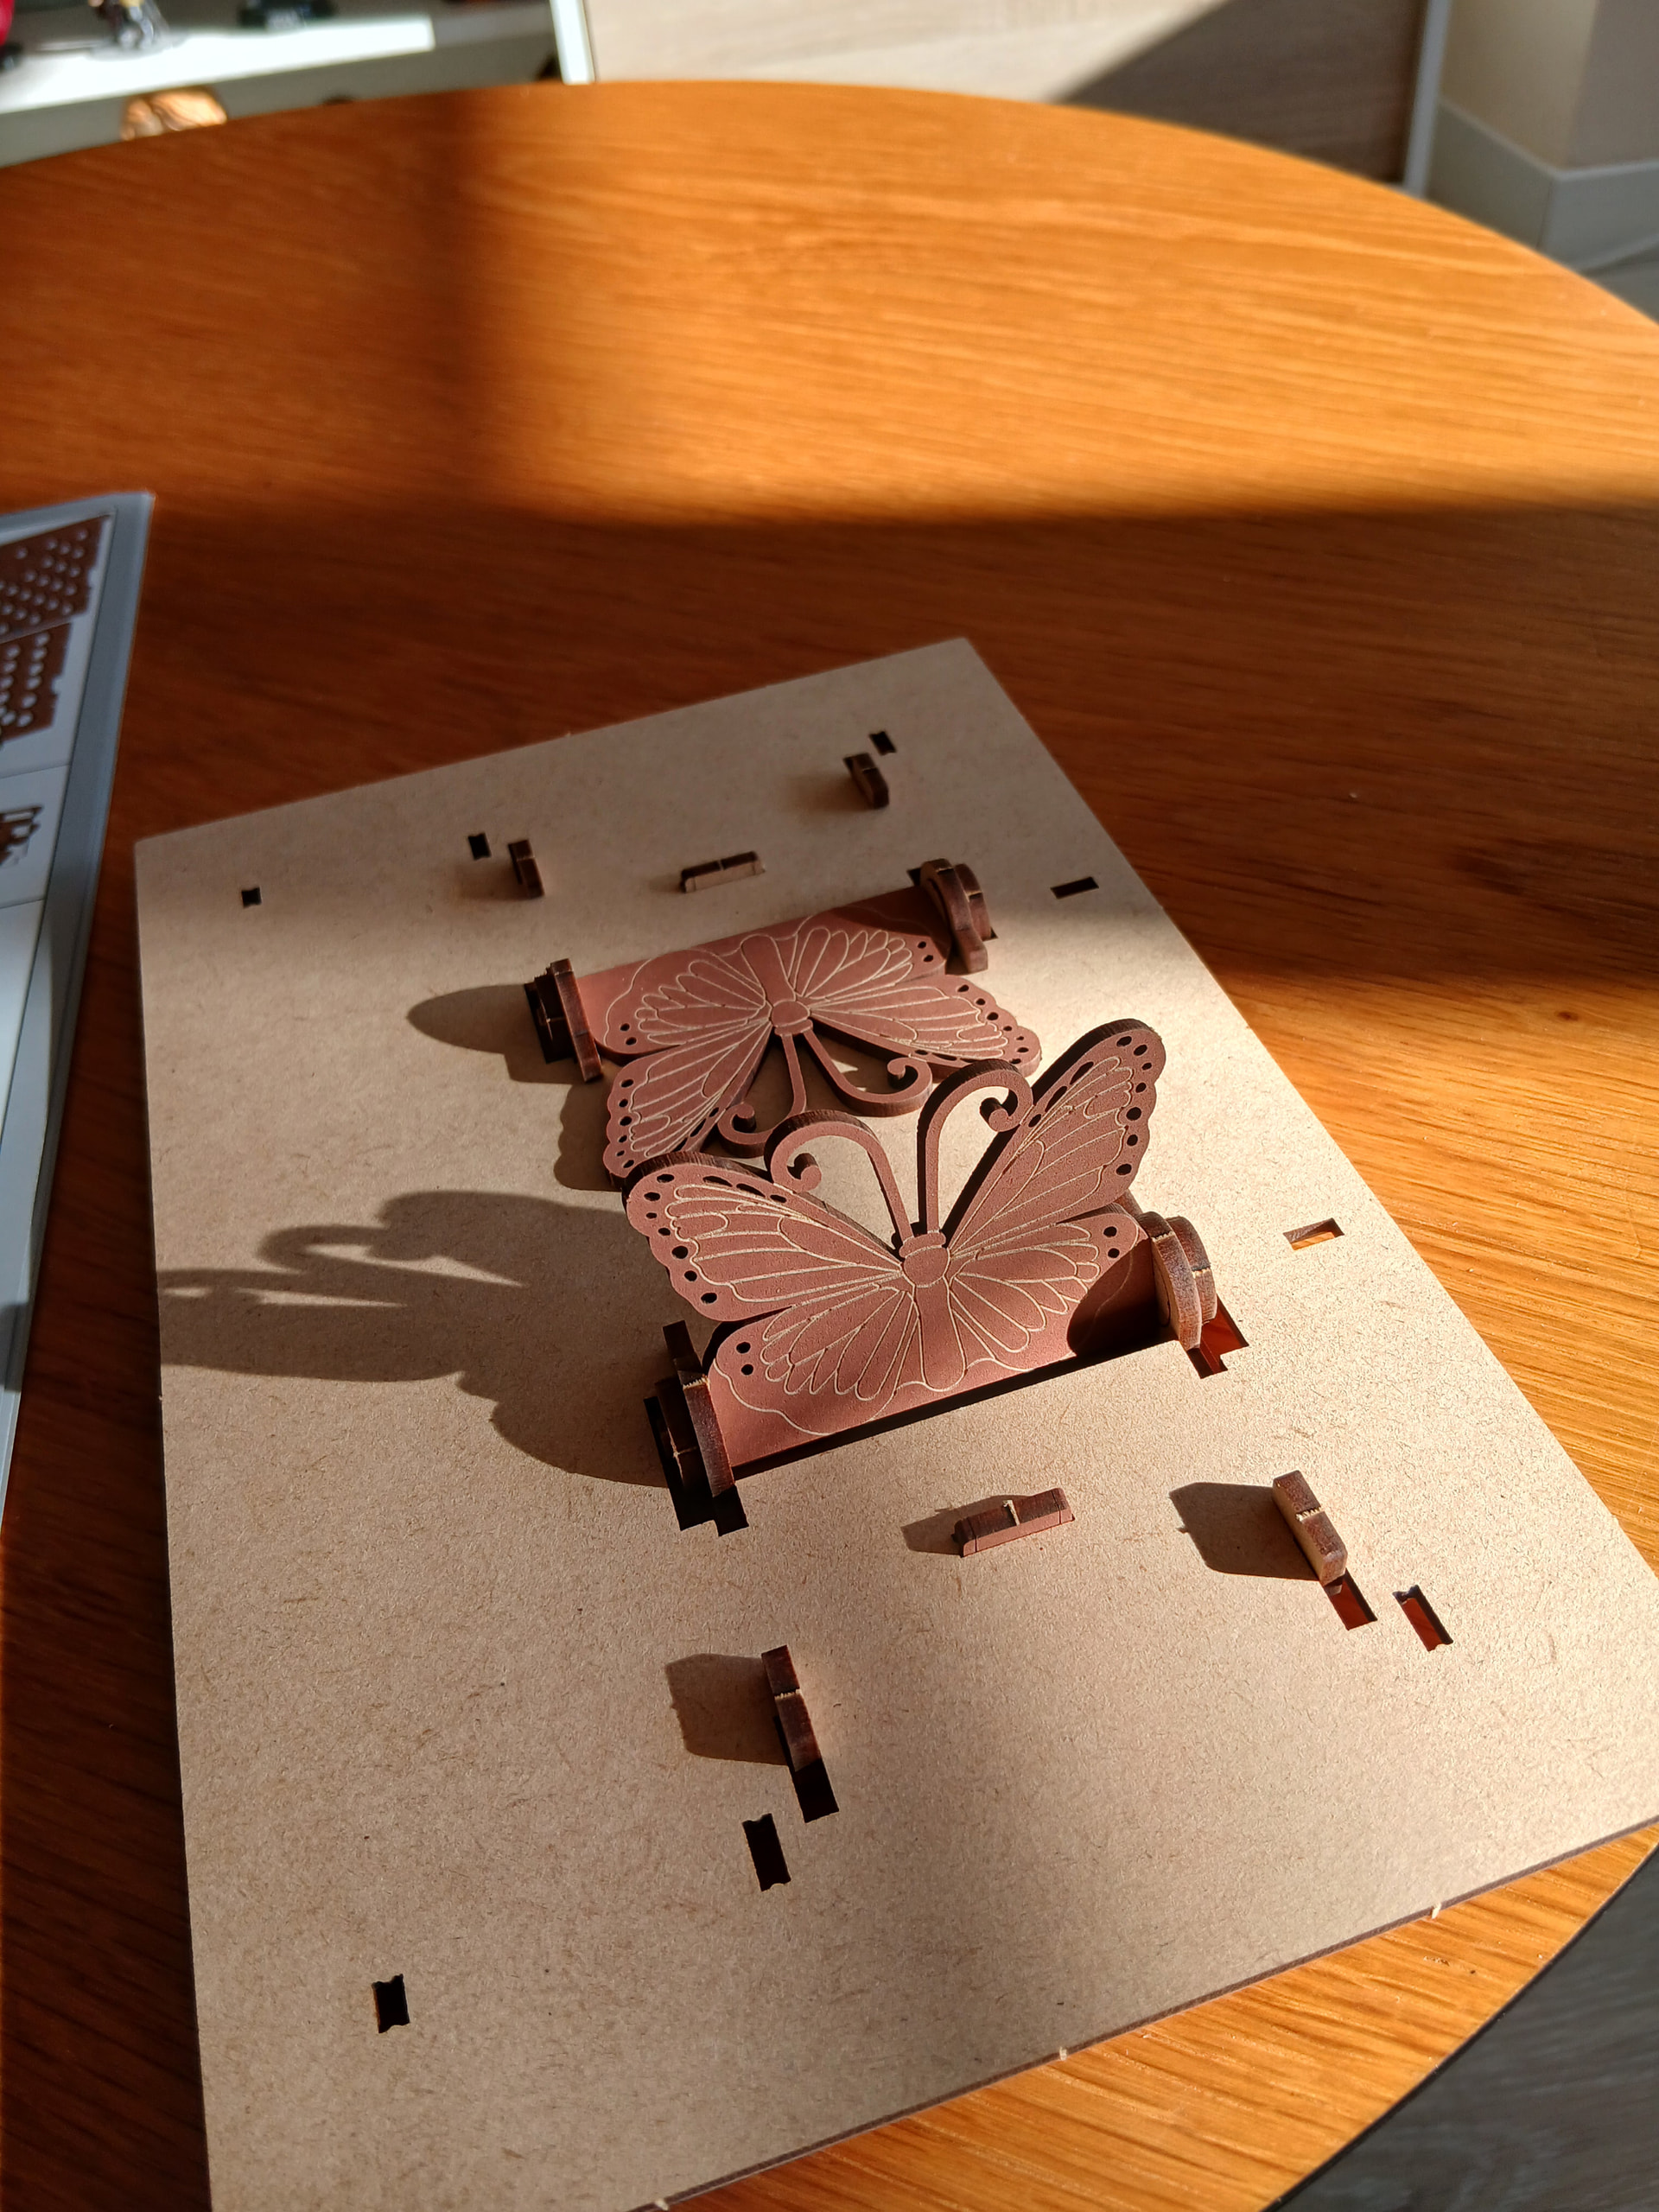
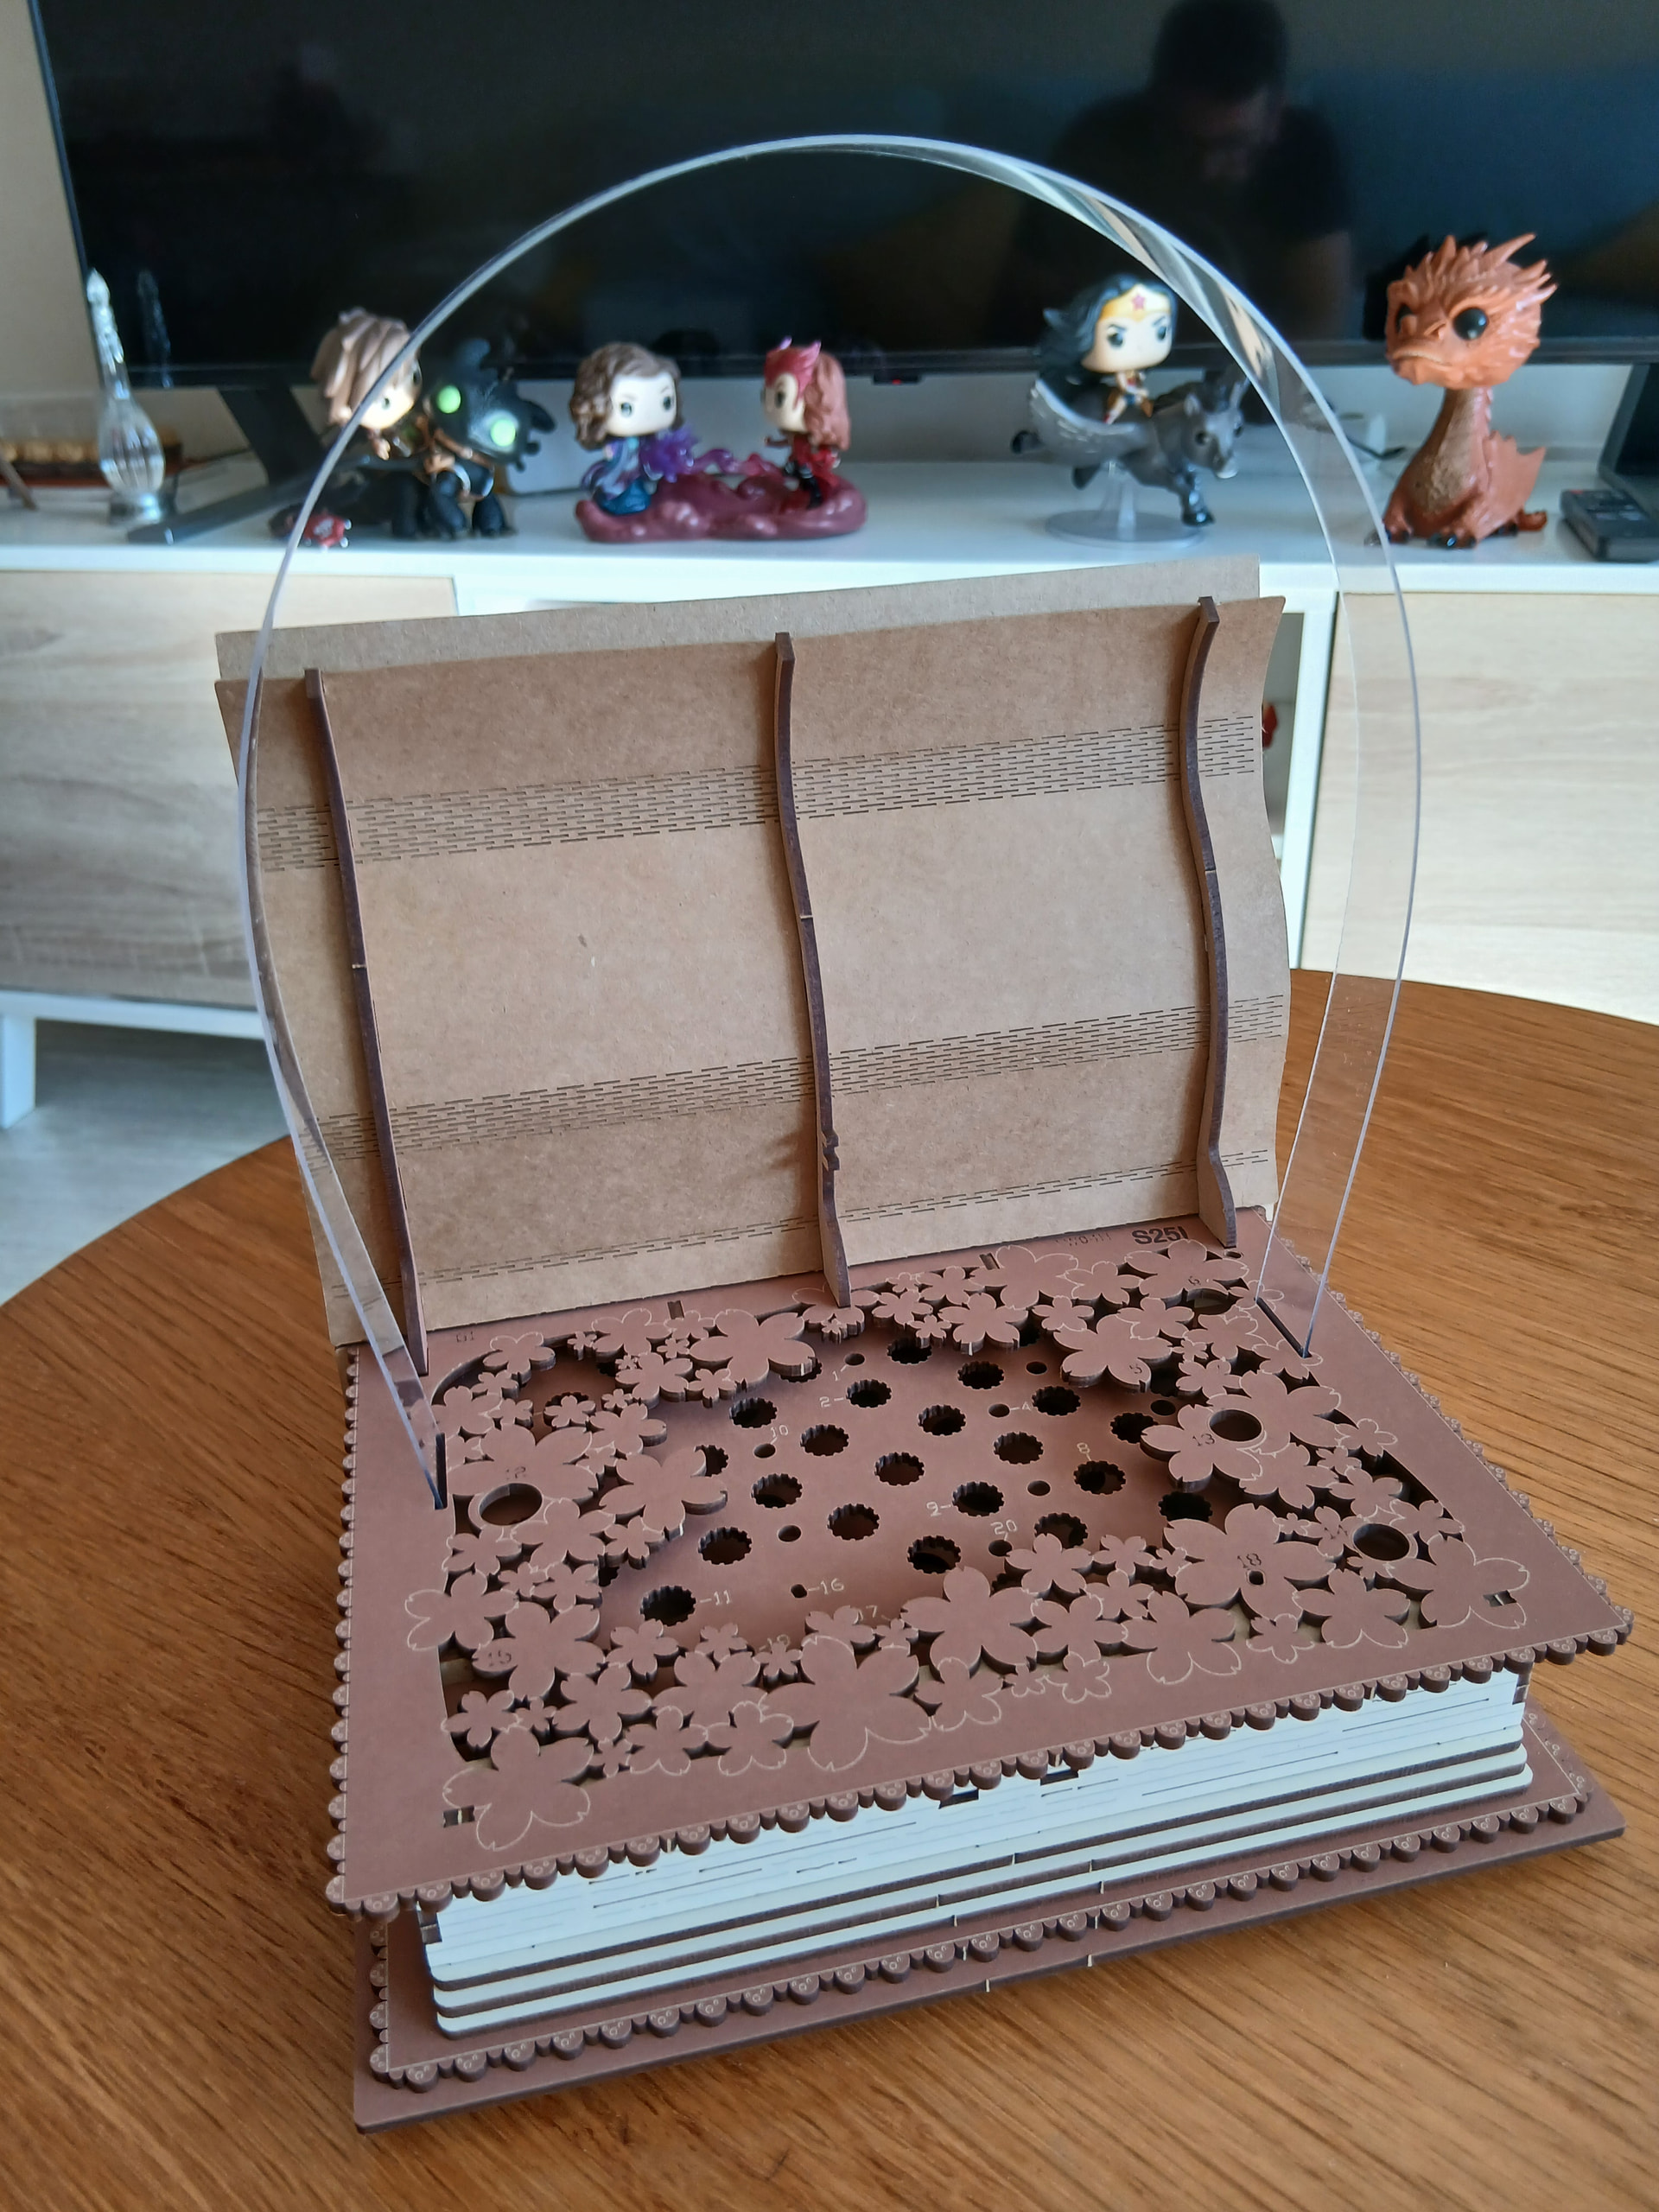
So this is how the “back” of the book will look, the part of it which will be facing the table or whichever surface you choose for it.
Then it was time to start building the rest of it! This is always an exciting moment for me, to finally start putting things together instead of having a lot of different crafted things separated!
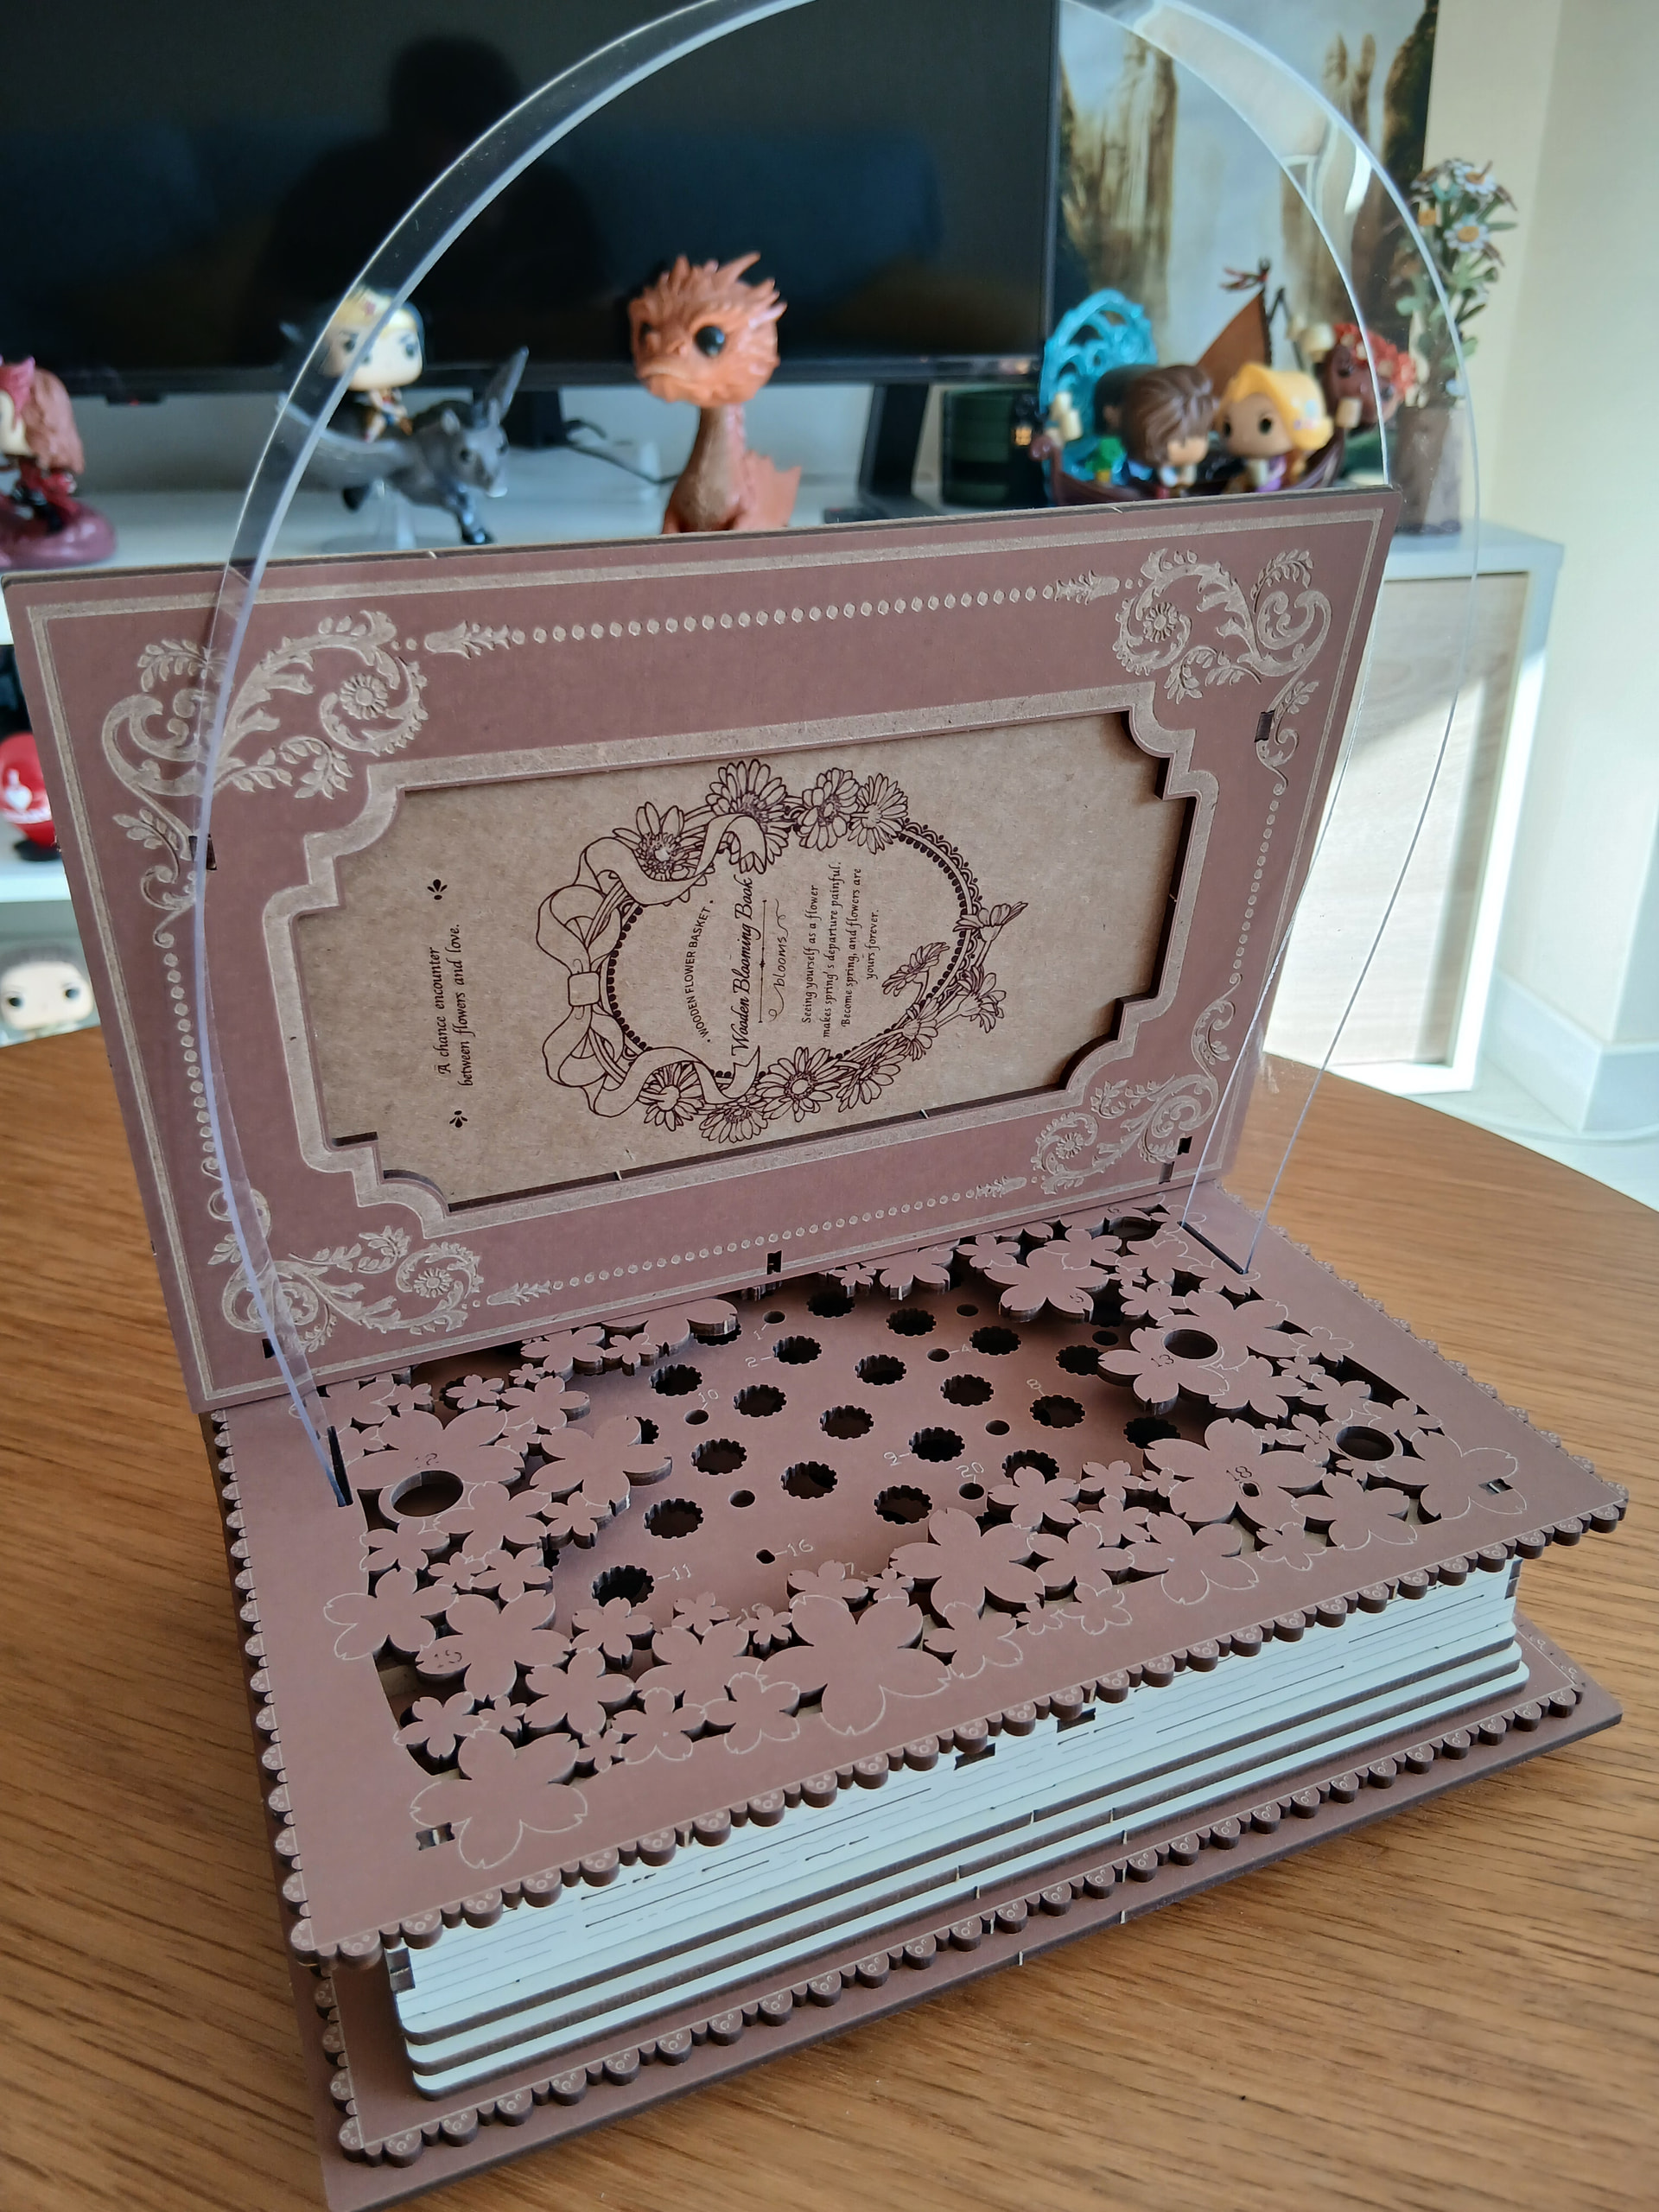
For the book itself there are two parts that are filled with a lot, and I mean A LOT of holes:
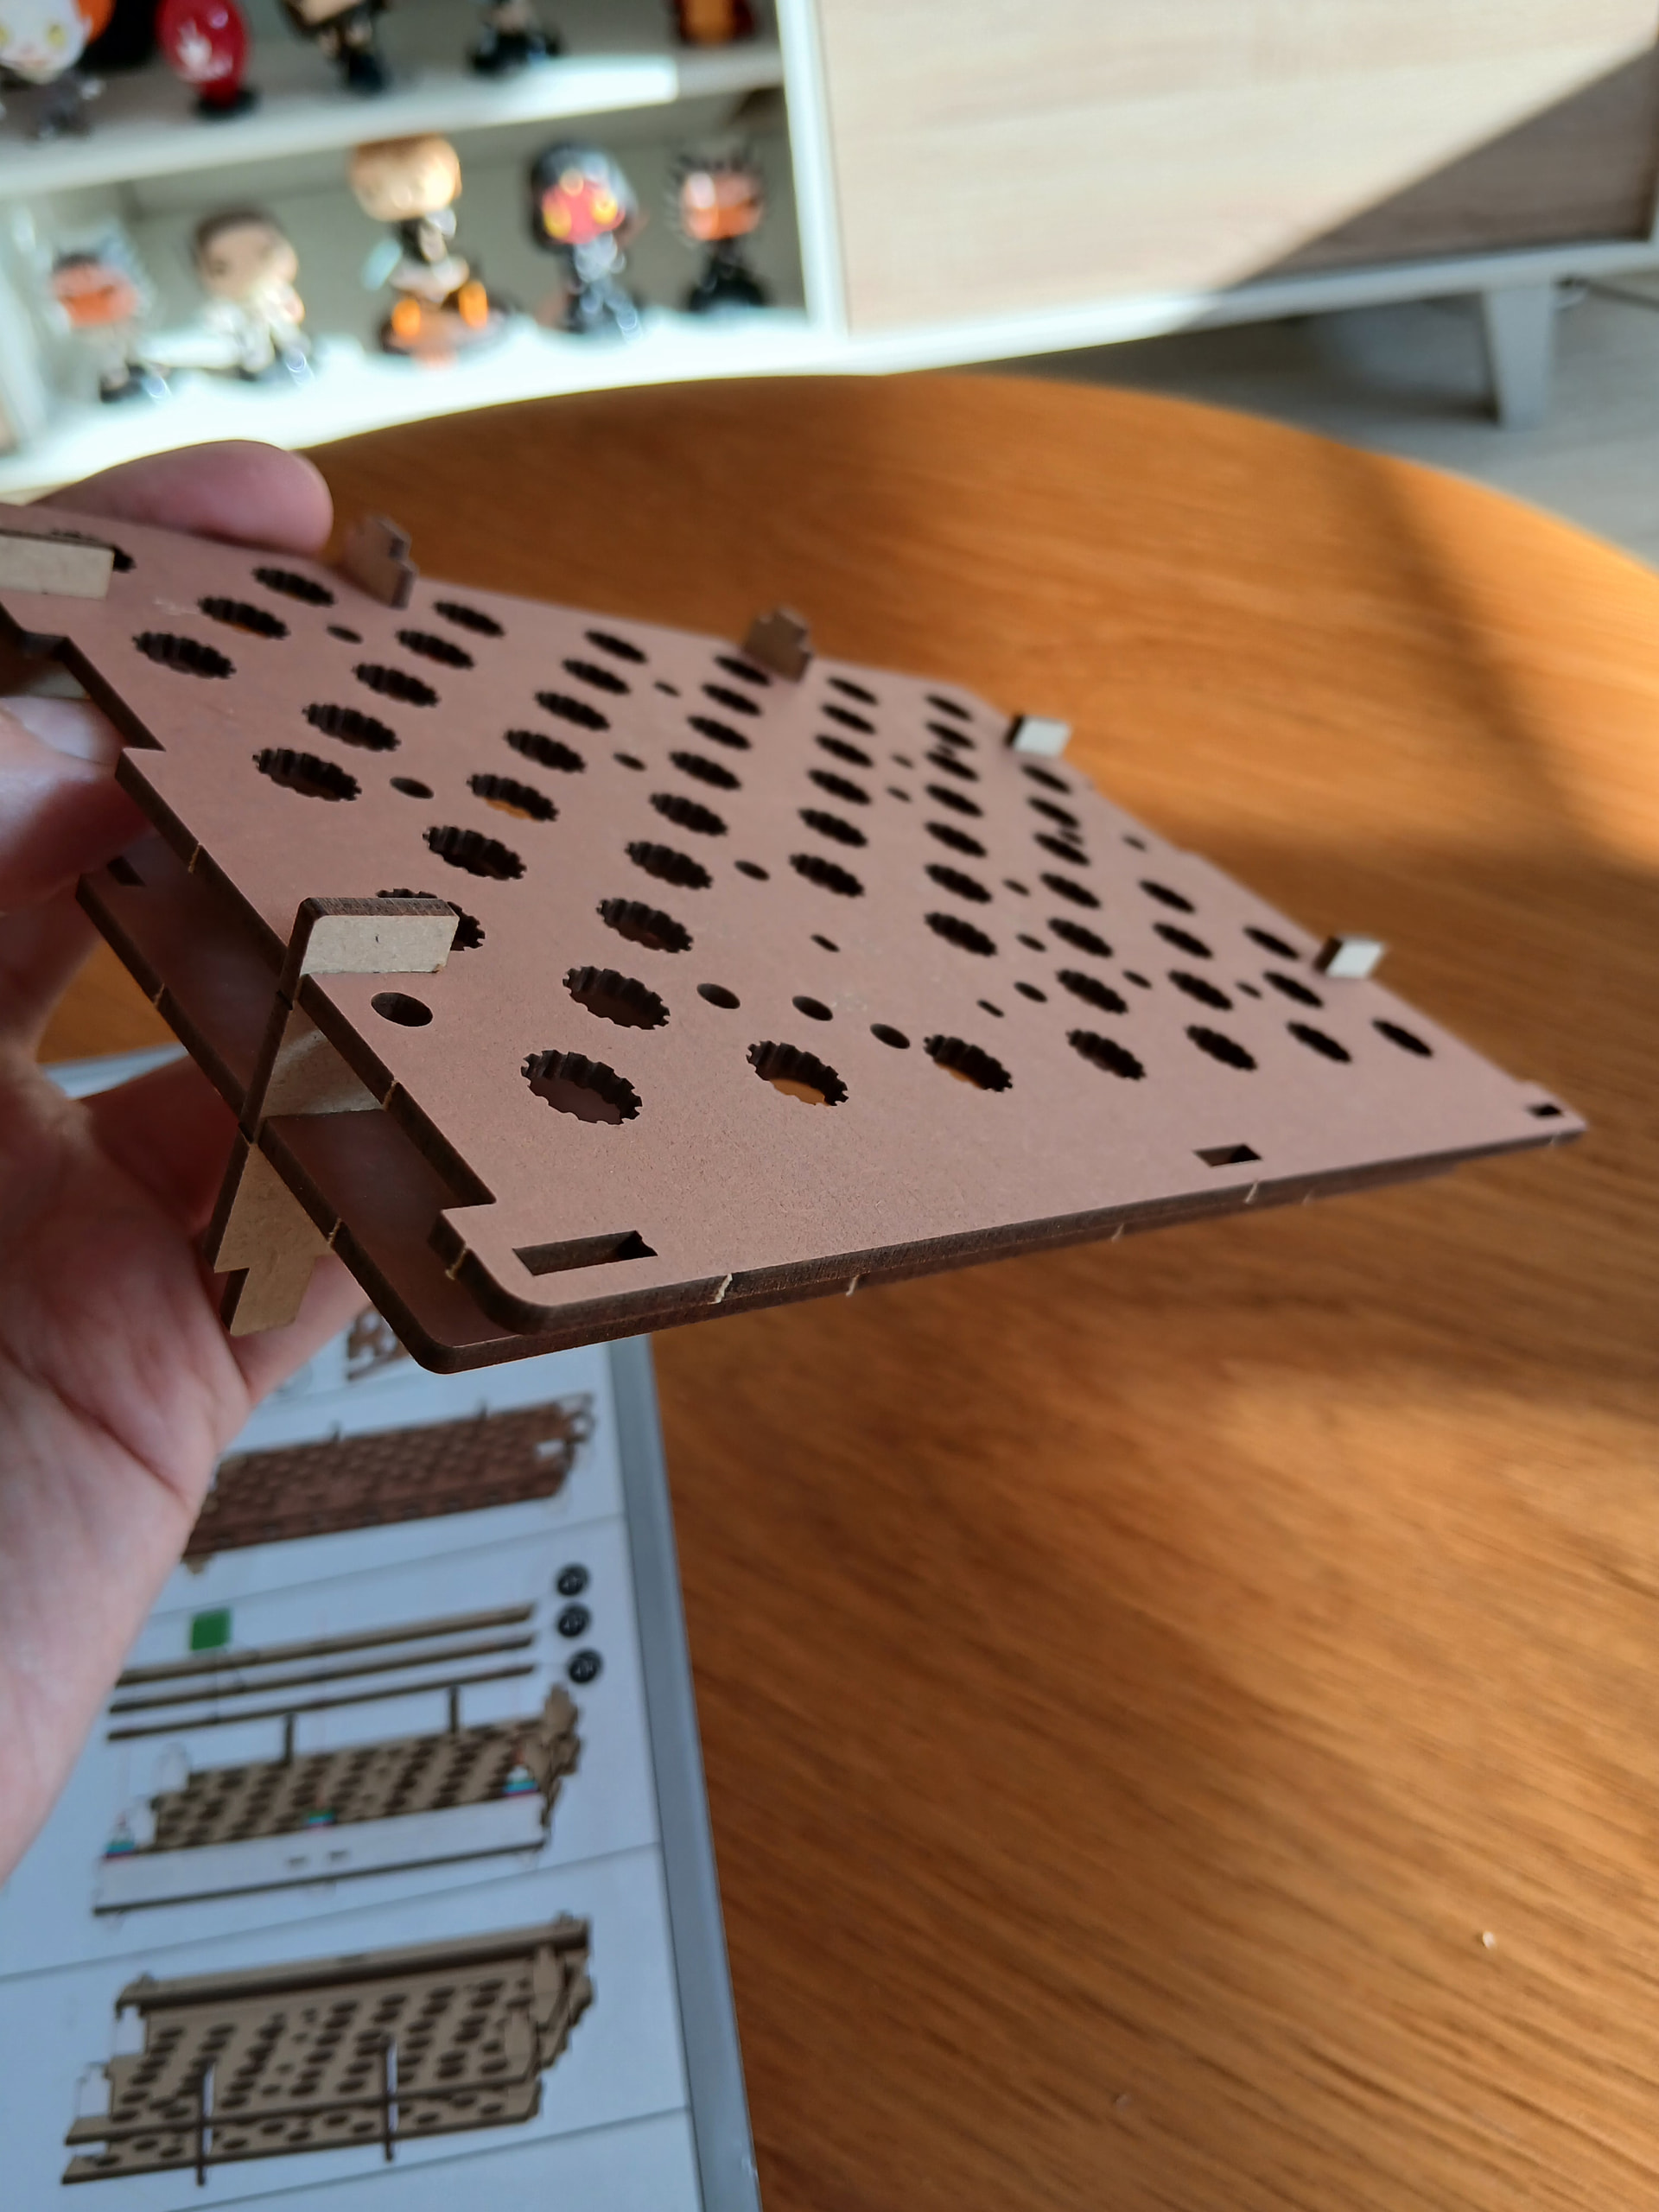
Am I supposed to fill all of those with flowers and stuff? OMG.

But first the book needs to be built, obviously. So let’s keep putting parts together, shall we? So it’ll start looking more like a… Well, like a book. Duh.

Not bad, huh? It feels pretty solid and stable already!

Not that kind of stable. Lol. I should stop this.
Also, at this point I’ve realized you can try to guess how long this is taking me by looking at how the sunlight has been moving through the pictures. Lol. I need more friends.

Anyway! For the other part of the book I had to fold and fit some paper-made pages with wooden parts.

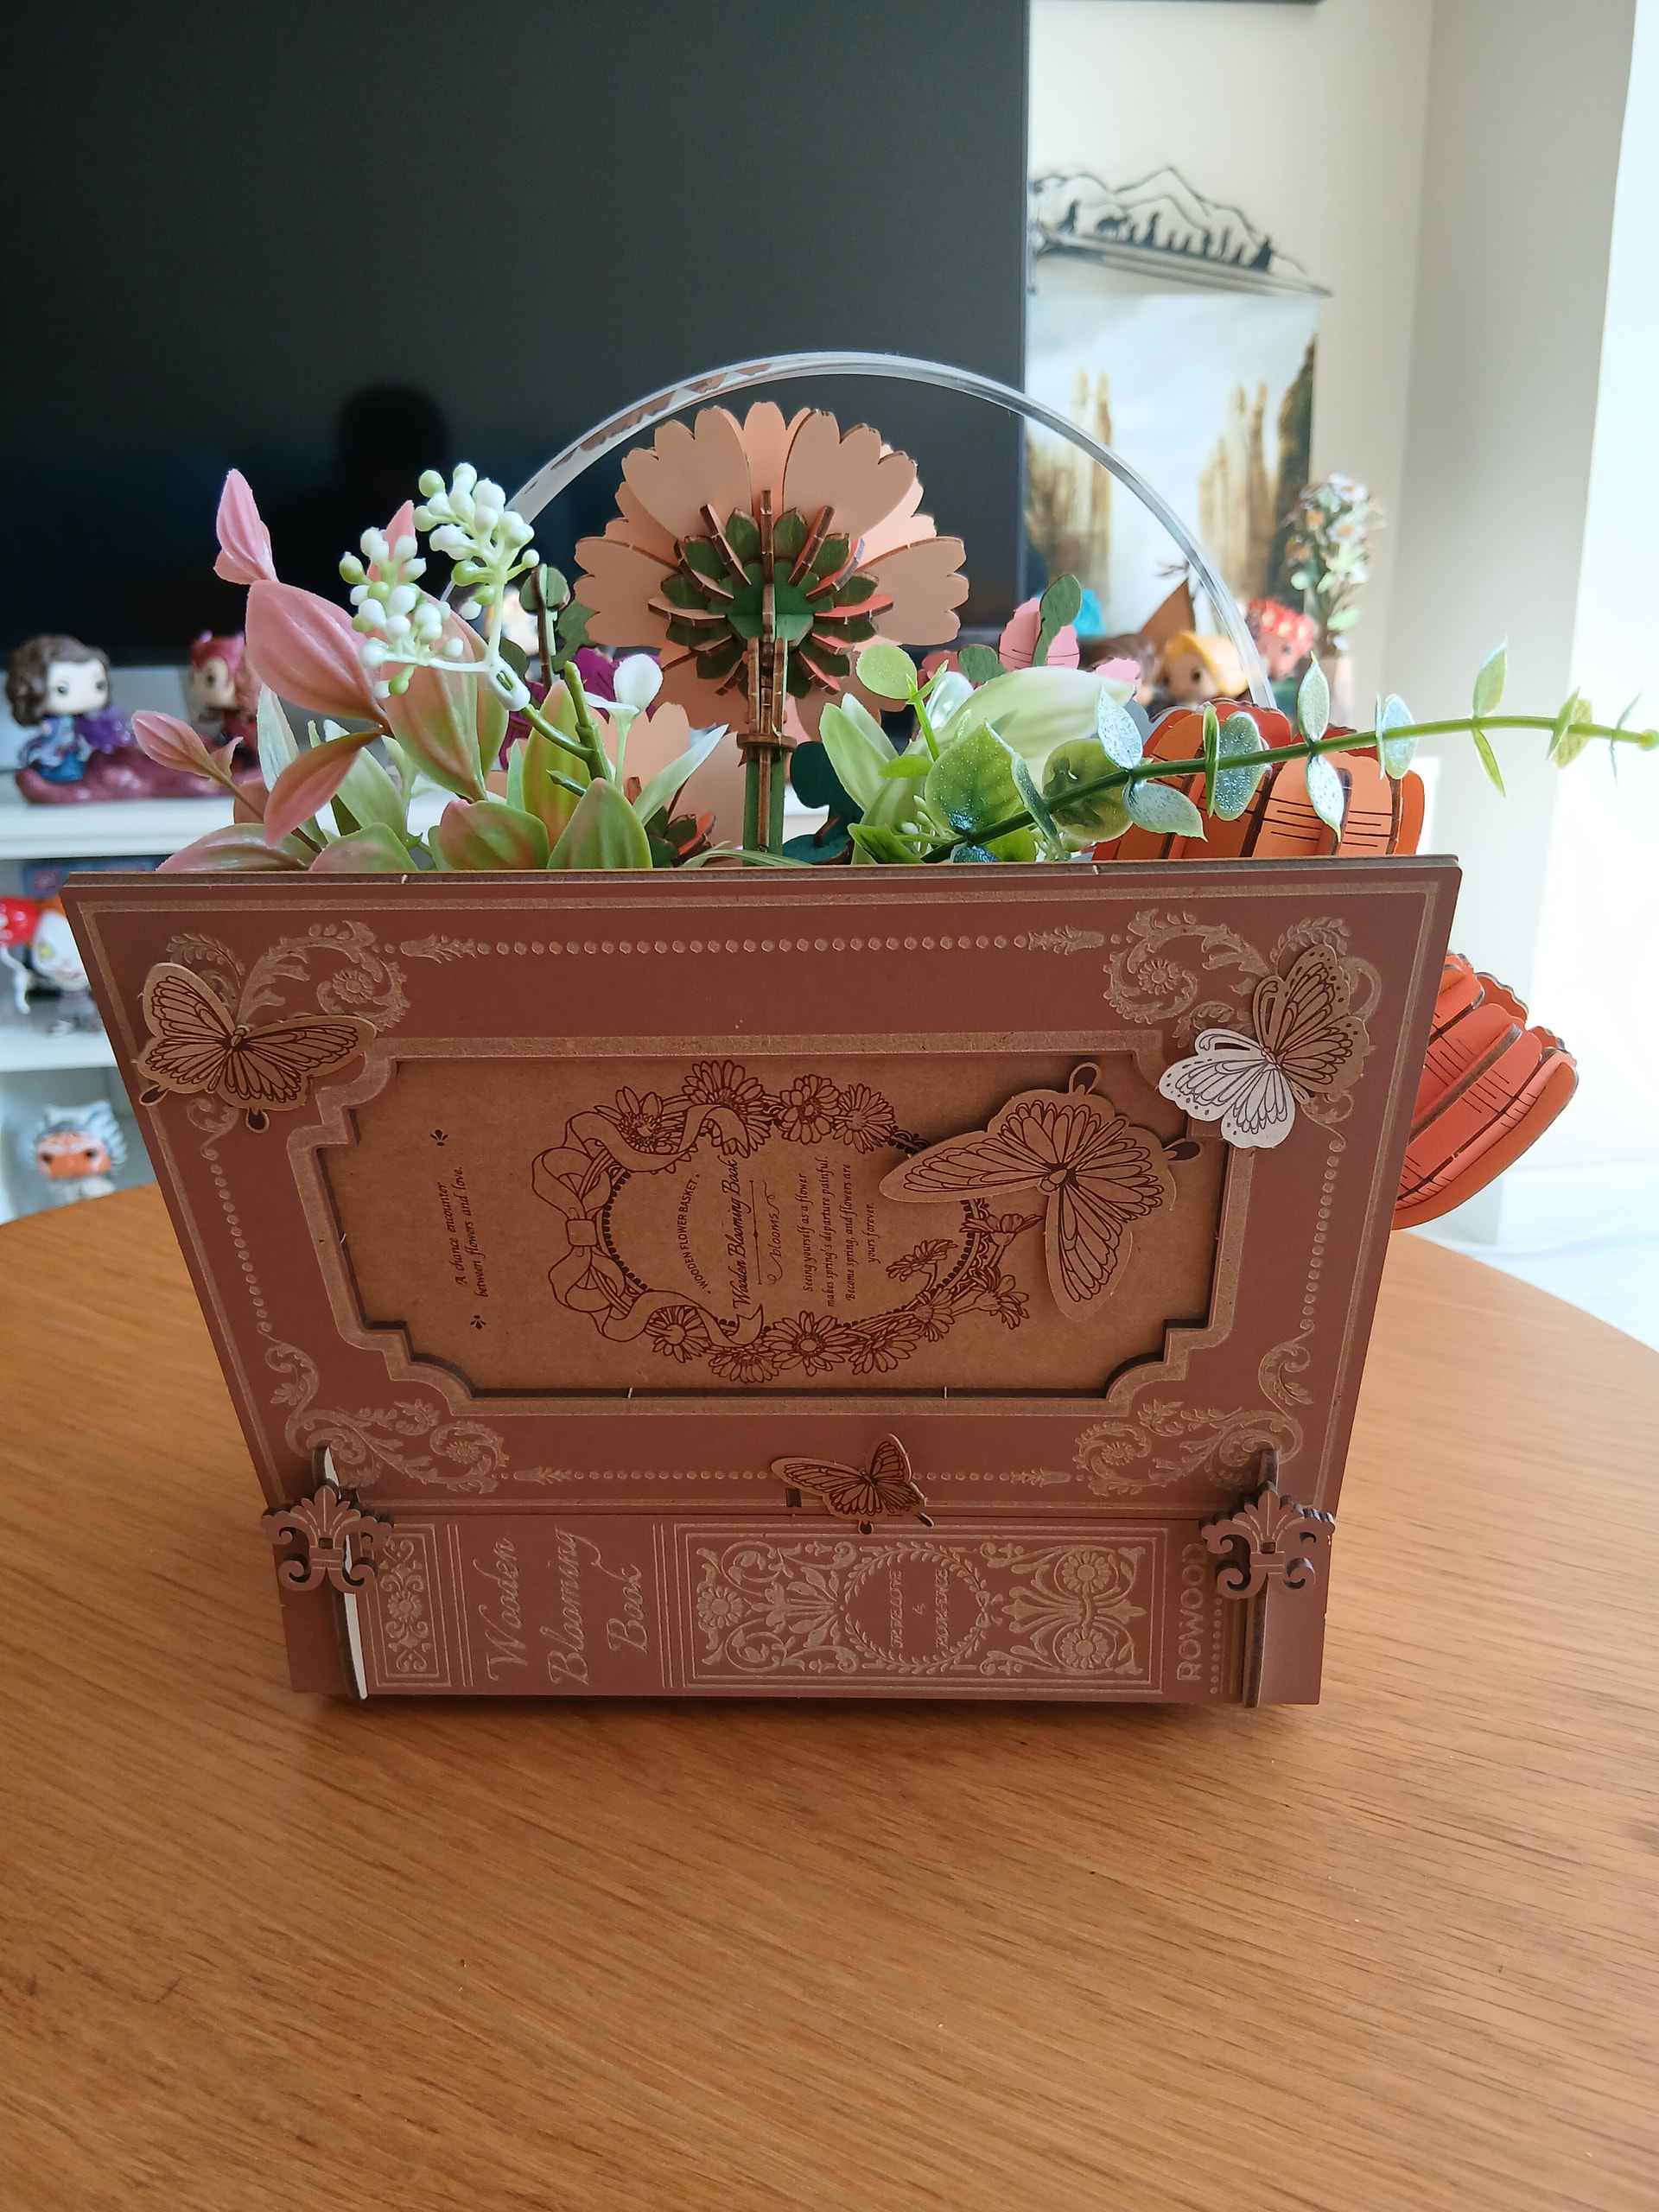
And this, by joining more wooden parts, would build the back cover! But… Eloy… Oh, dear, poor Eloy. What the heck did you do?
Yeah, you’re absolutely wright. I rushed it, didn’t properly look at the instructions (or at the whole logic of where the back cover is supposed to be, LOL) and I added the back cover to the book THE OPPOSITE WAY. Jesus Christ.

It took some time and effort and extra pressure (I was afraid I was gonna break something) to remove it an add it the RIGHT way. Damn. I was sweating a bit ![]() this kind of thing always happens to me when I’m closer to the end of a build, lol. I need to slow down, take a drink and think about my choices in life.
this kind of thing always happens to me when I’m closer to the end of a build, lol. I need to slow down, take a drink and think about my choices in life.

Well, maybe I’m being too drastic ![]() the important thing to know here is that I was able to properly fix it without breaking a thing!
the important thing to know here is that I was able to properly fix it without breaking a thing!
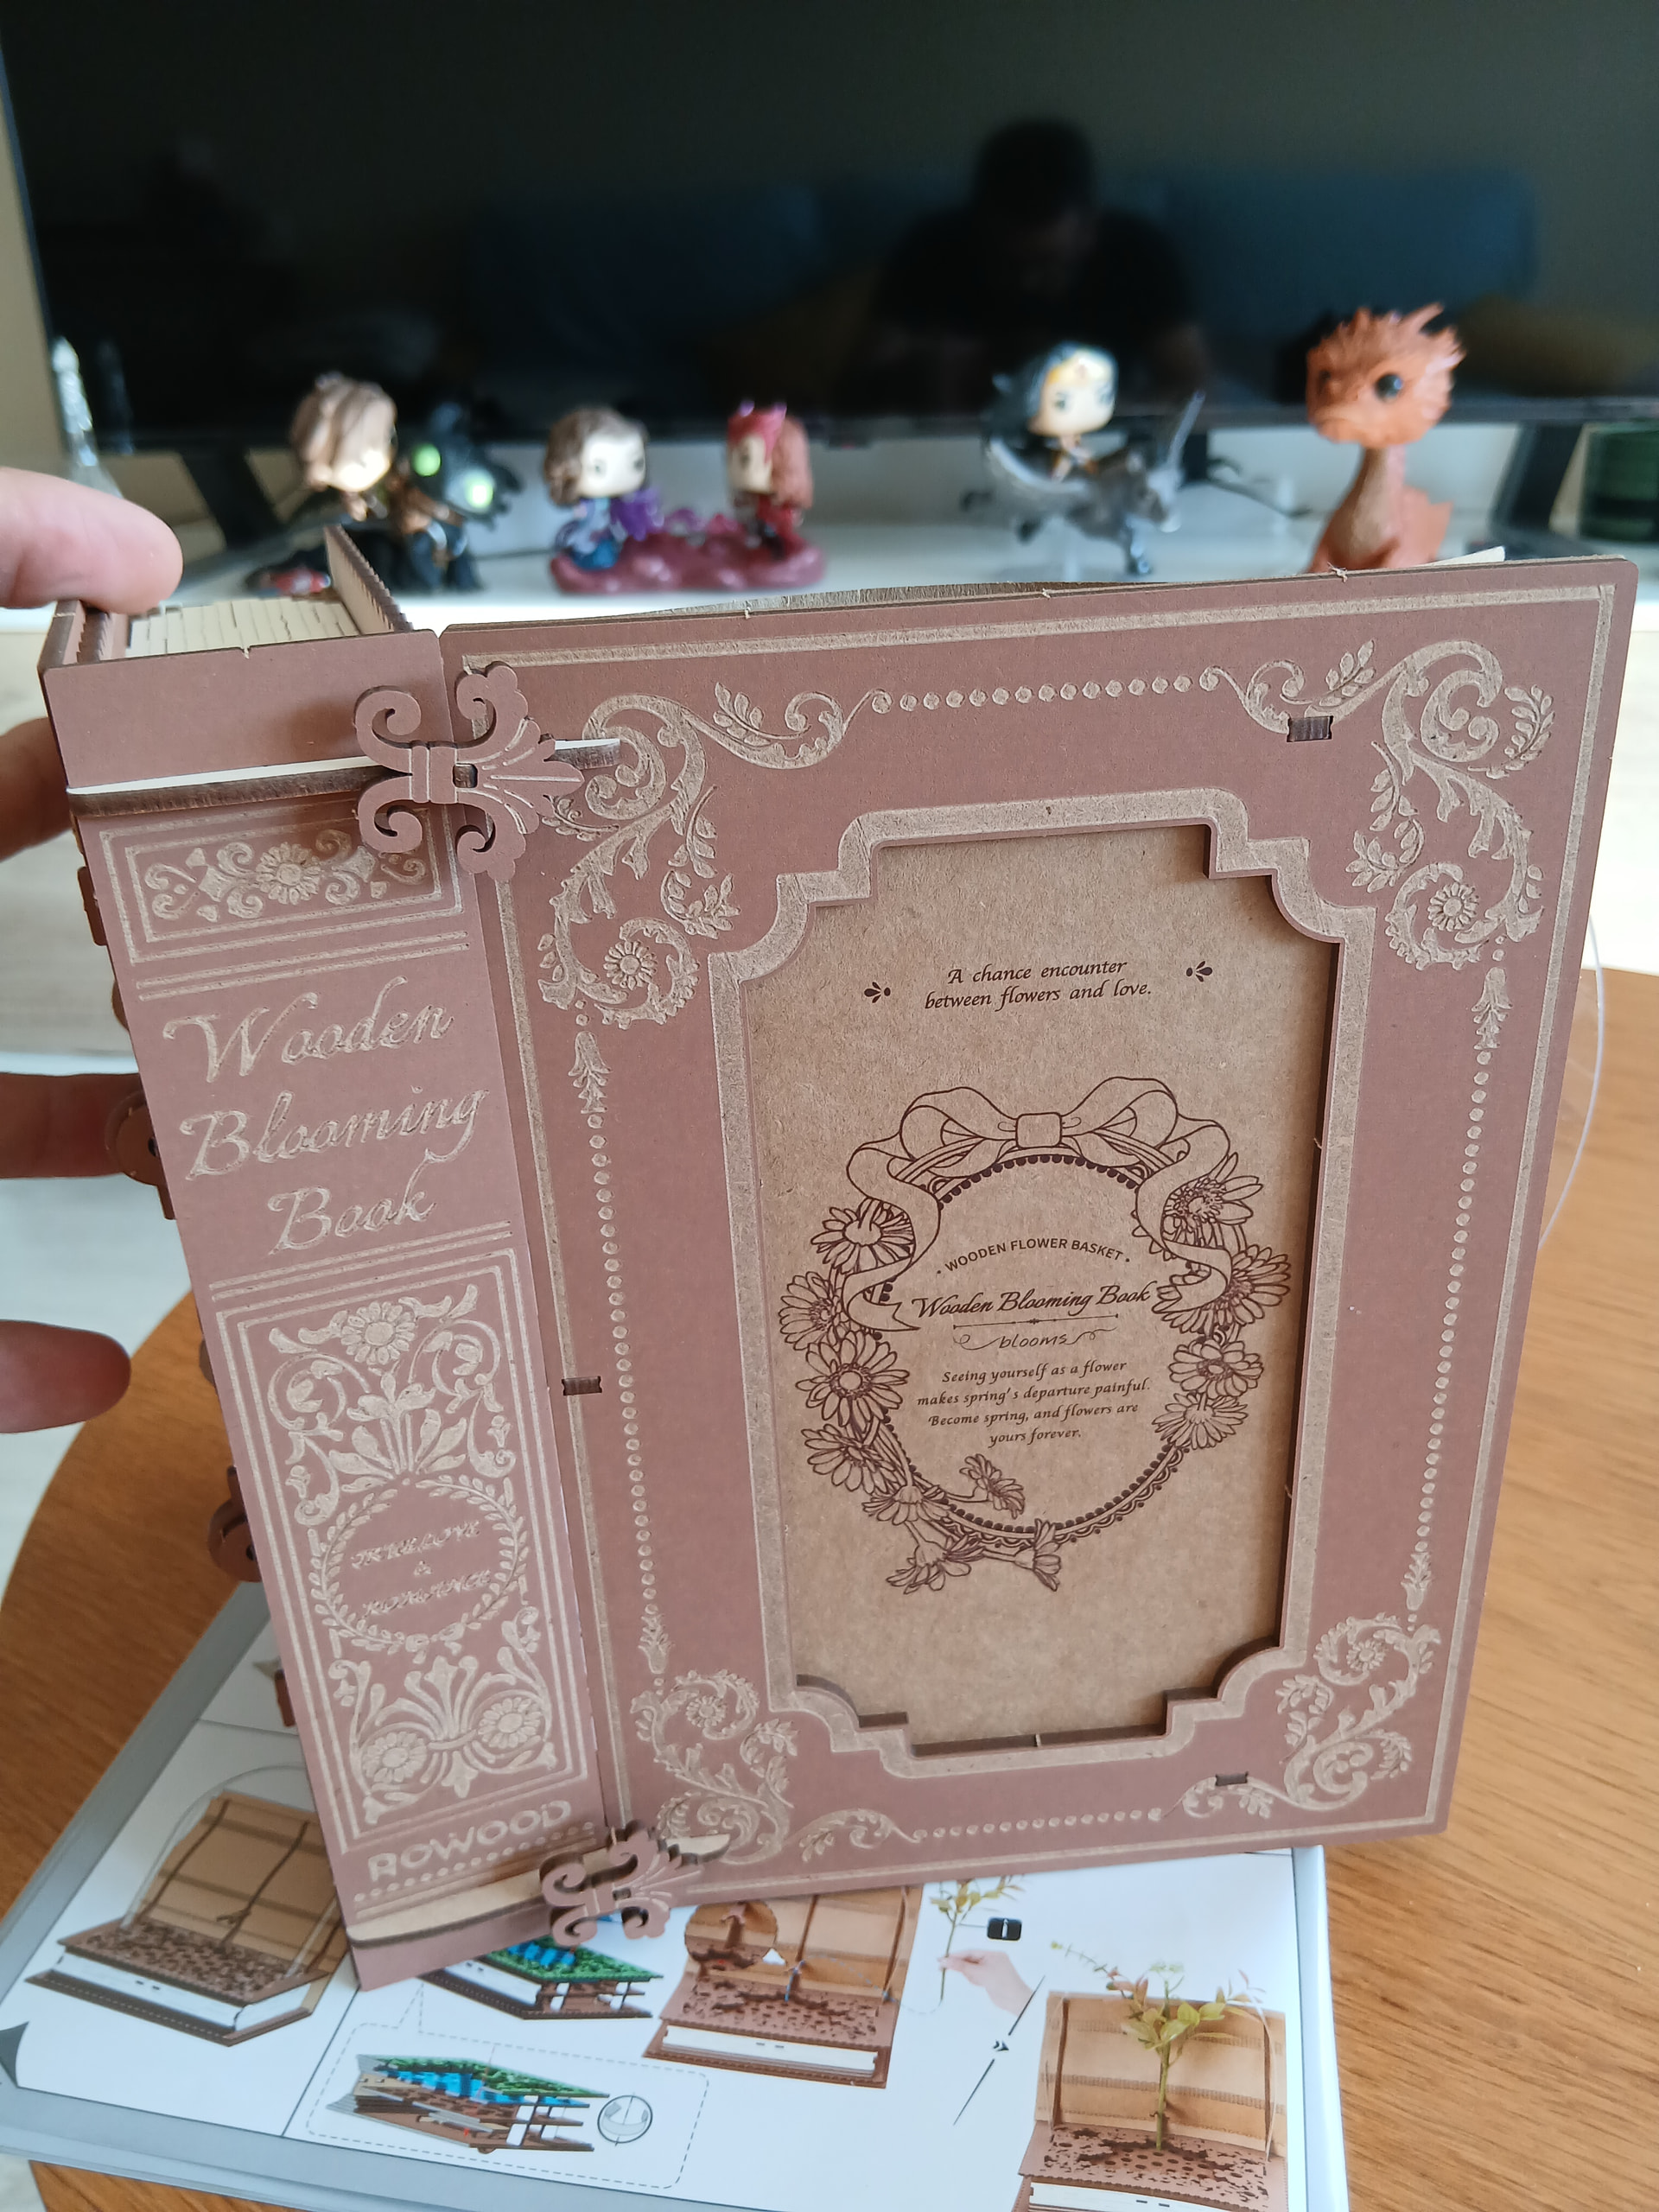
Oh and if you’re curious this is what the back cover reads. It’s a cute and beautiful quote!
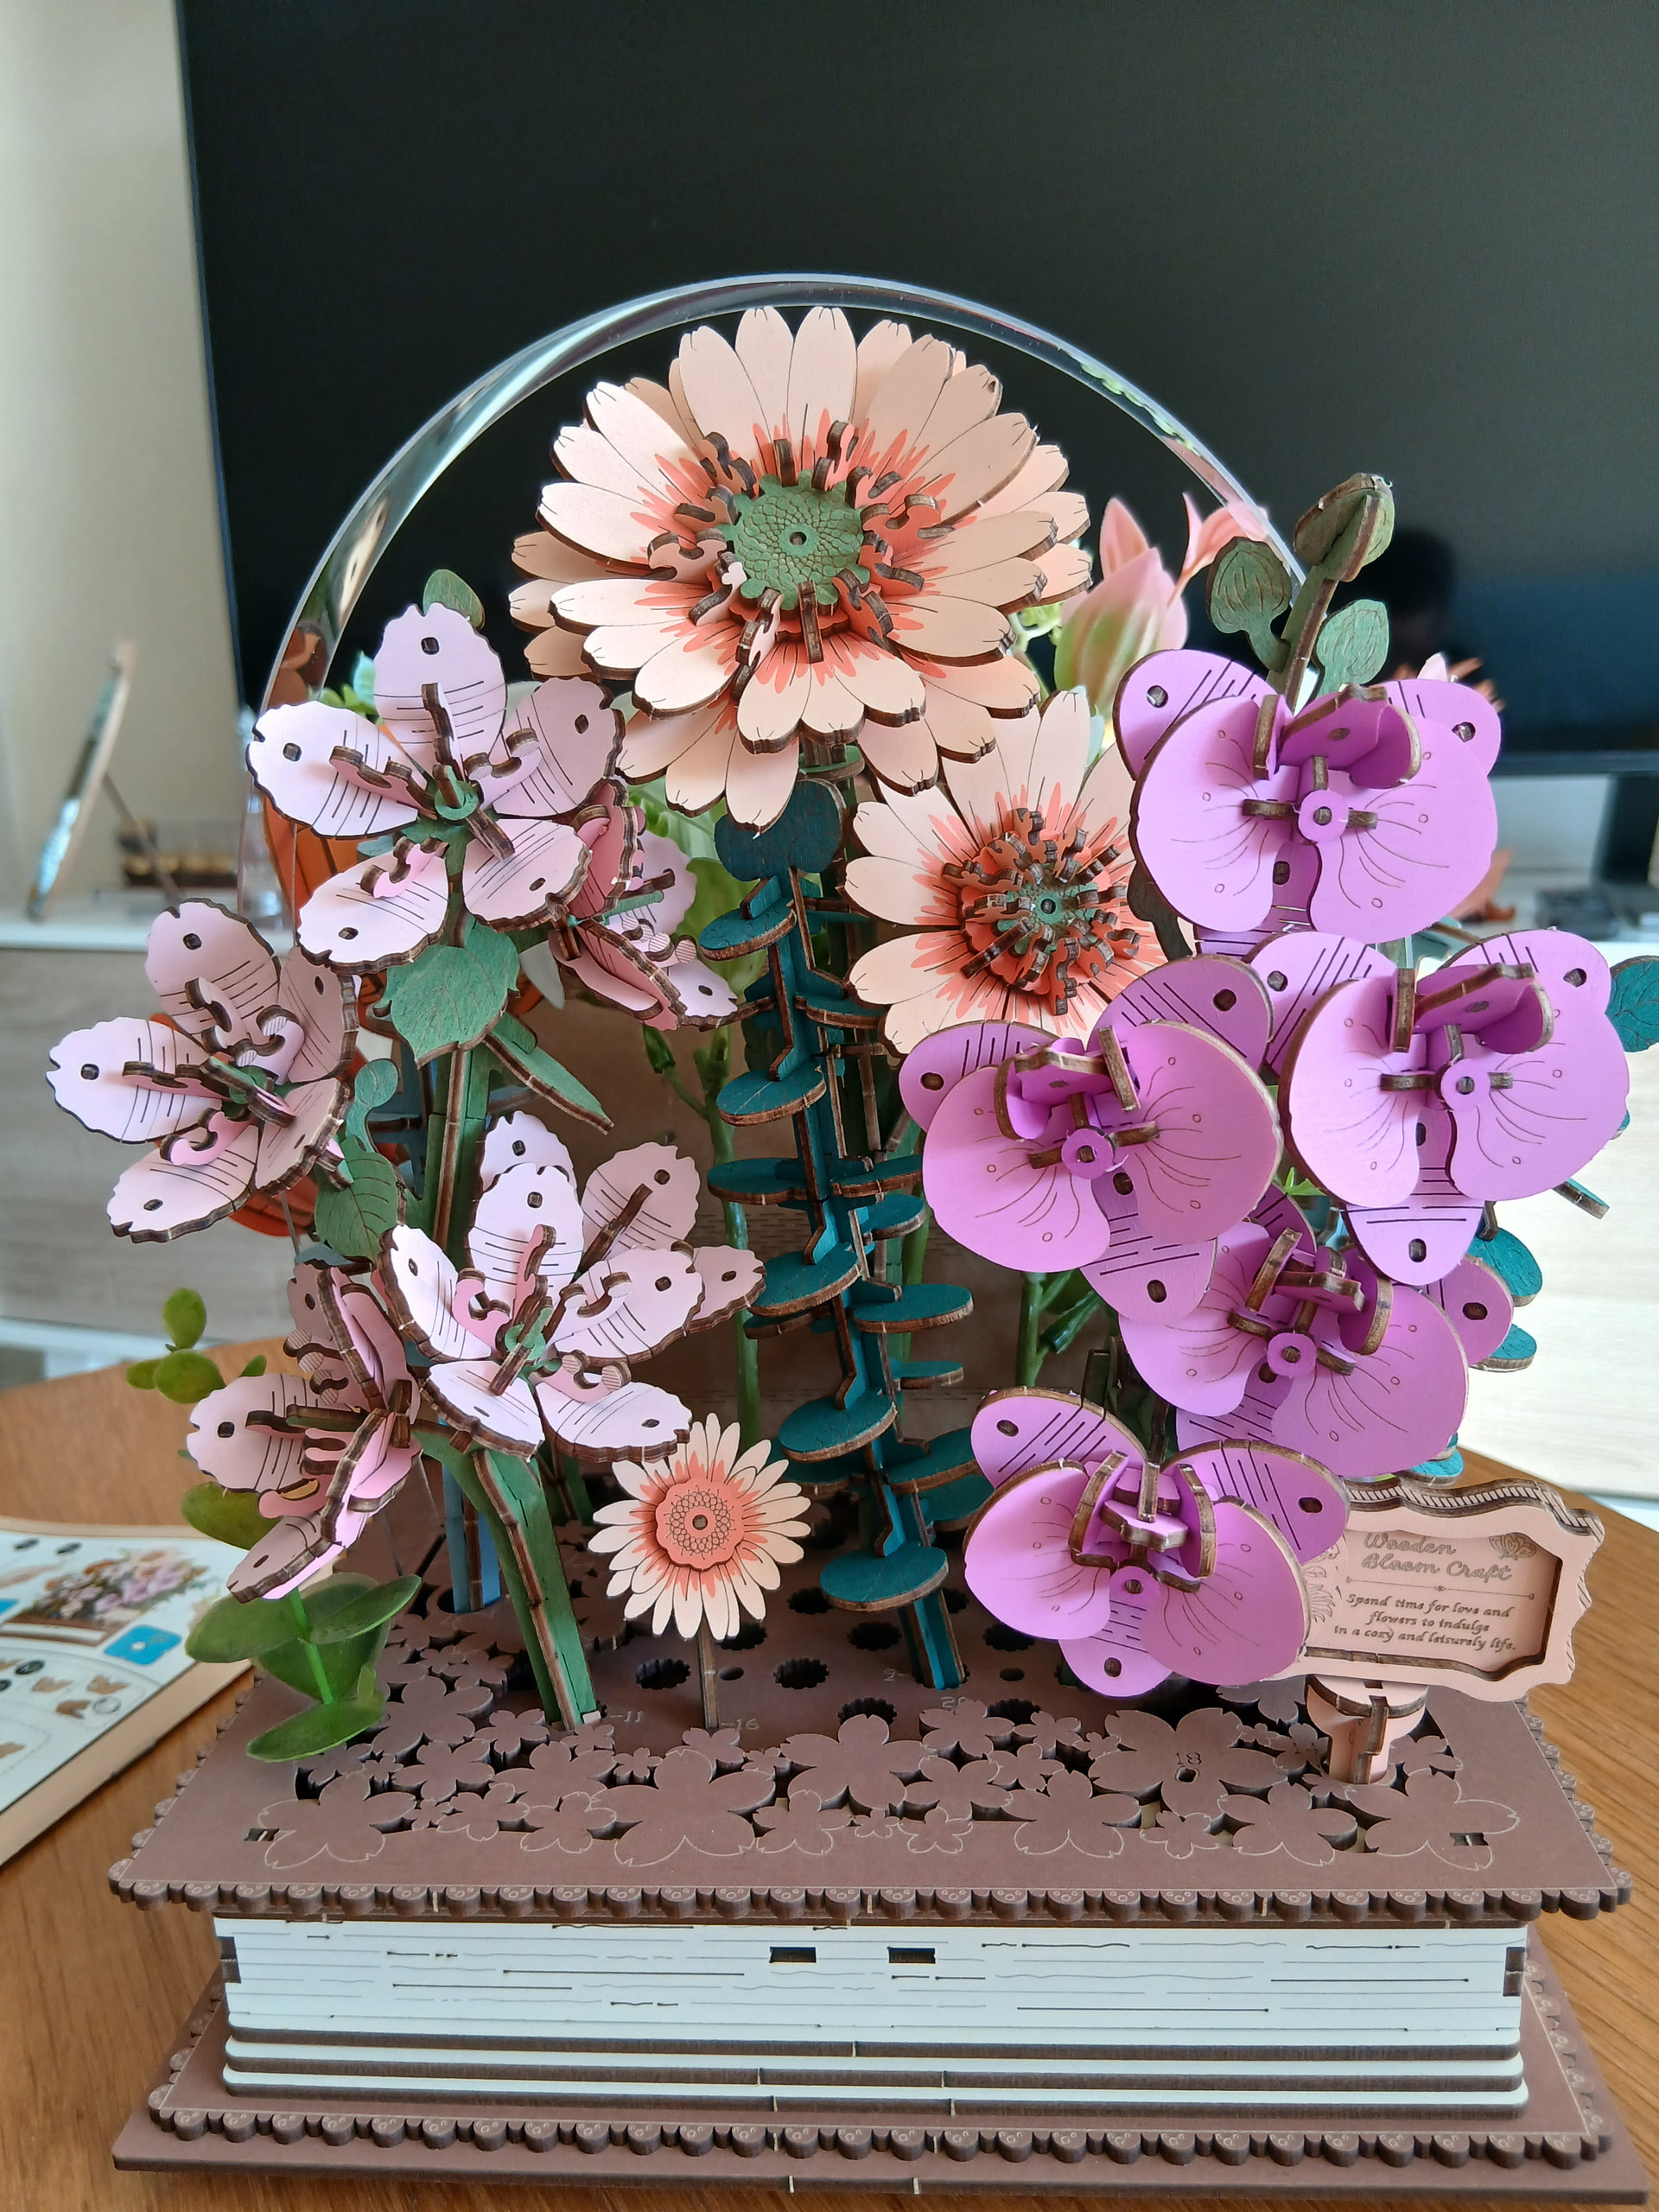
And now, ladies and gentlemen… Now the book is ready for the party! Which means we can start adding our flowers and plants. YAY!

I was a bit… Overwhelmed, by the amount of holes in this? I mean, I haven’t even built those many flowers! But no, folks. You’re not supposed to fill all of them, just the numbered ones. Phew!

Let’s go then! The manual is pretty clear on the process, it just gives you which plant or flower to add, the number of the hole, and the position of the other hole under the first one so you can properly align the flower/plant/whatever with it and make it through. Looks like playing with this as a kid was worth it for something after all!
Jokes aside, it was starting to take shape! This is how it’s looking like after the “first line of holes” is completed:

After a few more holes taken care of (that’s what she said? Oops), we’re finally going somewhere and the final picture is getting closer than ever!
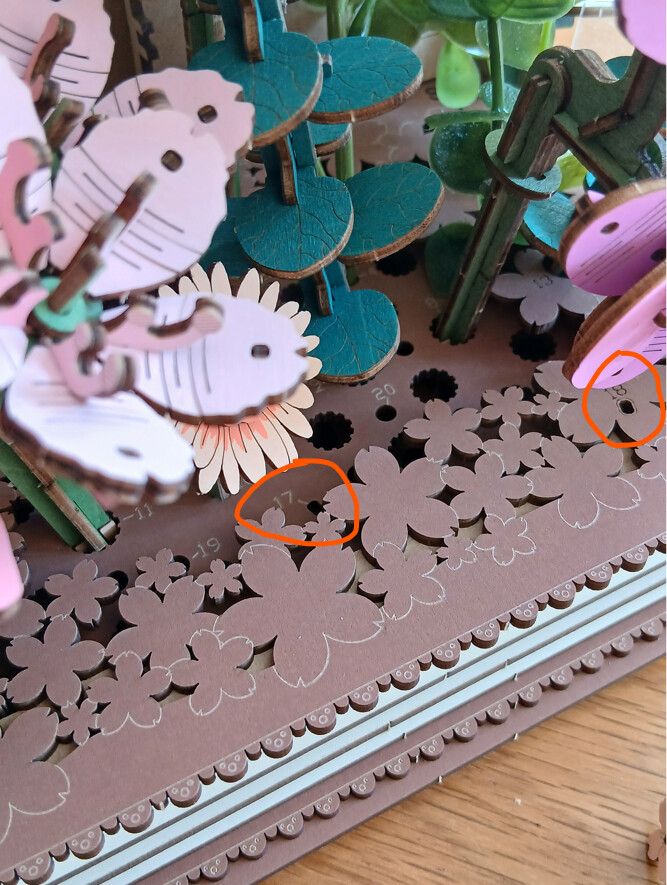
If I have to complain about something here, I’d change the order of the holes you’re filling with those flowers and plants. I mean… The numbers are not exactly going from back to front, so there are a few times you need to make your way through or between other flowers and plants you’ve already added in order to fit the next one. It’s a bit tricky! Nothing too complicated though, specially if you’ve played this one.

Yeah, I don’t know either what’s about me and child games today ![]() but, I mean… See what I mean. Those holes are sometimes in tricky places. And after all the main flowers and plants, those holes numbered 17 and 18 are asking for small flowers to be fit in. My fingers are already having issues getting there
but, I mean… See what I mean. Those holes are sometimes in tricky places. And after all the main flowers and plants, those holes numbered 17 and 18 are asking for small flowers to be fit in. My fingers are already having issues getting there ![]() we’ll manage though, I know it!
we’ll manage though, I know it!
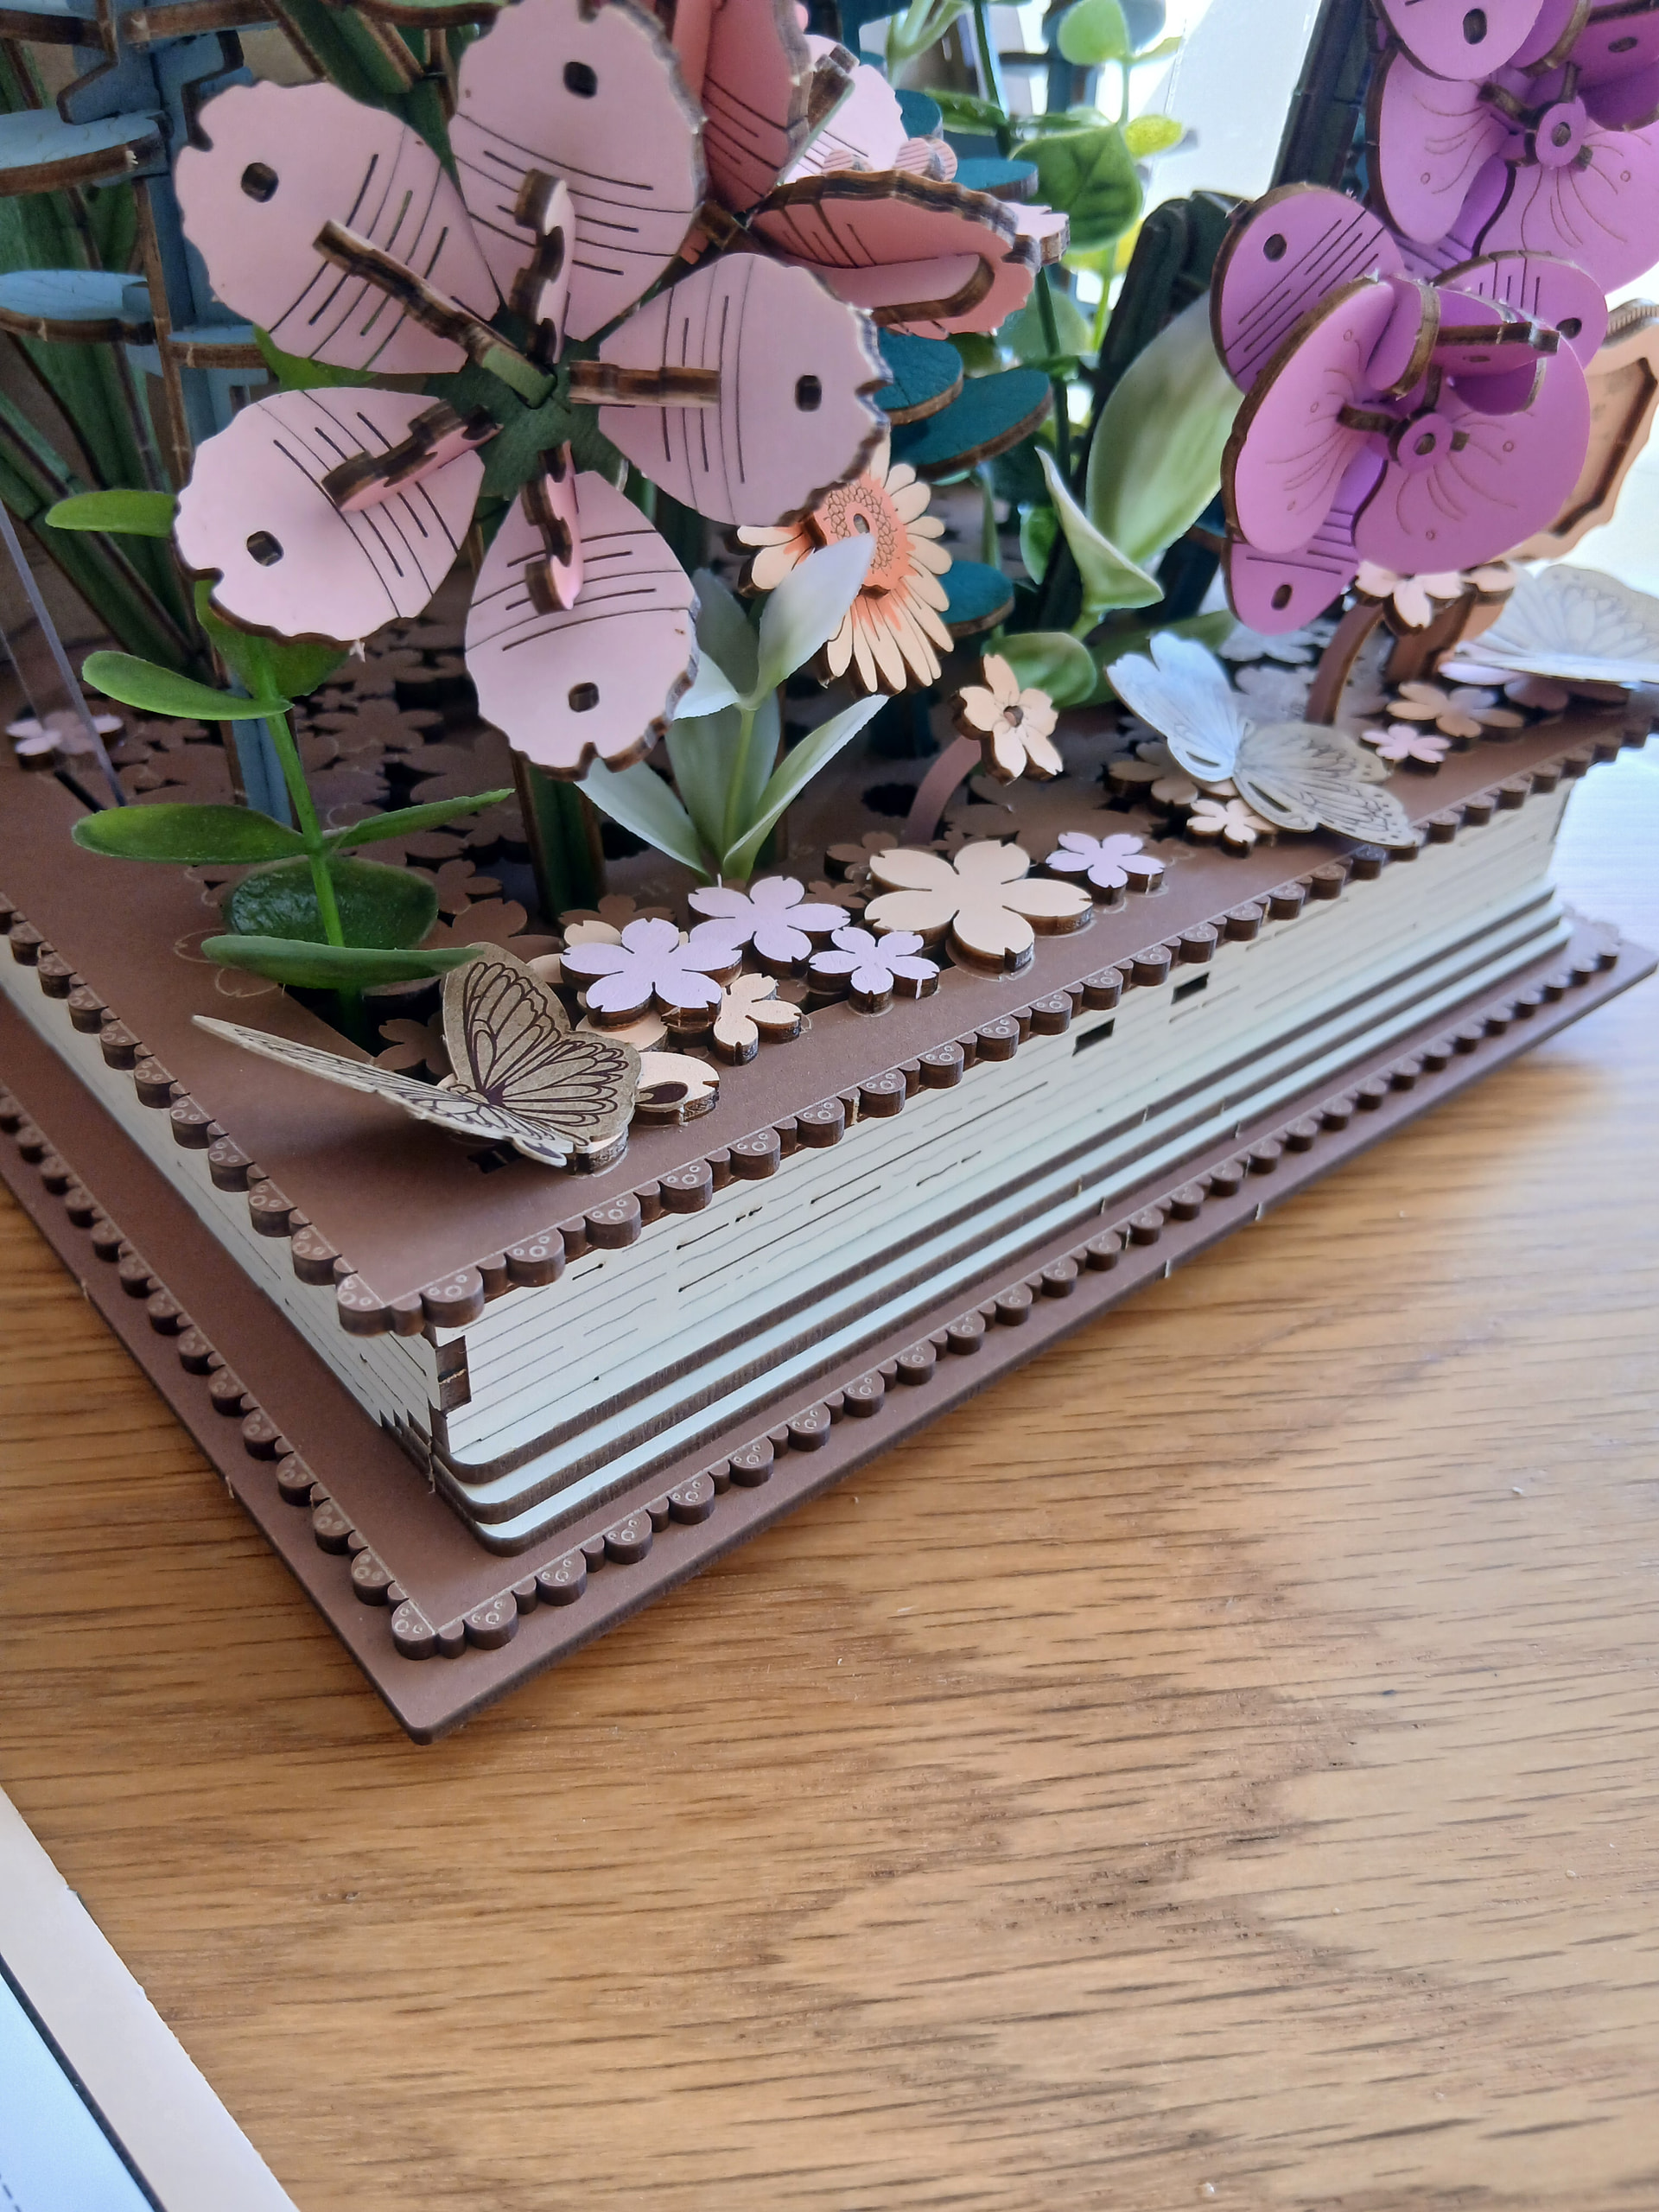
Anyway, once you’re done with the hole-filling process, it’s time to stick a few little wooden flowers and paper butterflies to the book. The manual is a bit vague about where to do so, and honestly, it feels more like a “just stick them where you feel it” moment ![]()
The manual asks you to stick both flowers and butterflies with those small double-sided tape stickers. While you can use glue for the flowers, I totally recommend you NOT to use it with the butterflies and go with the tape instead. That kind of paper doesn’t properly stick to the glue, not sure why ![]()
But yeah, this was a fun final step.
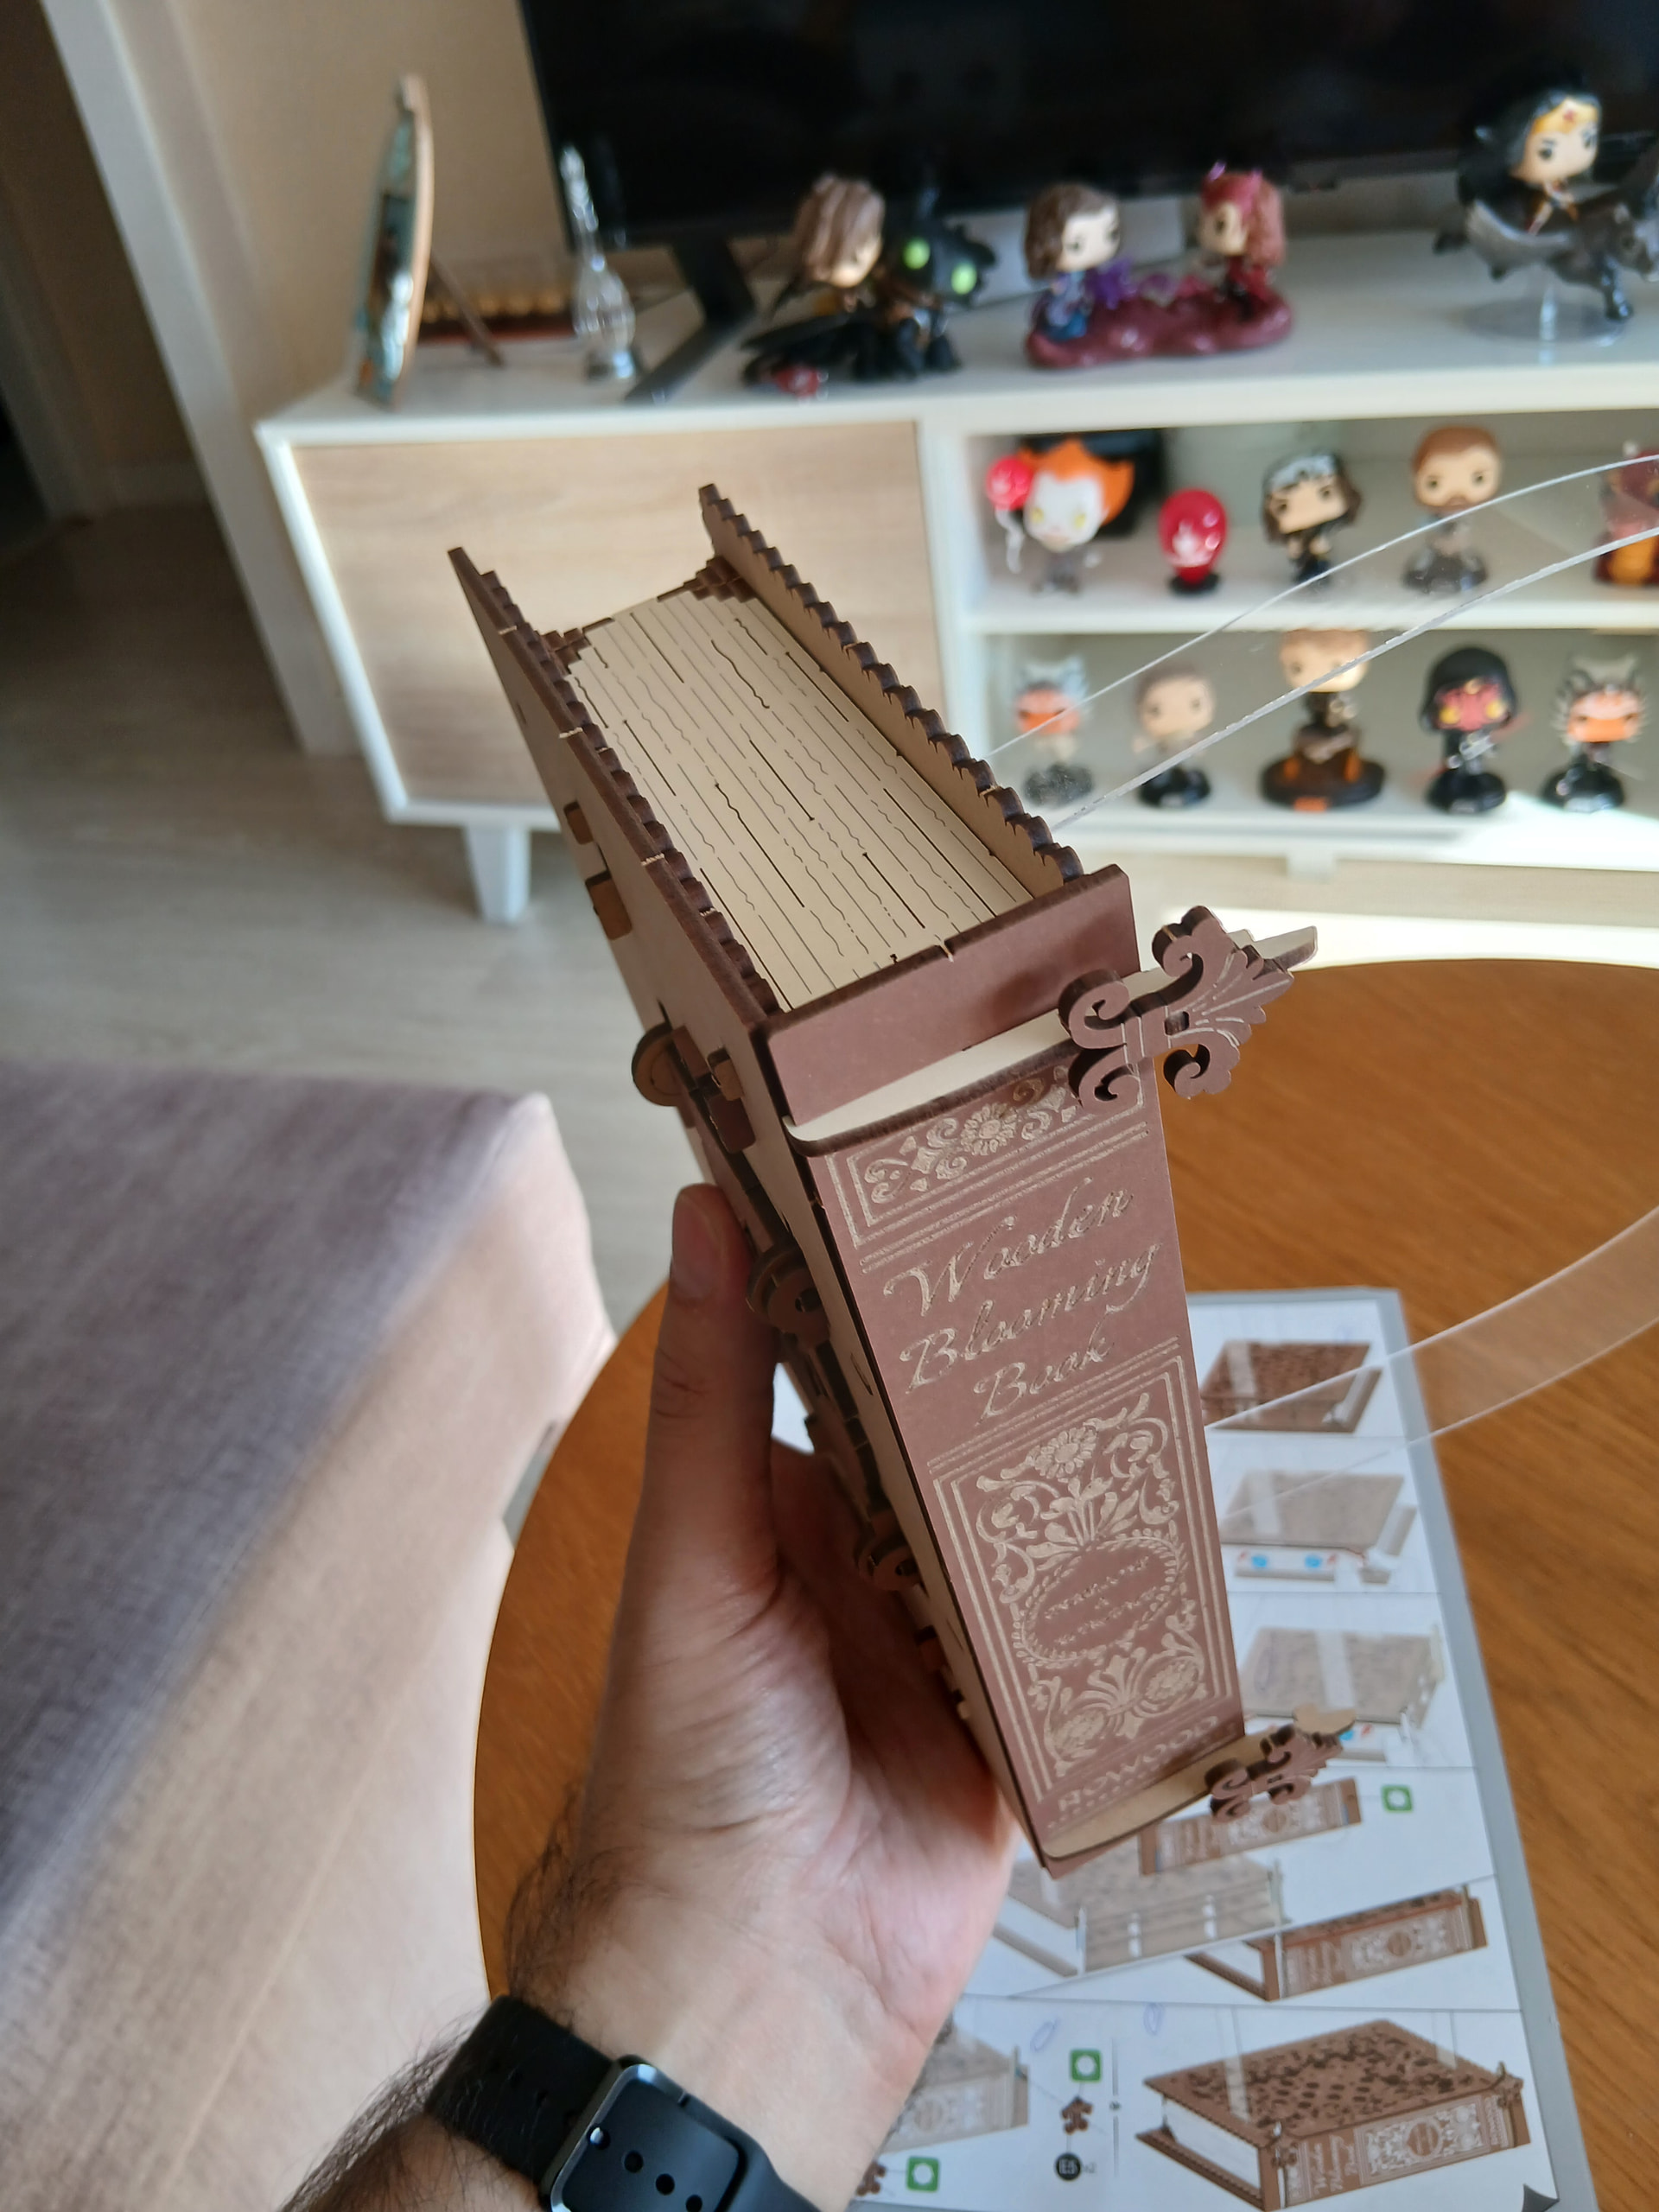
Yeah, final, because… This is it! At this point and after adding the ribbon made yesterday to those two holes at the front, and sticking some wooden tiny butterflies and bees to the main flowers (or the Fantastic Four, if you will), my Wooden Blooming Glooming Book is finally finished!

So this is how it looks from the back…
From the side…

And the front!
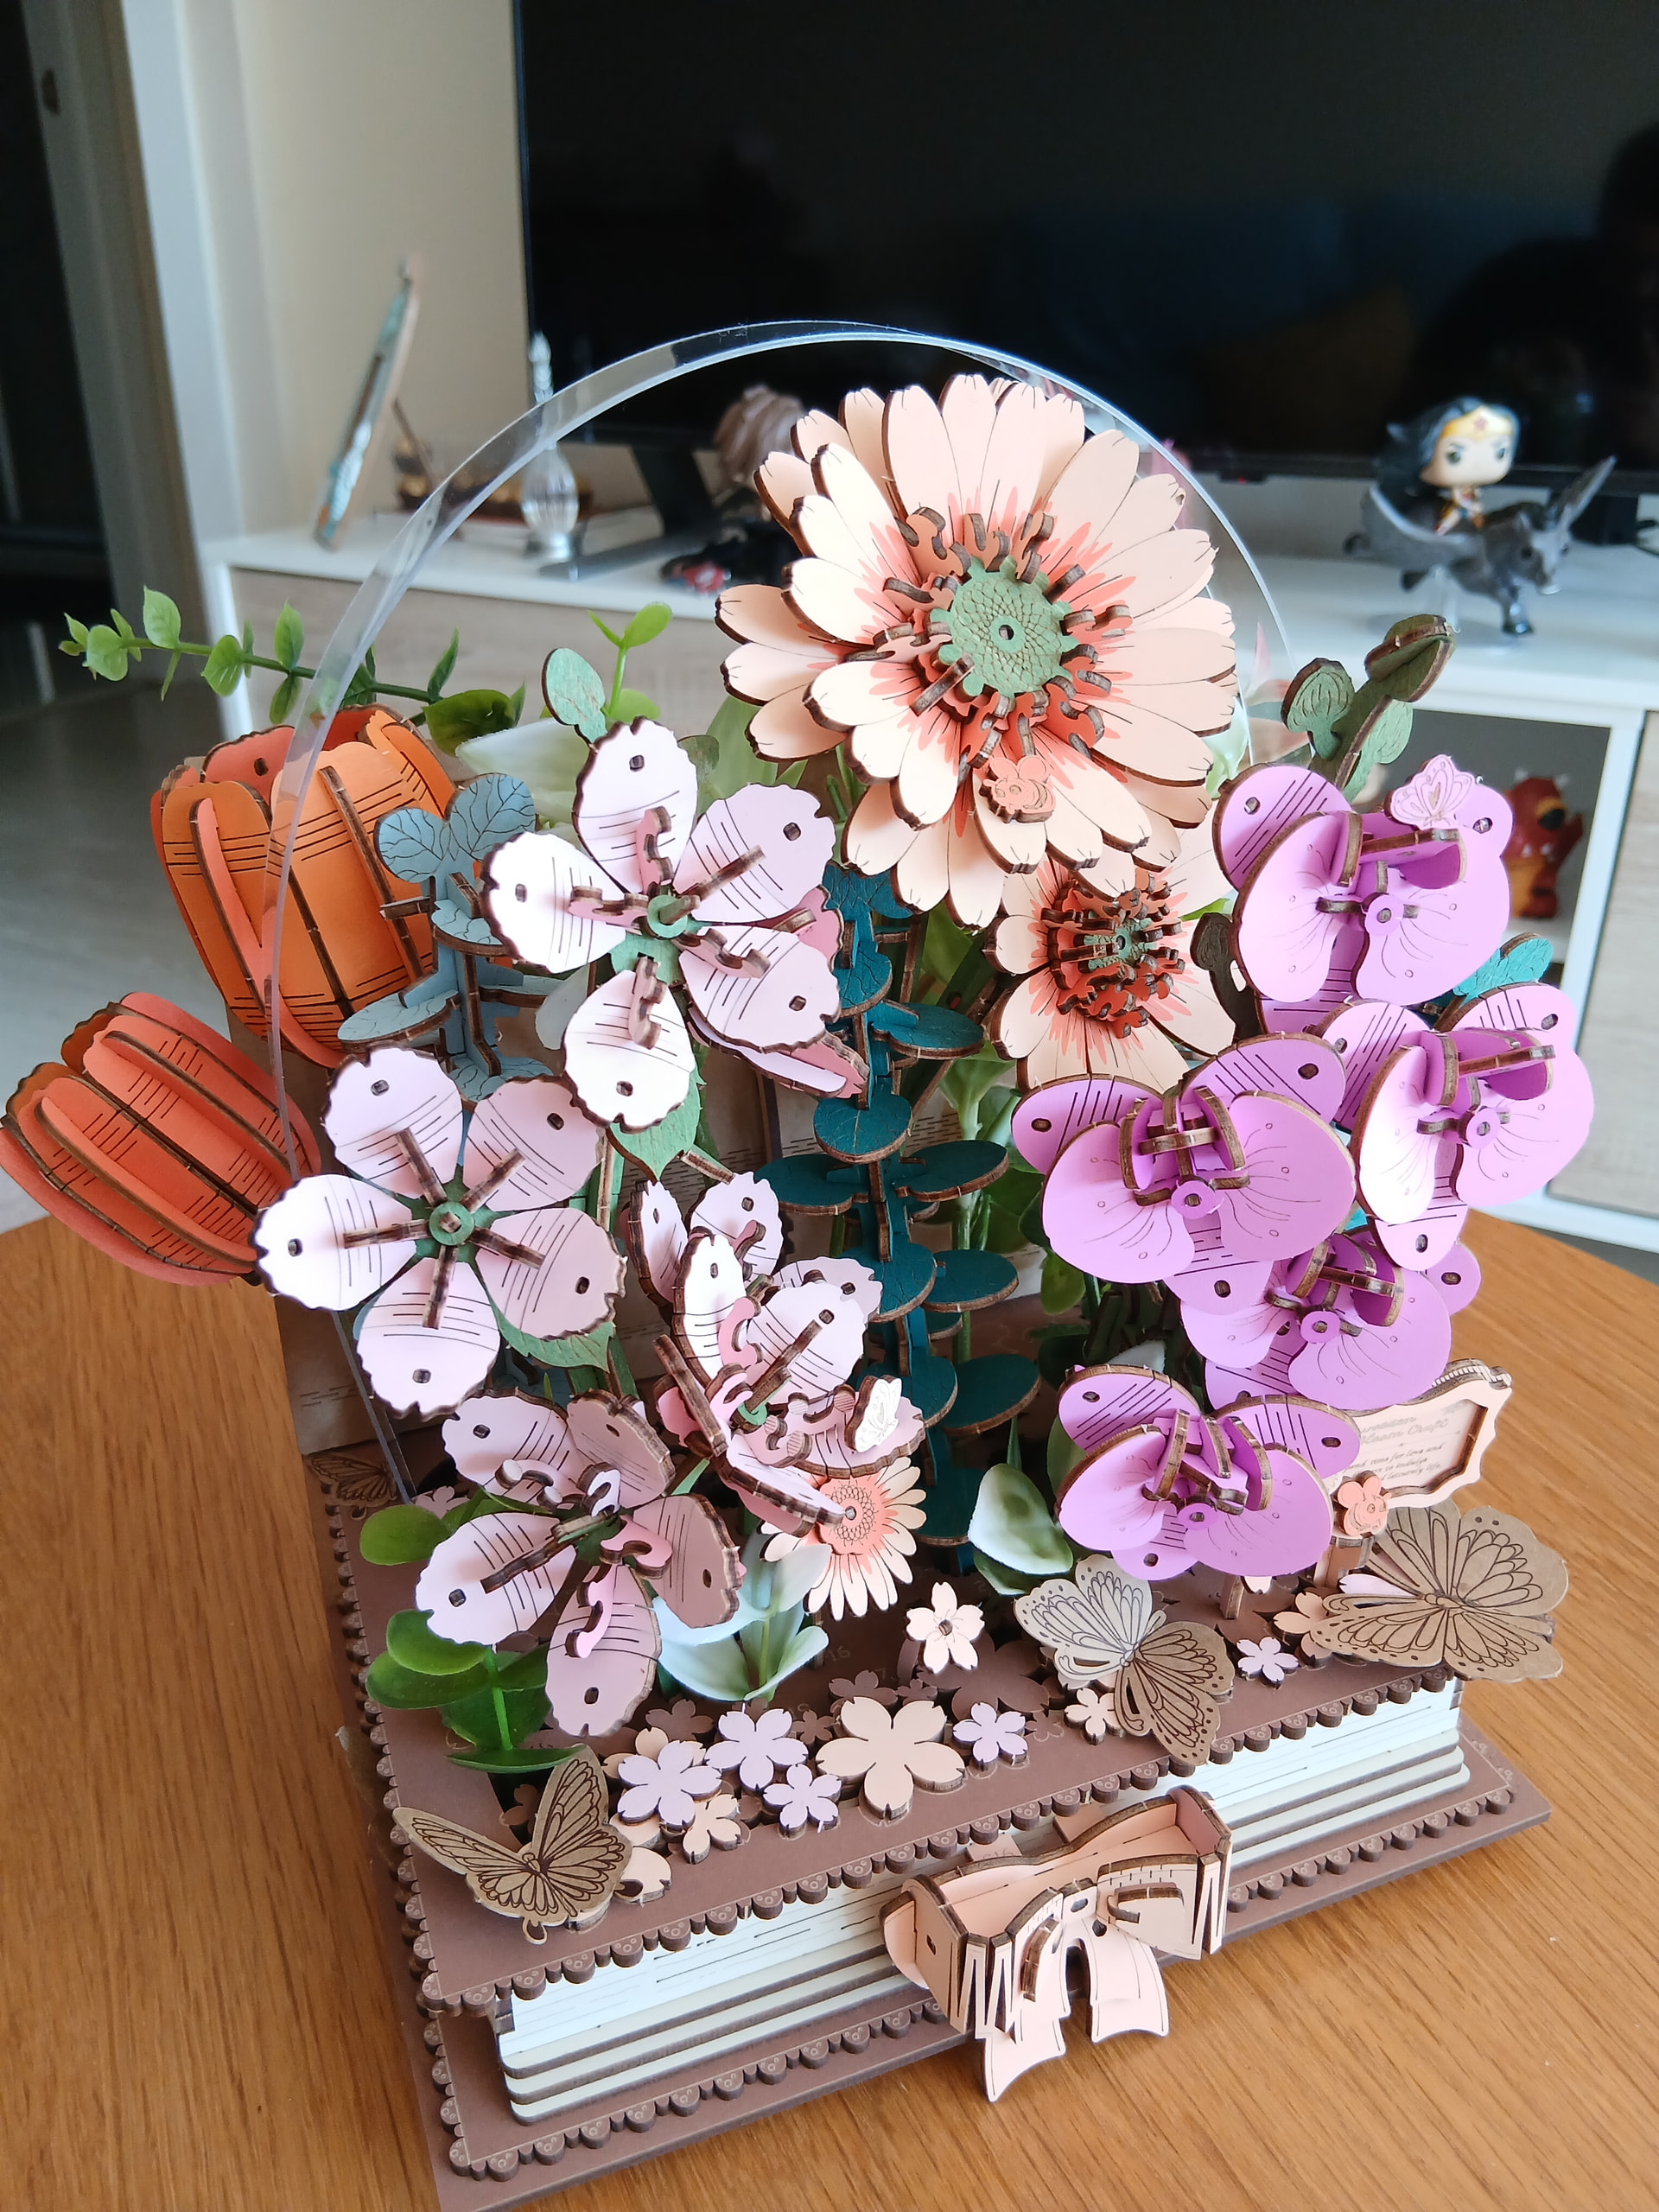
I’m pretty satisfied with this kit overall! Now I’m gonna take @Suzanne_Jones’s example and add a little pros and cons section to my final update.
Pros:
- It’s not too complicated
- The instructions are overall pretty clear and easy to follow
- It has some hidden window for customization (you can decide to change through which hole to fit each flower or plant, where to stick those little flowers and butterflies, etc)
- It’s one of the most beautiful, complex and satisfying flower builds in the Robotime store
Cons:
- You’re asked to build some stems that you’ll remove and throw away afterwards, which has no point for this particular build
- Some sheets of parts are particularly hard to work with (it’s particularly easy to break parts while removing them)
- The numbered order to fill the holes in the book is unconvenient
- Some of the holes to fit the flowers in are a little too big for them and they’re just hanging there, the orchids for example tend to the front too much for my taste
Also… Does anyone (or @Robotime themselves lol) who’s built it know what these two are for, parts E2 and E3?
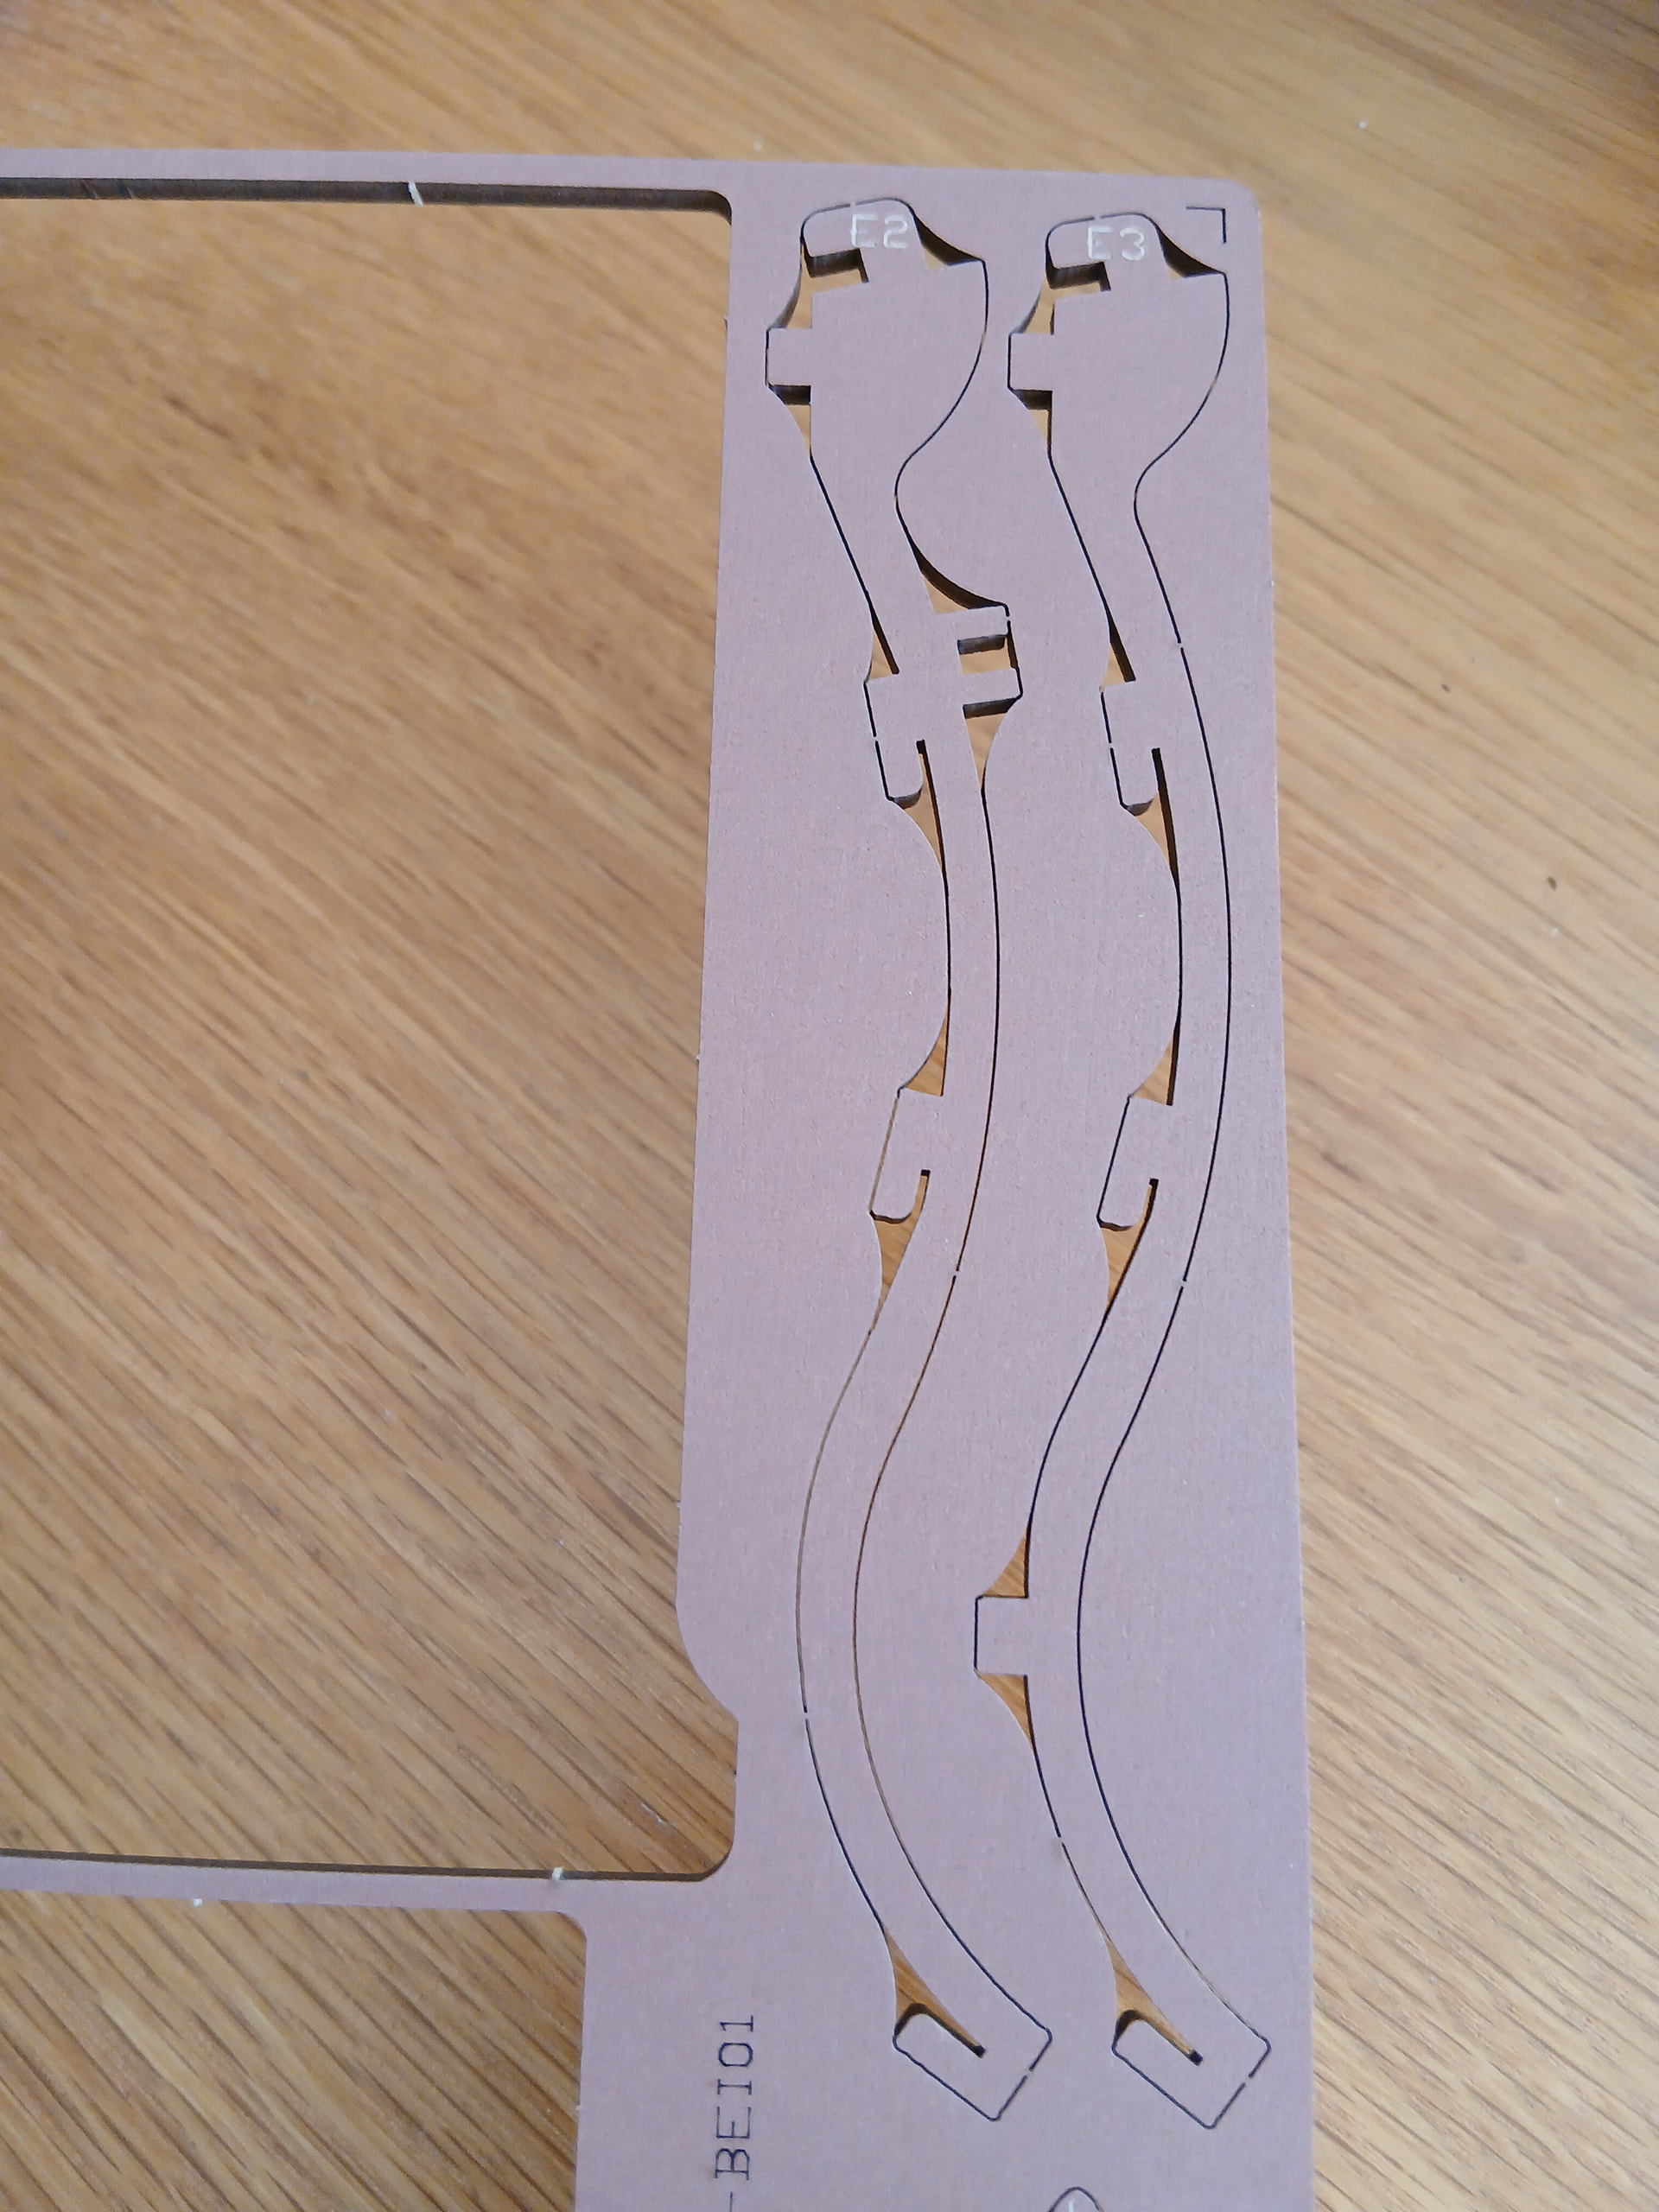
I mean… When I finished it I though that I missed something as a few times I have (like that small part for the dog to step on in the Ocean Fisher Pendulum build), but I’ve checked the manual 3 times and those two don’t seem to appear or to go anywhere. They look pretty similar to F7 and F8 though, which are the ones holding the paper page in the back cover:
But… I have no idea, honestly. Will this mistery be ever solved? Maybe they are hidden spares of F7 and F8 that for some weird reason got renumbered?

Who knows! Either way, I’m pretty happy with my build. Moving on to the next one!
That’ll be tomorrow though. Today there’s an episode or two of Young Sherlock in Prime Video waiting for me. I need to finish it! It’s so interesting and I only have a couple of episodes left.
See you/read you around!