
♪ Yooho, yoooho, a piiirate life for meeeee~ ♪
Hello, hello there!
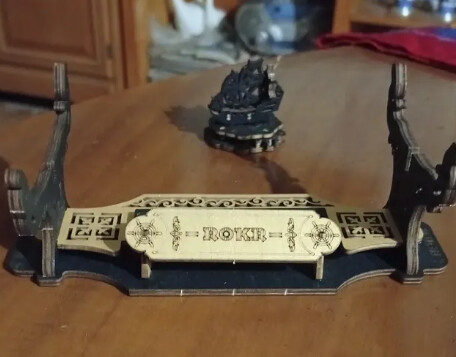
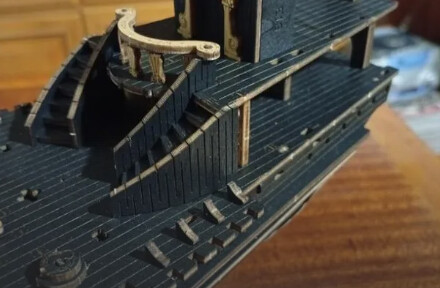
As some of you already know, ROKR’s Seahorse Barque was my first ever build from Robotime. I didn’t know about this amazing community by then so sadly I don’t have my building stories to share during the process! But since there’s a PDF version of the instructions and I’ve found some struggles or challenges or WTF moments through it, I thought of bringing this not-that-small topic to try and help out people who want to build it (which you definitely should! It’s SO majestic, just ask Captain Jack Sparrow here).
Least I can do now is to bring cuts from the PDF manual with written explanations, but I hope to be of some help nonetheless. I wasn’t taking photos that nicely during the process because I didn’t know about a place like this one to post them, so they may not be that much of help, but I hope my explanations are ![]()
Here we go then!
Issue 1 - Page 3: The ROKR Logo Waxing
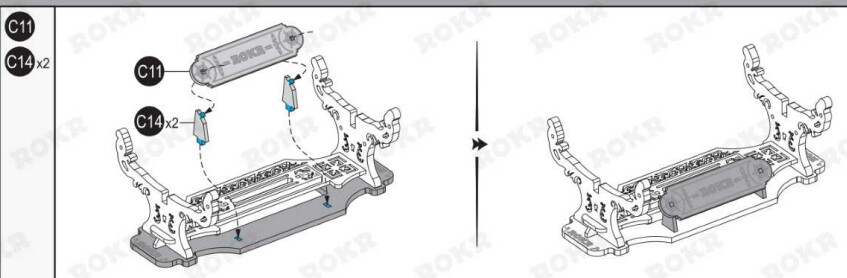
When assembling the base, you’ll find that fitting together C11 with those two C14 and onto the base can be a bit tricky. You should definitely assemble the C11+C14 set before adding it to the base, and you may even want to add some glue to the C14-C11 connection since the C14 parts can be a bit loose. Then, just maybe help yourself with a pen or something to align and fit the lower part of each C14 with the base. Don’t push too hard though! The C11-C14 fitting area is more fragile than it seems.

Issue 2 - Page 5: The Hull Screwing Complication
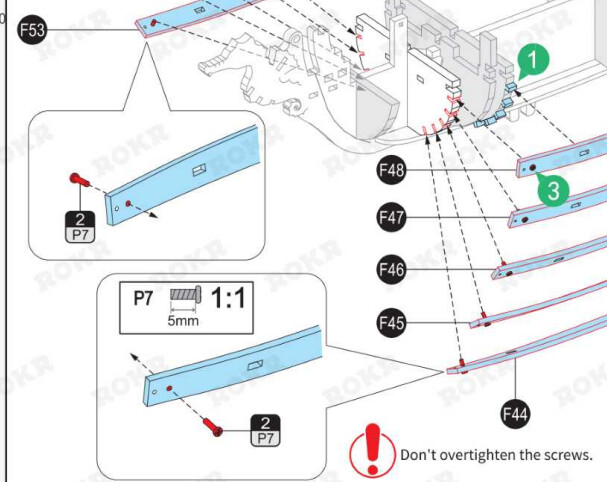

For this particular ship you’ll need to fit all those long F44 to F53 parts to both side of the skeleton in order to bring the hull to life. While doing so you’ll be asked to screw 20 screws to hold them there, and those screws are fitting into the holes painted in red in the skeleton of the ship. It’s tricky, but you’ll want to be super precise in aligning them to the hole, and step back in your screwing if the screw is pushing wood instead of pushing itself into that hole. It may sound tricky, but you’ll become a master of it after 4 or 5 screws ![]() Just don’t get too screwed with your screws, if you know what I mean!
Just don’t get too screwed with your screws, if you know what I mean!

Issue 3 - Page 6: The Hull Sticking Dissatisfaction
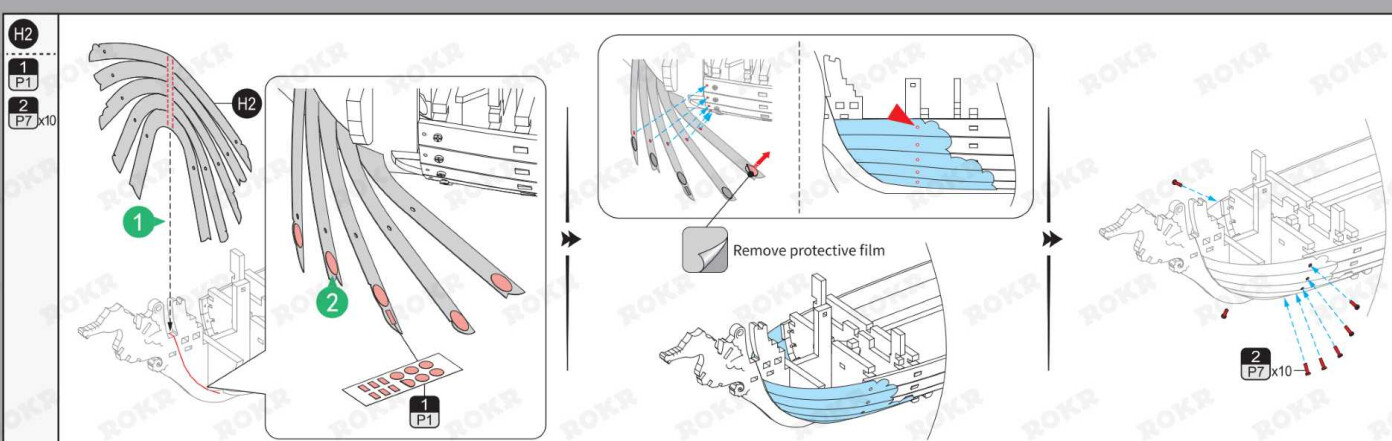

The manual will soon prompt you add a paper-made part to the bow (and a smaller one to the stern) for some colour; you’ll need to fit it, then stick it with some tape, and then add some screws. Two things here:
- Wether you choose to use the provided double-sided tape or to glue it instead, really go for the pointy ends of the paper part (otherwise the pointy ends will be loose and that won’t look smooth at all on your finished ship)
- During the fitting of the paper part be really, REALLY careful you properly align it with the holes on the hull on both sides, otherwise the screwing part will be a nightmare. Believe me, mine was

And well, if you’re a painting expert and lover like @Nita_Davis and company, you may even decide to skip this paper part and paint the hull yourself ![]()

Issue 4 - Page 10: The Gunport Opening Problem


At some point you’ll need to craft those 16 small gunports; those will hide the cannons and whenever you active the system you’ll build for it, the cannons will push the gunports open to show themselves. I found a problem (and some others like @Jerry_Boswijk have too) that some of those won’t always open properly or open too much so they won’t close when the cannons hide again. In order to solve this, and since this kit provides you with a wax bar that you won’t be using too much, I’d suggest to wax every single gunport holder (the circled holes in them that will fit the gunports themselves) so the movement of every single one of them will be smoother.

Issue 5 - Page 11: The Folding Breaking Craziness
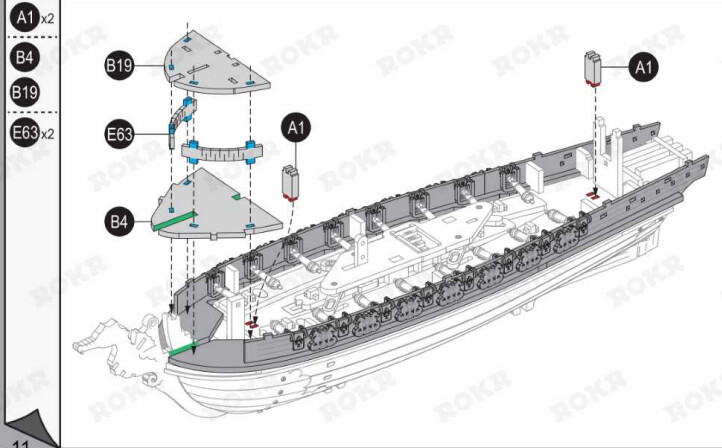

Beware! Those two foldable E63 parts are REALLY fragile. One of mine broke when I was trying to fit B19 over it and I was being extra careful. Maybe wax the top pointy ends of them a bit before fitting the other part on top so they won’t split in two that easily? (But hey, even if mine broke, it’s still hidden under B19 so is not that big of a problem ![]() )
)

Issue 6 - Page 13: The Fragility of the Pirate Bell
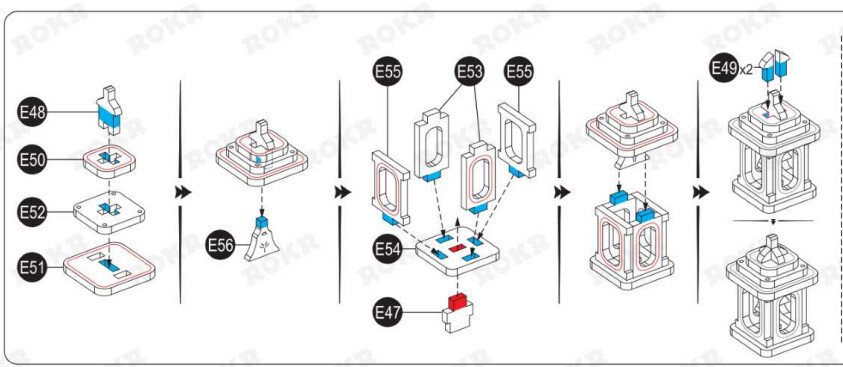
This sort of “Bell Tiny Temple” is a fragile little thing. The bell inside (E56) it’s just hanging there loose, so I’d strongly recommend you to glue it before adding it to the upper area! Mine fell a couple of times before I decided to do so.

Issue 7 - Page 15: The Moving Stairs of Seahorse
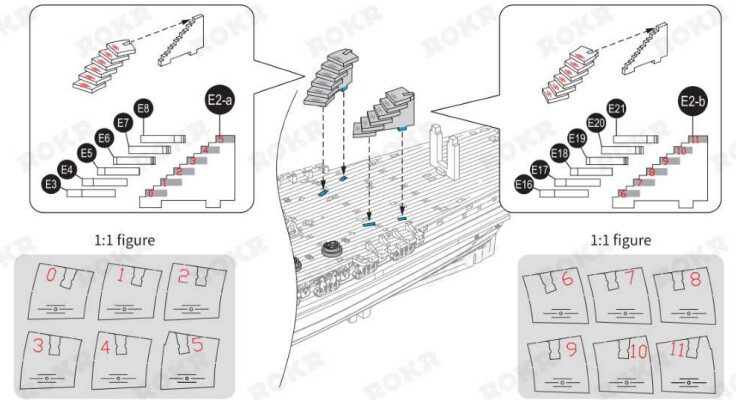
Those stairs are a bit… I don’t know how to call it! But since the steps are just horizontally fit into the E2 parts, they can easily slightly move up and down, hit each other or even come off. I’d definitely recommend gluing them! (Same for similar stairs in future pages lol)

Issue 8 - Page 20: The Crazy Back Window

100% recommended to glue D4 and D10 to the window structure. Otherwise you’ll need to actively hold them together while trying to fold C31 over and around them. C31 is more fragile than it looks and it can easily break due to the fitting-while-holding pressure, which is basically what happened to me! And so I had to finally glue C31 in two parts over them and fold those two broken parts as smoothly as I could ![]()

Issue 9 - Pages 21 & 22: The Alignment of Hell
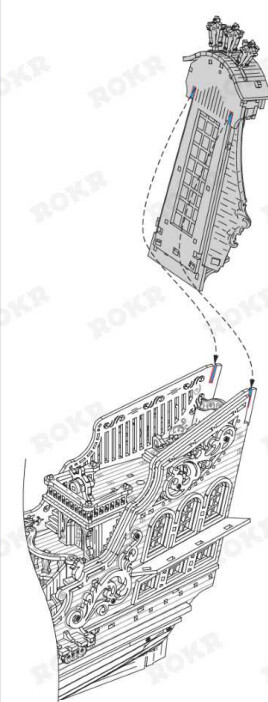


You REALLY want to take special care into fitting and aligning your window build properly on the back of the ship. Otherwise, when the time comes on the next page, there will be no way D27 will properly fit in both sides and the image on the right won’t be happening! We want a smooth ship structure, crew ![]()

Issue 10 - Page 23: The Overuse of Glue
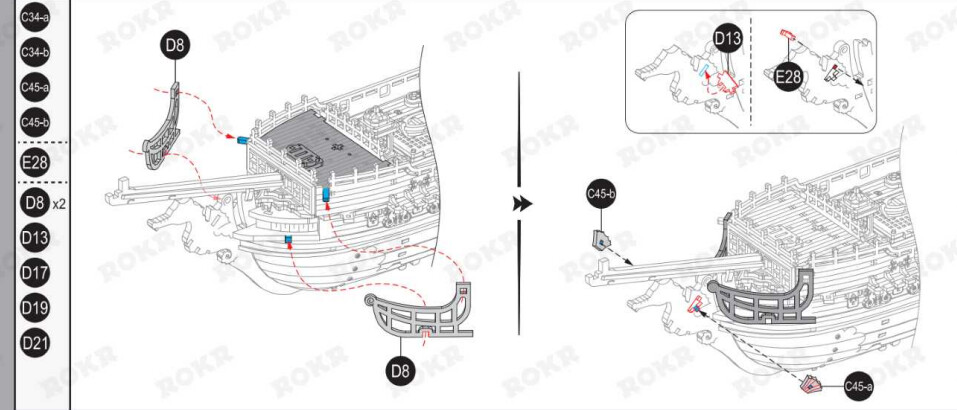


Well, you may find out yourself since it’s a pretty clear thing ![]() but for those three different and one-after-the-other steps (the bow barriers, the seahorse figurehead and the anchors), you should definitely use glue to keep them together and on place. They’re pretty easily loose and they can fall from their spots too easily.
but for those three different and one-after-the-other steps (the bow barriers, the seahorse figurehead and the anchors), you should definitely use glue to keep them together and on place. They’re pretty easily loose and they can fall from their spots too easily.

Issue 11 - Page 31: The moment when you shouldn’t trust the manual
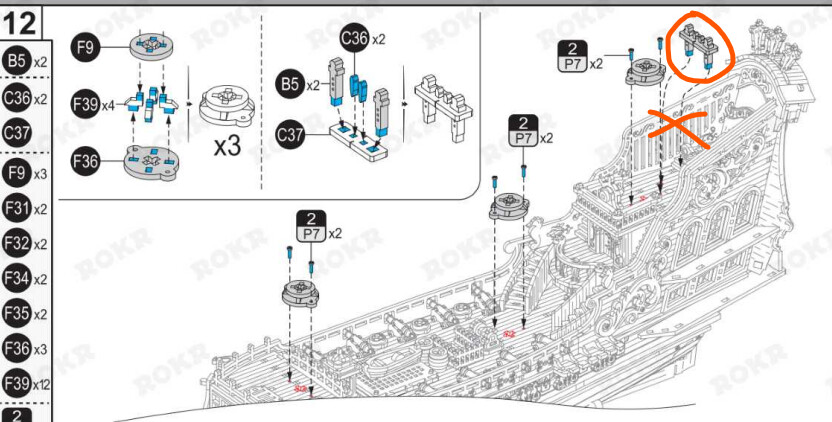
Okay, I believe this is just a mistake on the manual! But trust me here. Once you start step 12 on page 31, you see how it’s asking you to build that small thing out of C36x2, B5x2 and C37 and fit them on top of the Captain Quarters on the back? Well, don’t. I mean, you can put them together and save it in the box or something, but DON’T fit it on the ship just yet. Once you make it to almost the end of the build and you have to sew your ship and sails and masts, you’ll be asked to tie a rope to this BEFORE fitting it on the ship, so I guess this step of doing it by page 31 is a mistake, since once you reach page 33, the manual will ask you again to build this small thing, tie the rope to it an THEN fit it on the ship:
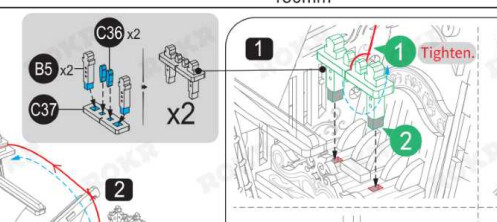
We all make mistakes! Just saving you some time here, folks, since otherwise you’ll have to remove it at this point, and it will be tricky with all those sails and masts around.

Issue 12 - Page 32: The Fitting Masts


Last but not least, the process of fitting the masts. The parts of the deck highlighted in red are mast holders you should’ve built and put there not long ago. So to fit the masts you’ll need to fit them through the opening in them, and then through the X holes under them on the deck part. Just don’t rush it; once the mast is in the mast holder, move it around a bit if needed until you feel it’s aligned with the X hole and push through. It shouldn’t be that hard at this point!
Also, the manual suggest to fit the masts from front to back, but in my opinion it’s easier the other way around.
And that’s it! After this it’s all about sewing the ship, but it’s way easier than it looks if you follow the instructions closely and properly tighten the ropes along the way.
And this is it, I think. I hope this can be of help to anybody out there.
See you/read you around!