Tiny Resin Tricks for Miniature Jars and Drinks
One of my favorite little ways to customize a kit is adding “filled” jars instead of leaving them empty. While working on Sweeties Donut Shop, there were two little red jars that were supposed to stay empty, but they were so visible in the display that I really wanted them to look like donut filling jars instead.
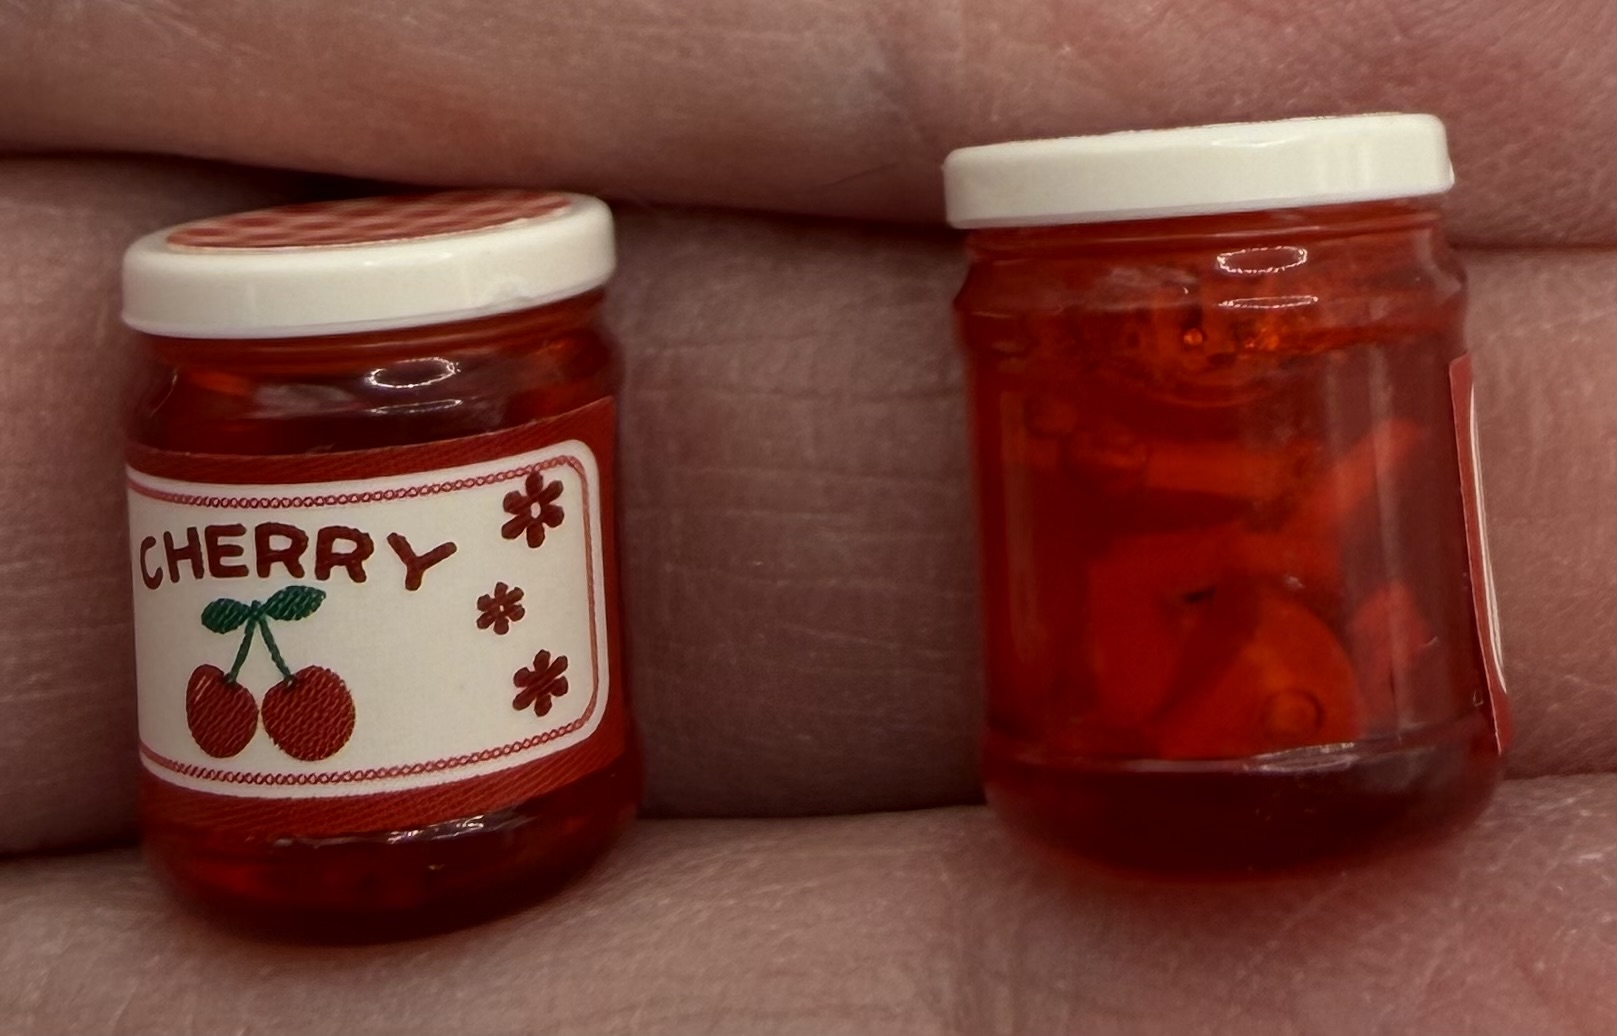
I dug through my stash of tiny polymer fruit slices looking for cherries and realized I didn’t actually have any. I ended up using some tiny red fruit pieces and even a few mystery fruits that looked close enough once chopped up. Honestly, at this scale, it worked perfectly fine.
For the first jar, I layered UV resin and fruit pieces a little at a time so the fruit looked suspended throughout the “jelly.” It actually turned out really nice and gave the jar a more realistic look.
My big mistake though was forgetting to wipe the inside rim of the jar before curing the resin. When I went to put the lid on, it wouldn’t fit because cured resin had built up around the edge. Scraping cured resin out of a tiny jar is definitely not fun, but luckily I managed to fix it enough to force the lid back on.
On the second jar, I forgot to layer everything, so all the fruit pieces sank to the bottom. Funny enough, that one probably looks even more realistic because real fruit filling would settle a bit anyway.
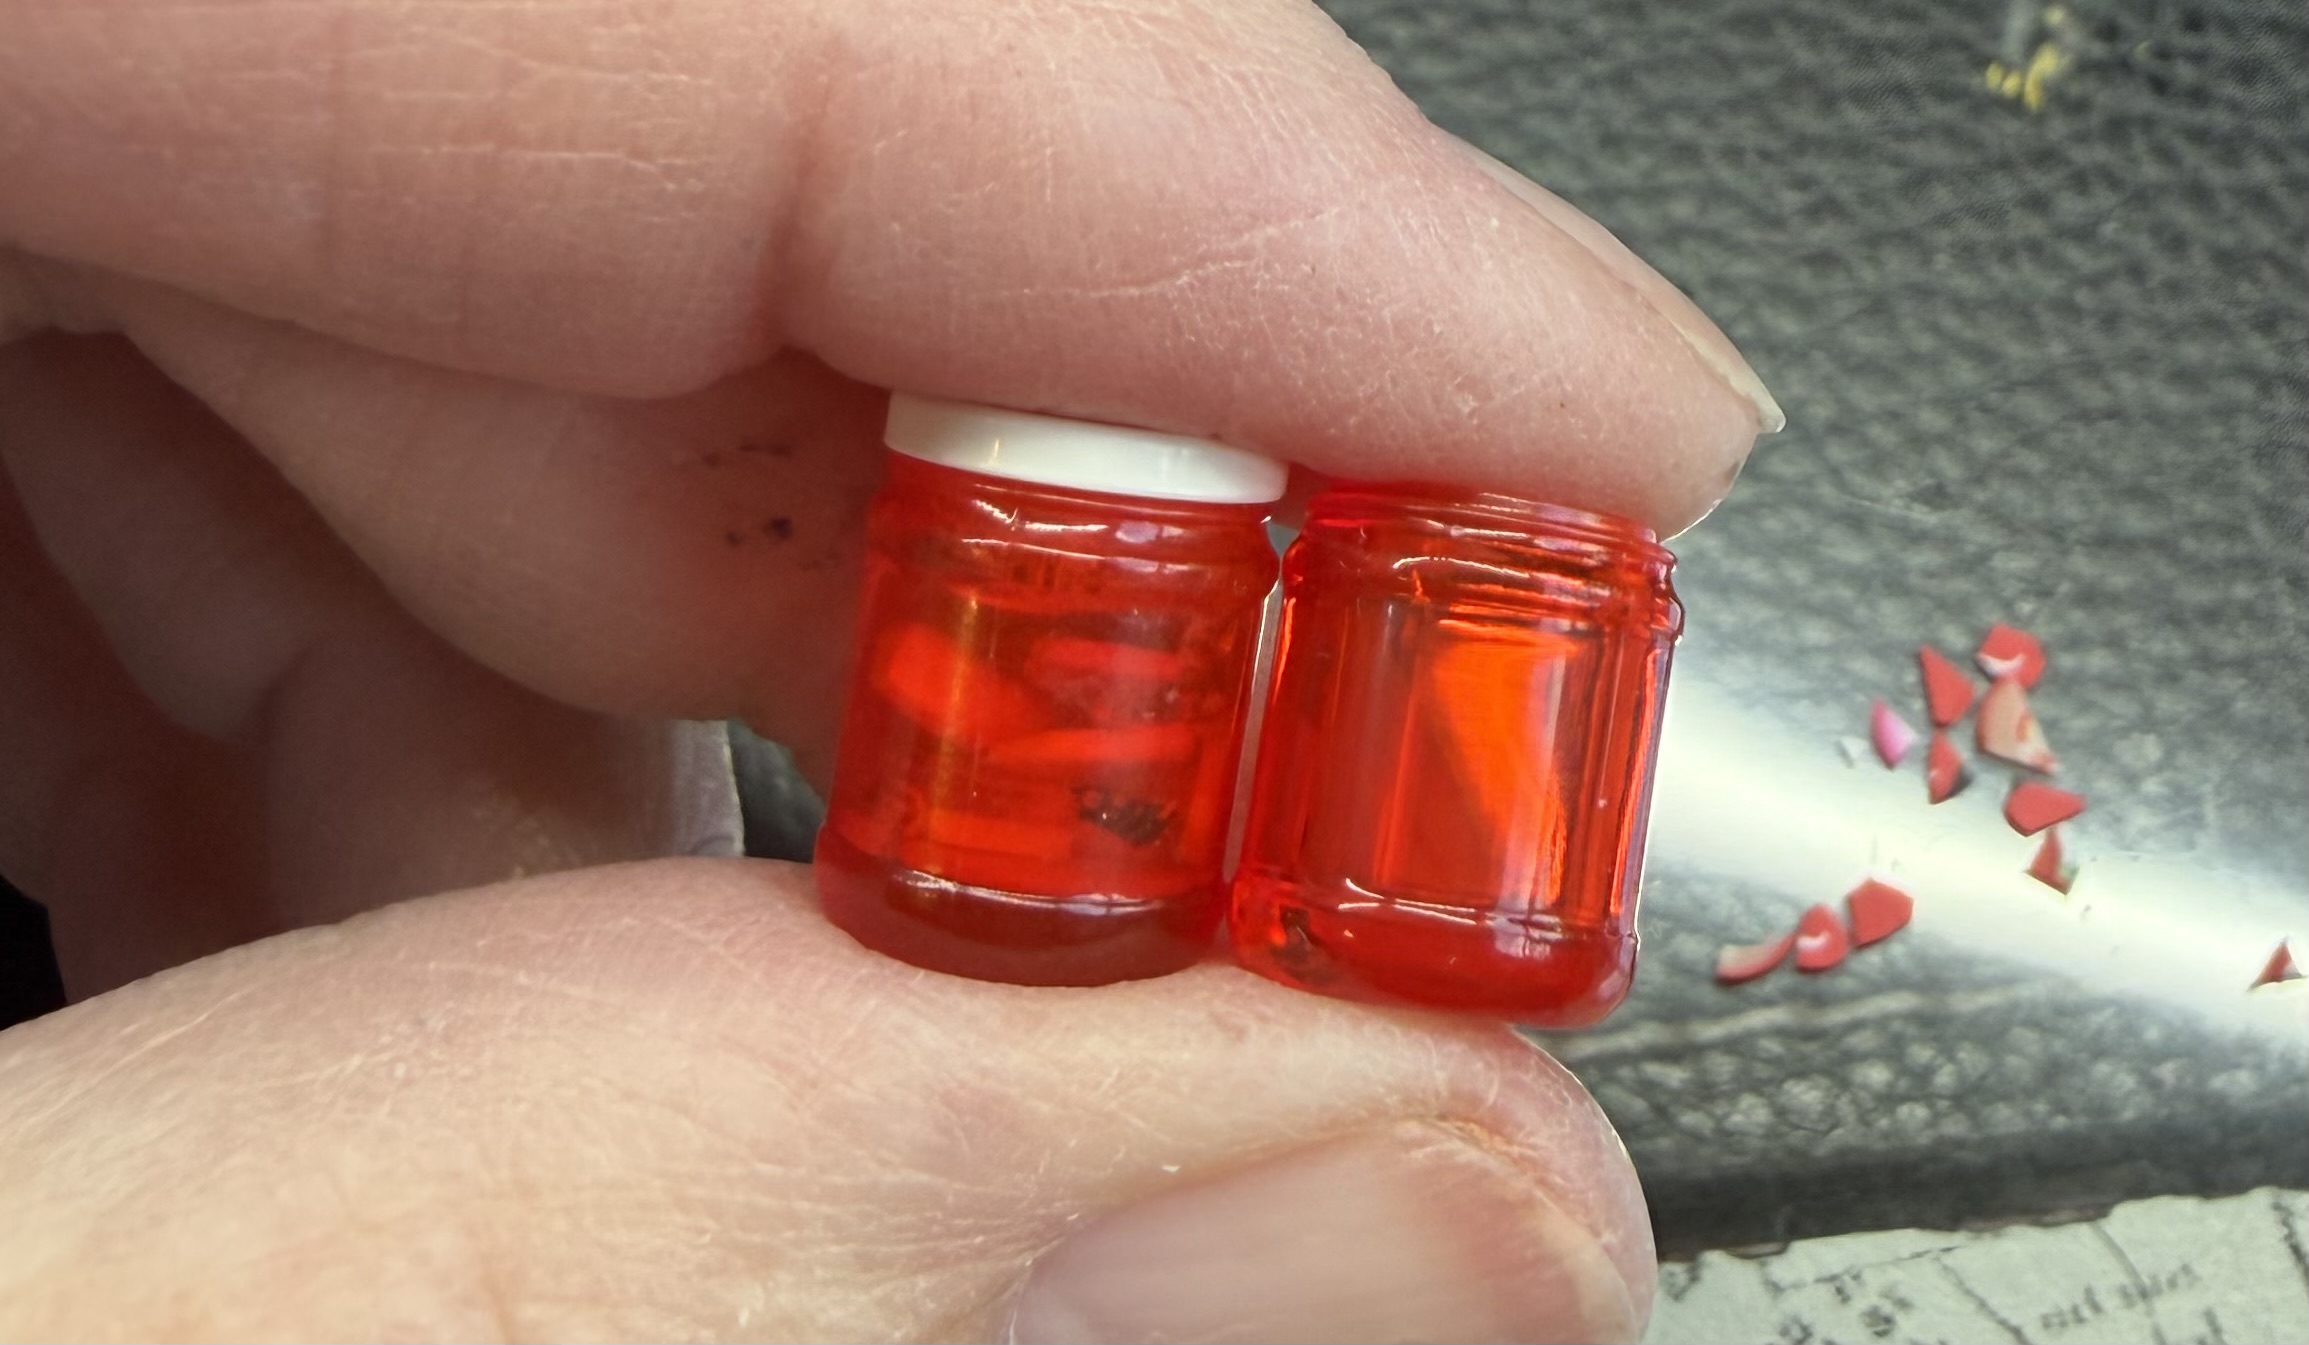
Since the jars turned out pretty cute, I thought this might be a fun little resin technique to share. I already had some oversized clear vessels from AliExpress that ended up being too large for any Rolife-sized kit, but for a couple of dollars they were worth the gamble. I still haven’t found a good source for properly scaled tiny jars and glasses, though, because I would absolutely use them in other miniature builds.
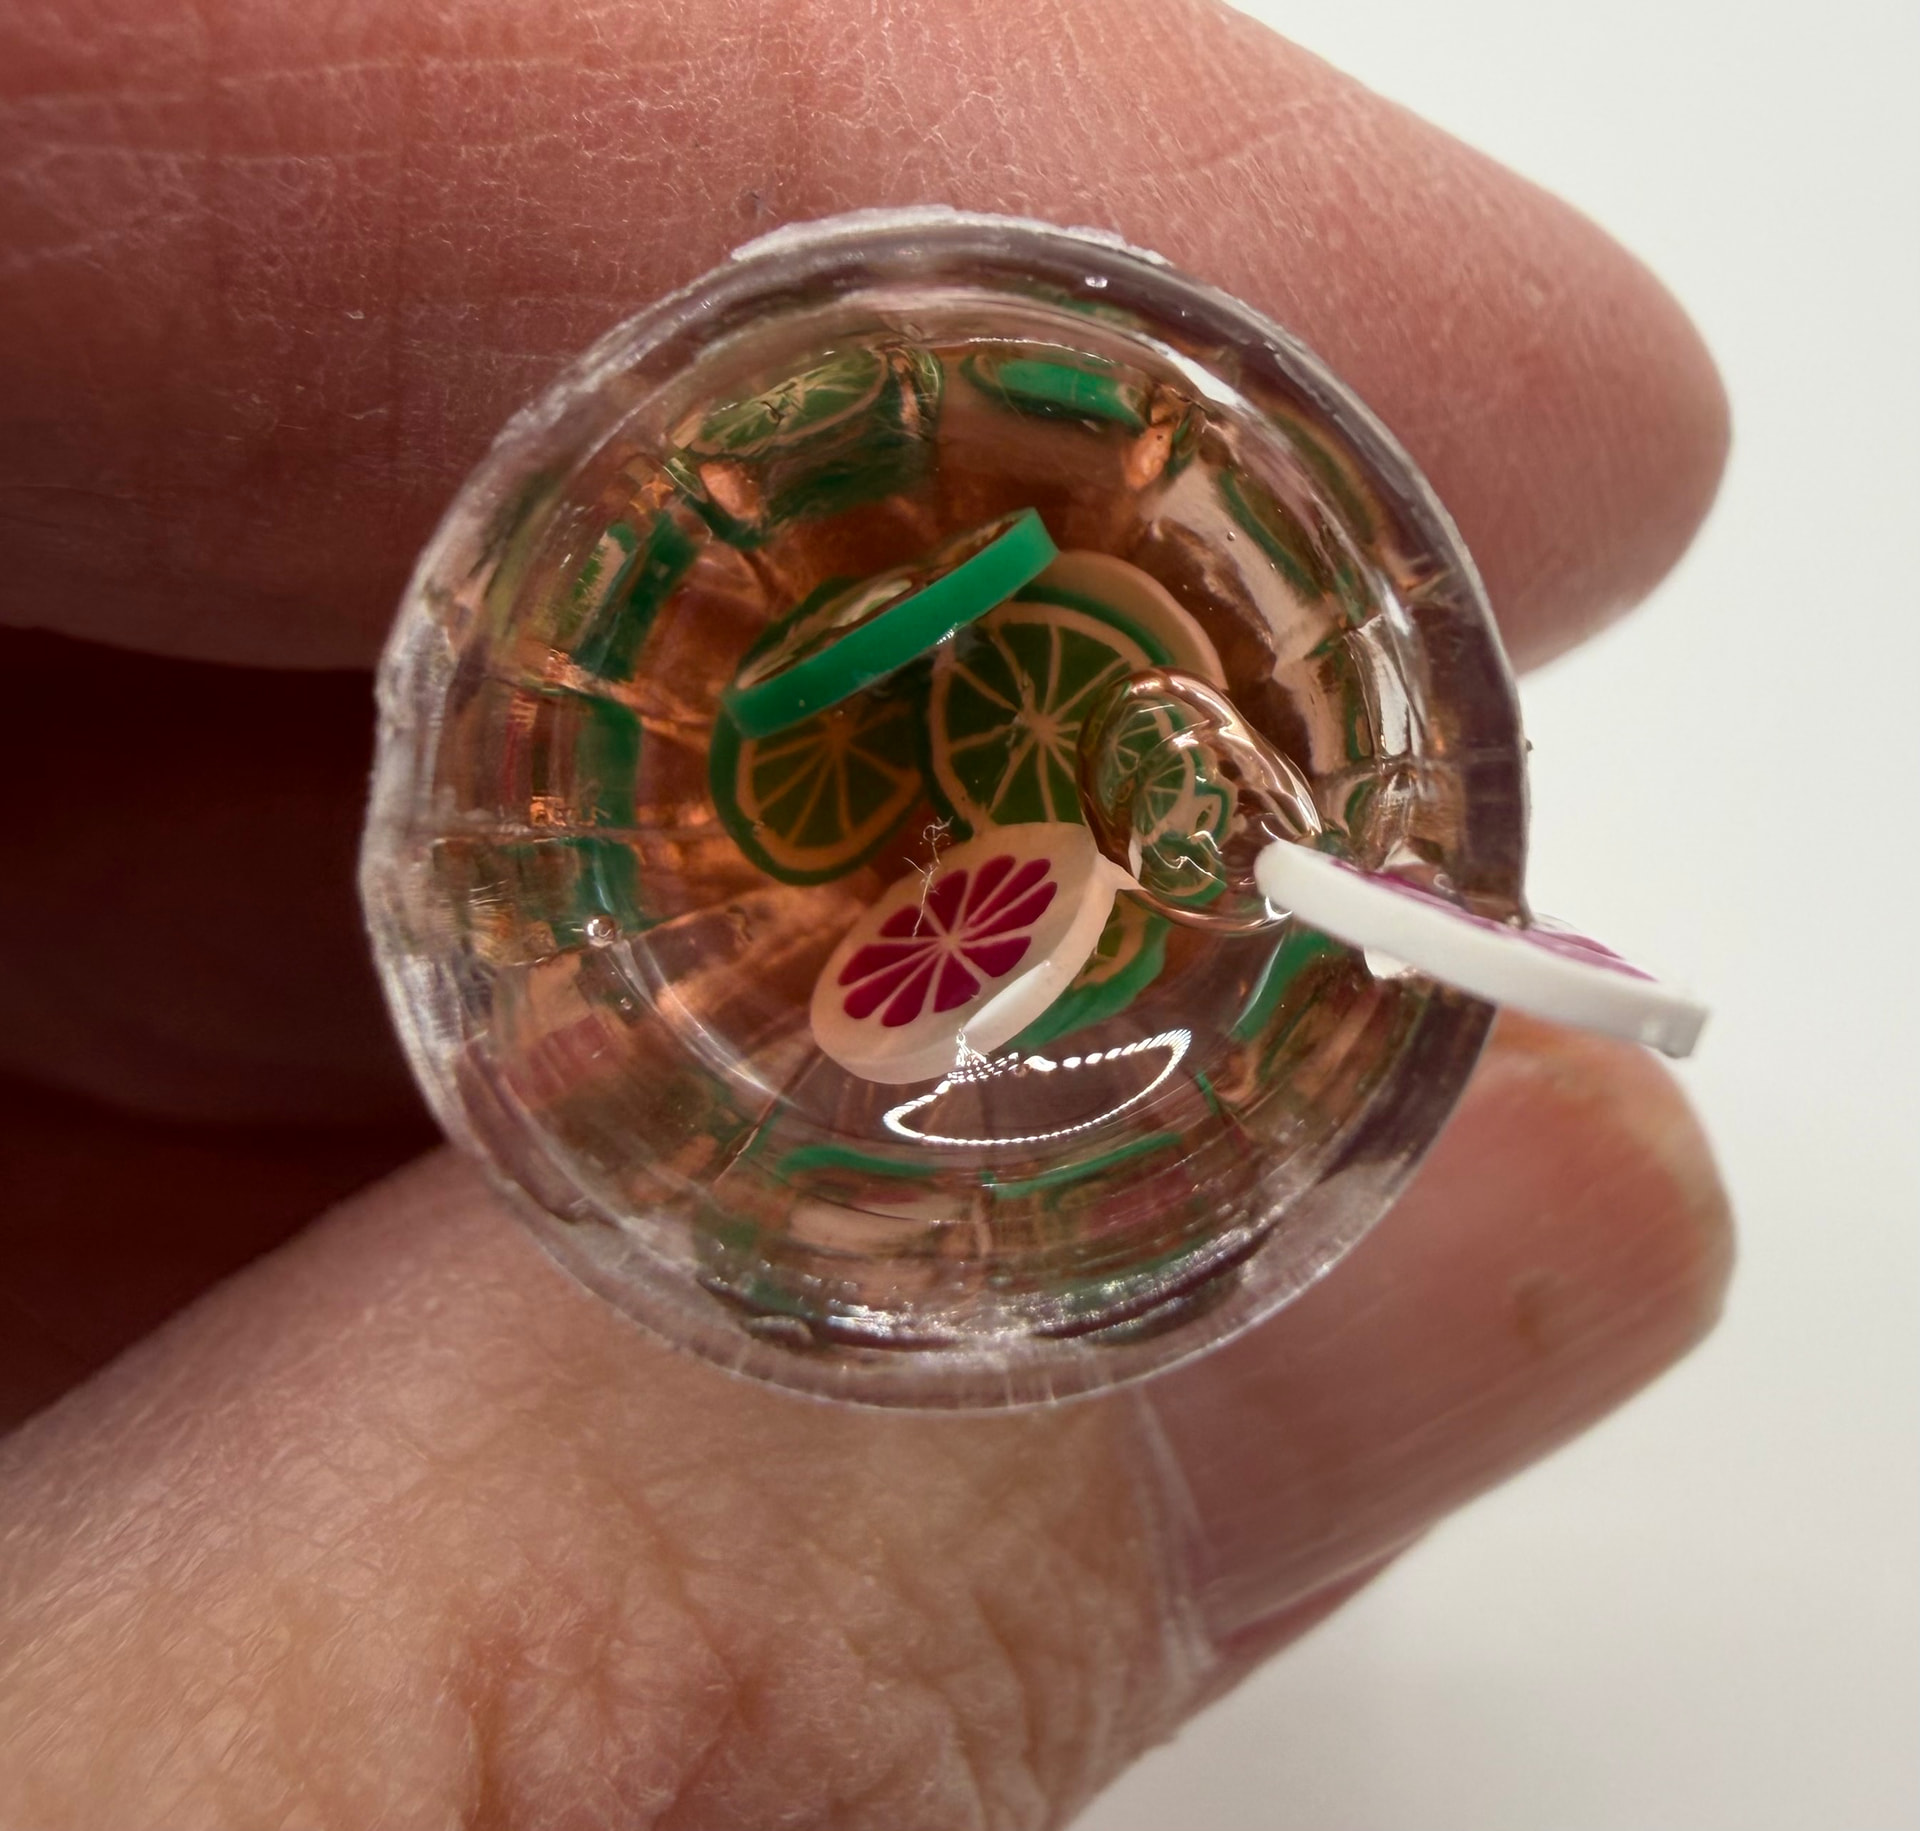
I decided to use one of the oversized glasses as an example to show how simple little resin details like this can be.

I started with just a small amount of translucent resin in the bottom of the glass and slowly added fruit slices with tweezers.
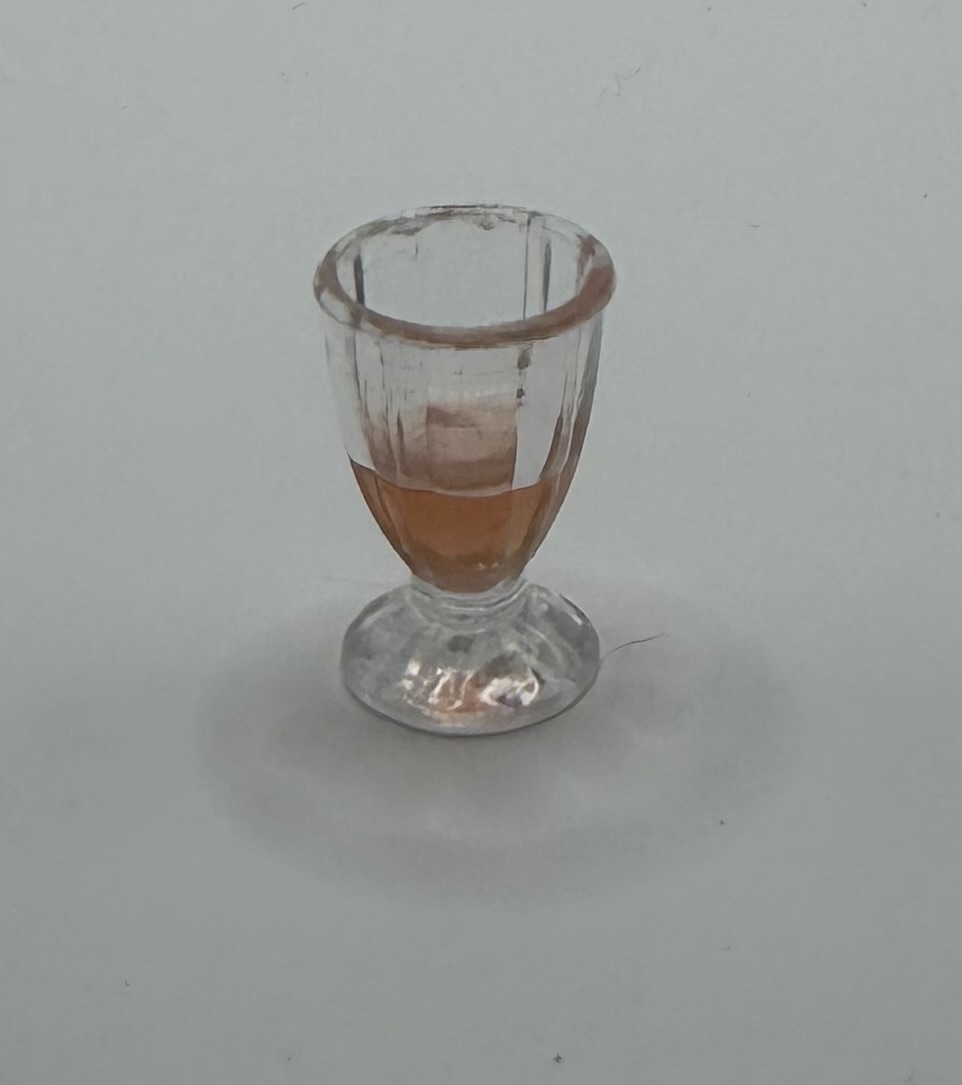
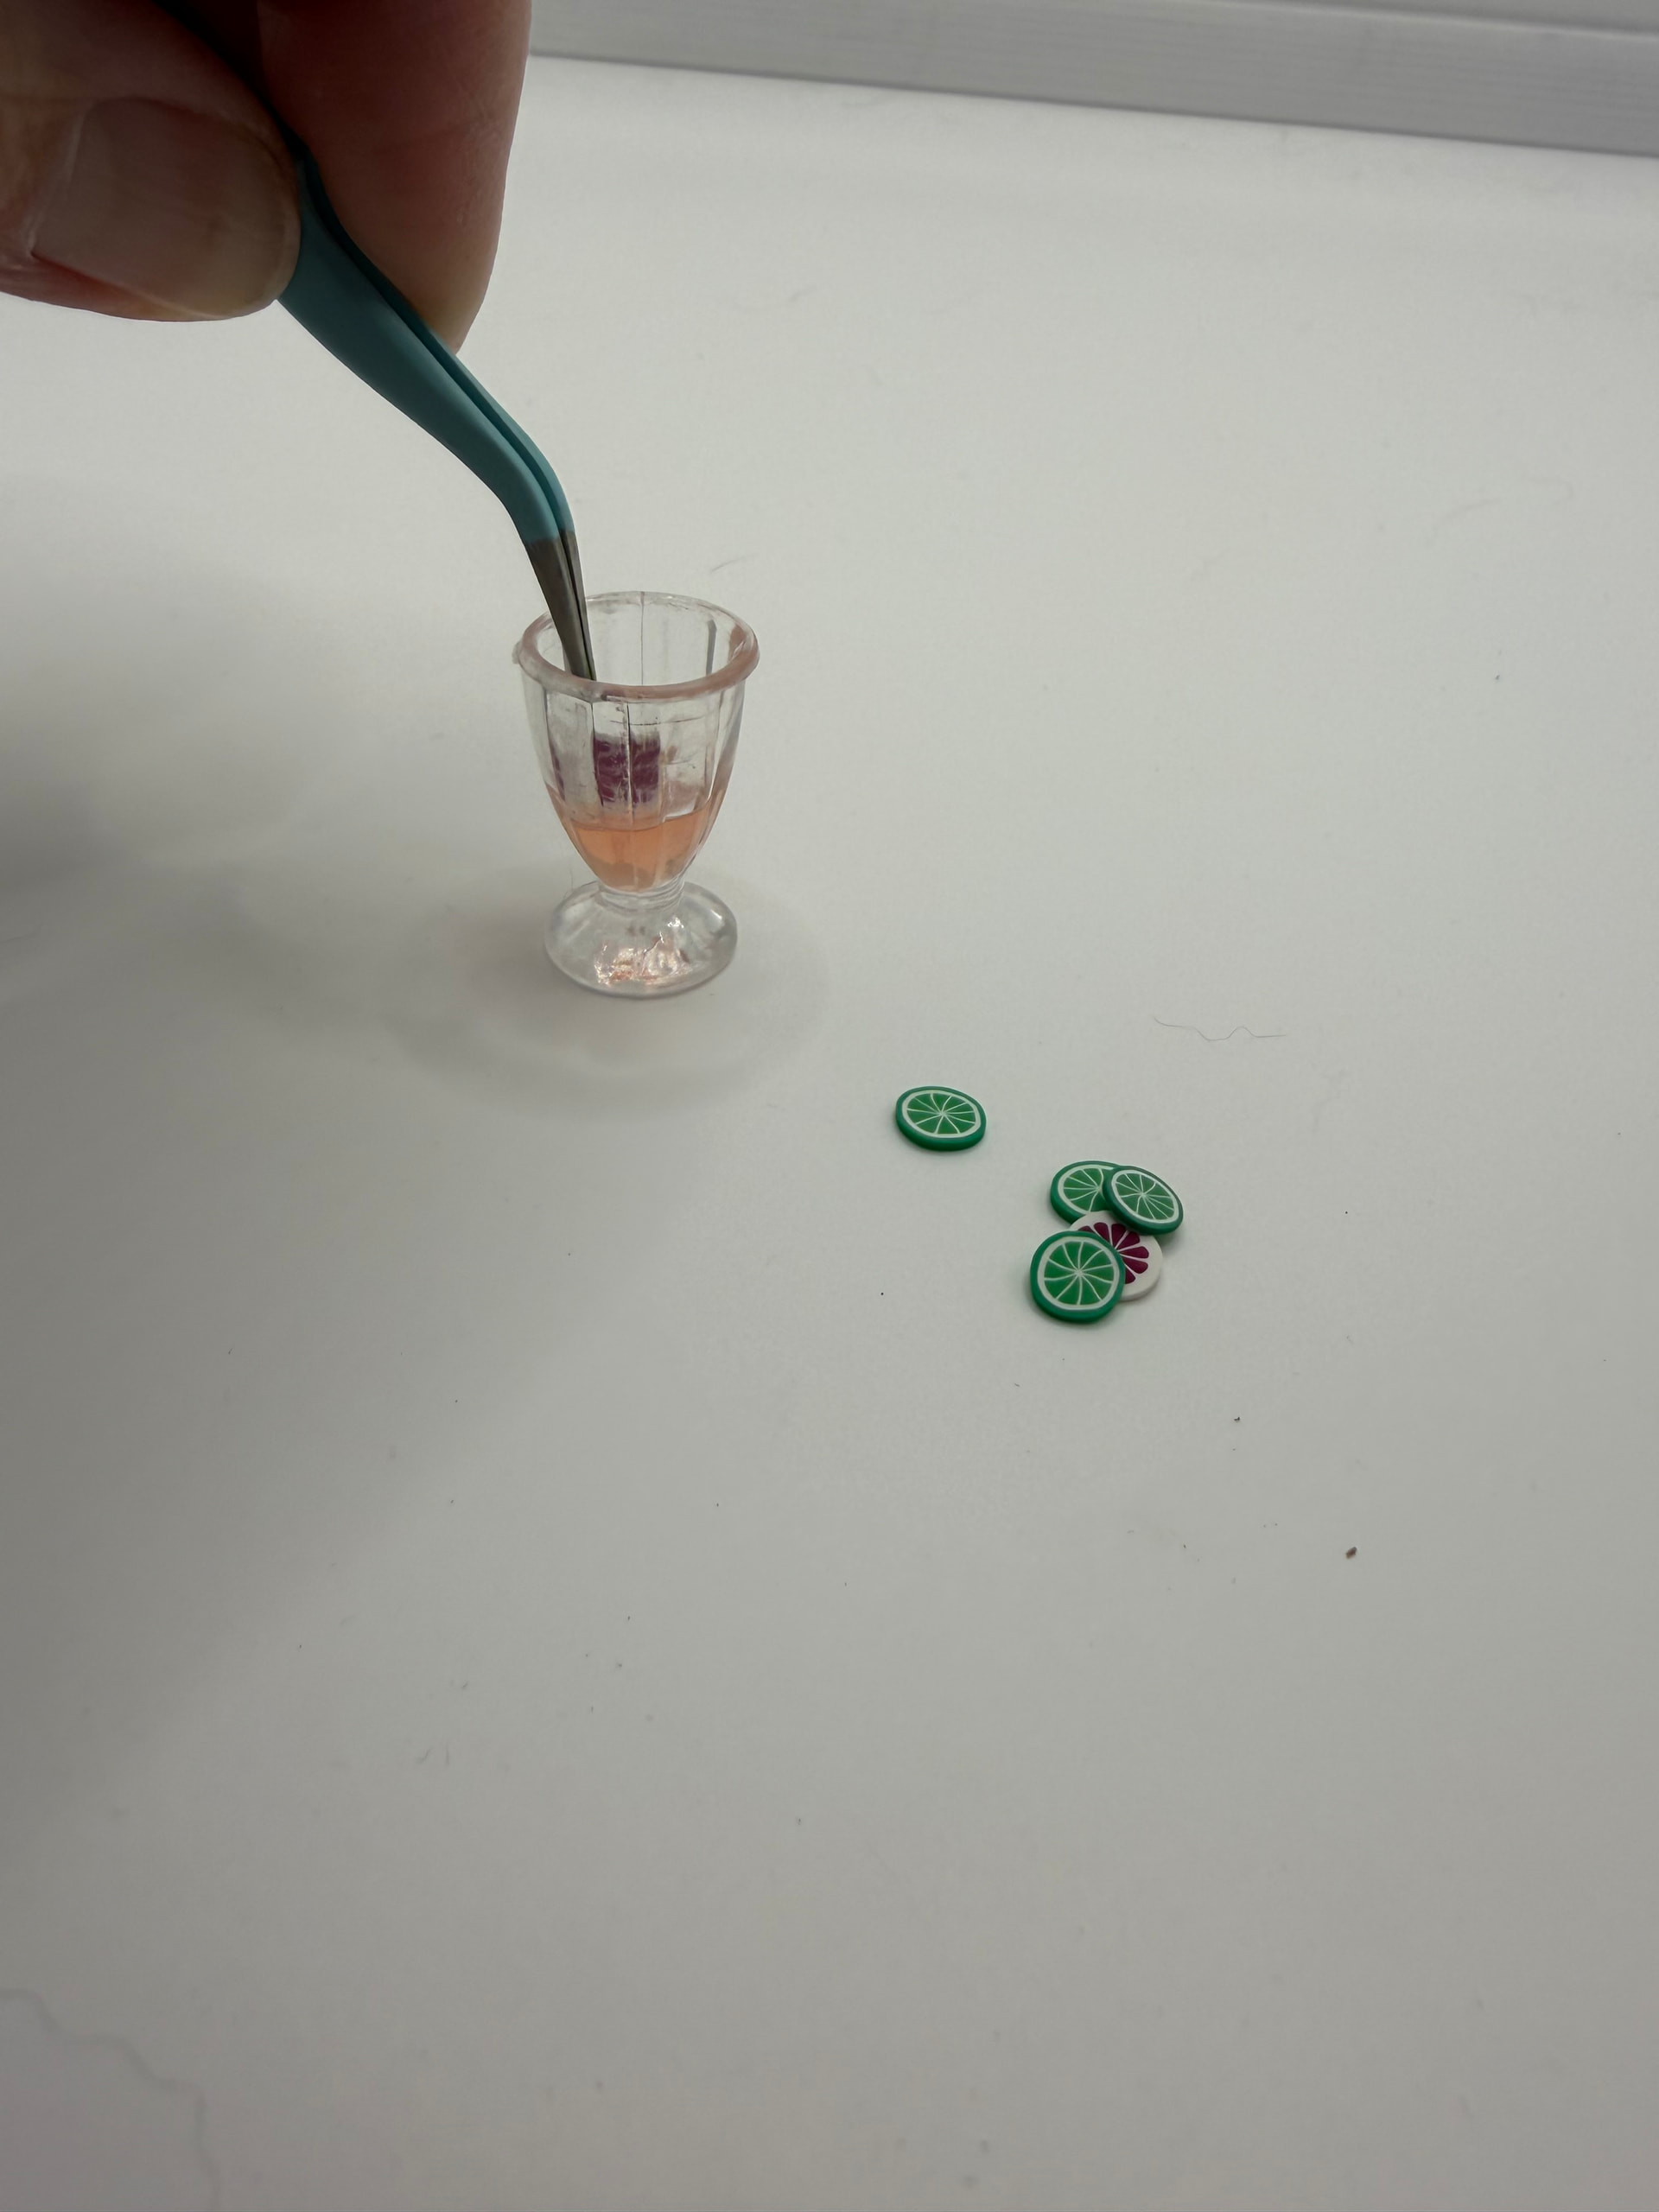
One thing I noticed while experimenting was that the fruit slices showed up much better when I gently pushed them toward the outside wall of the glass before curing. It made the details much easier to see once the resin hardened.
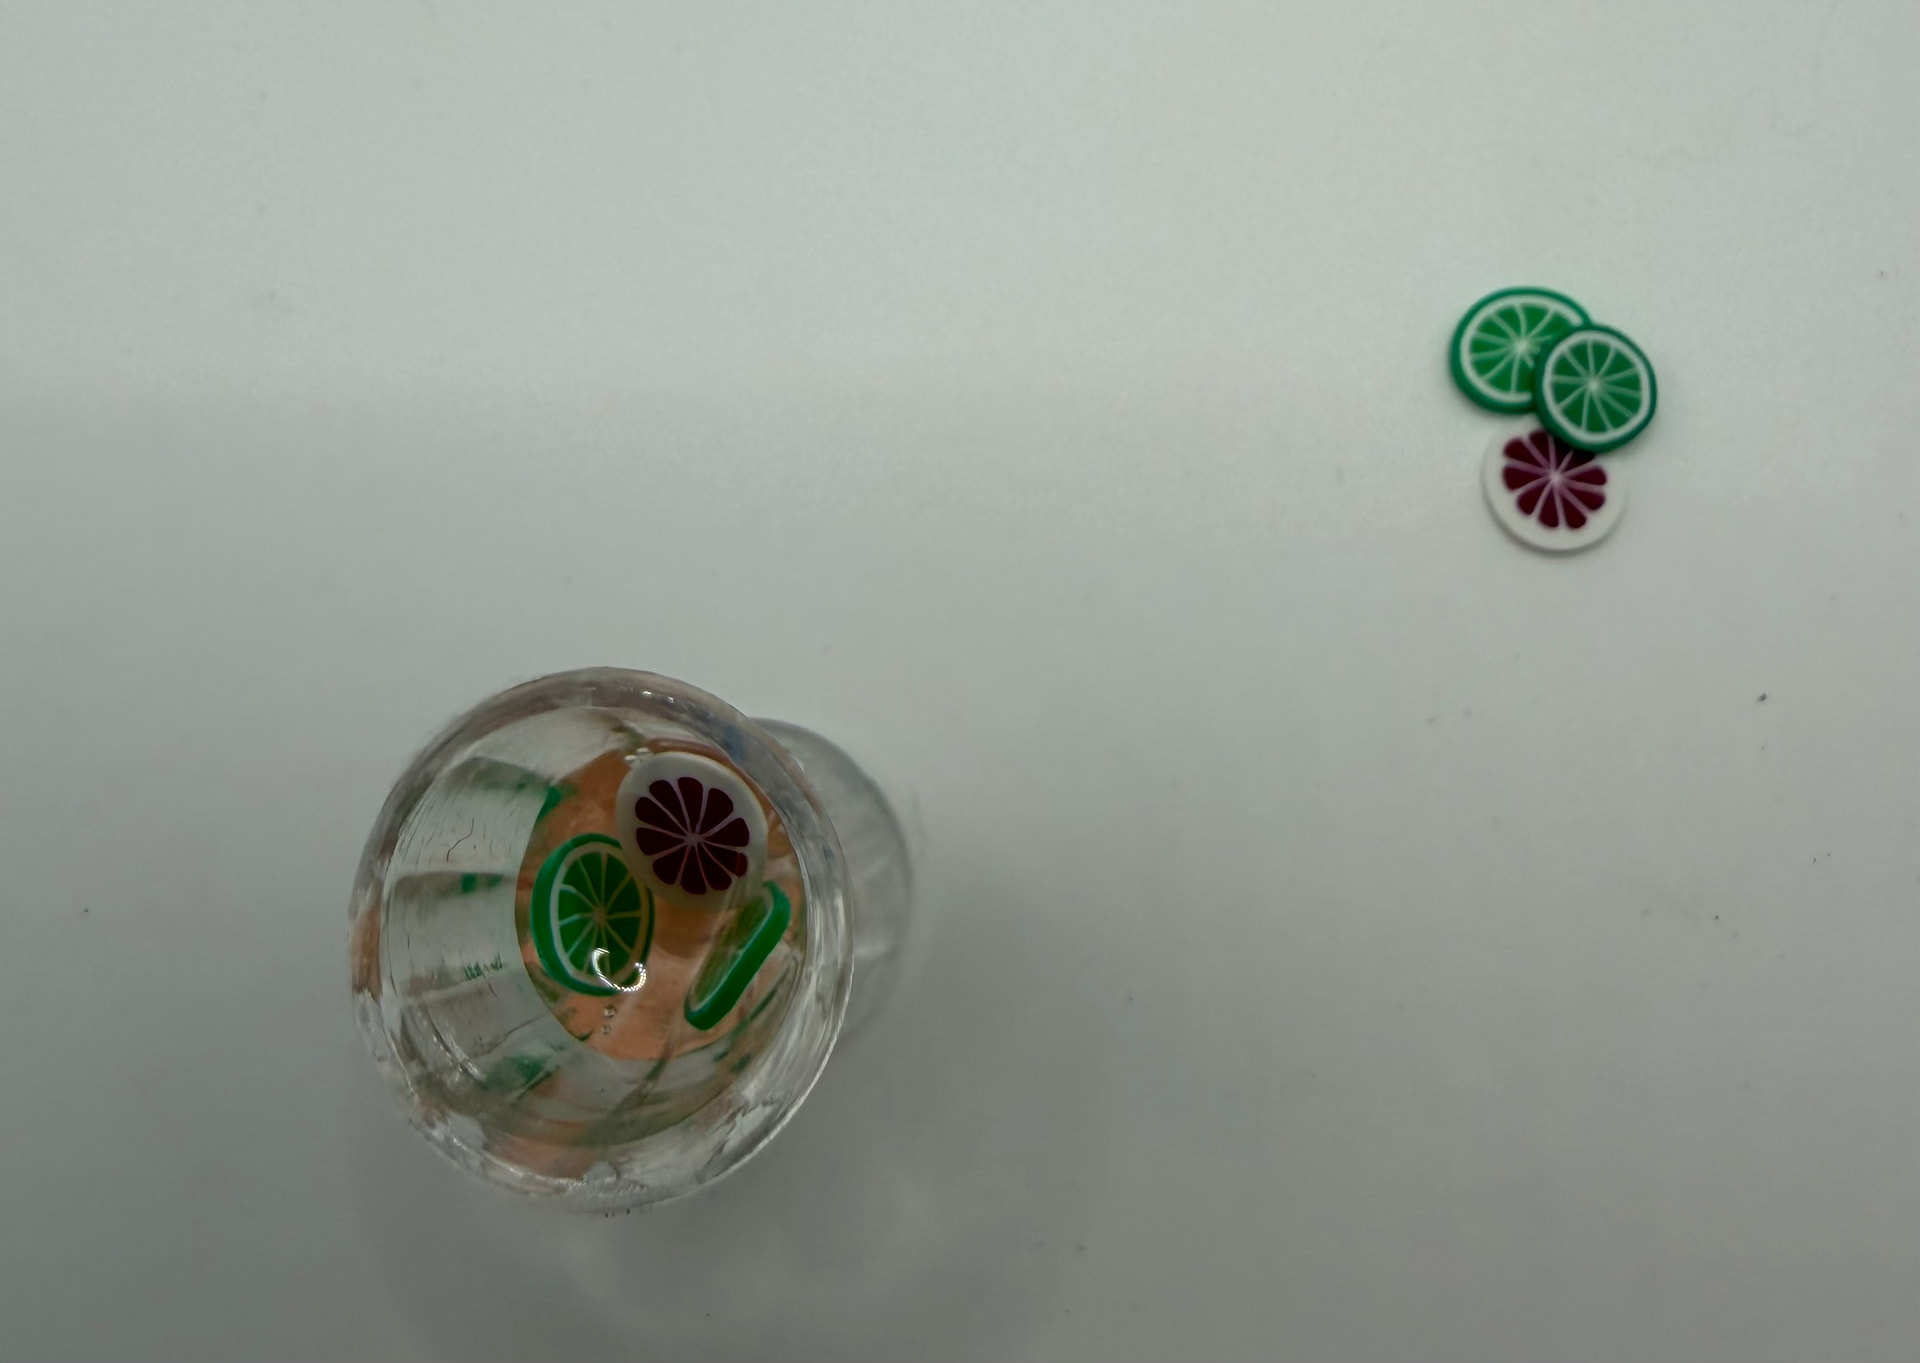
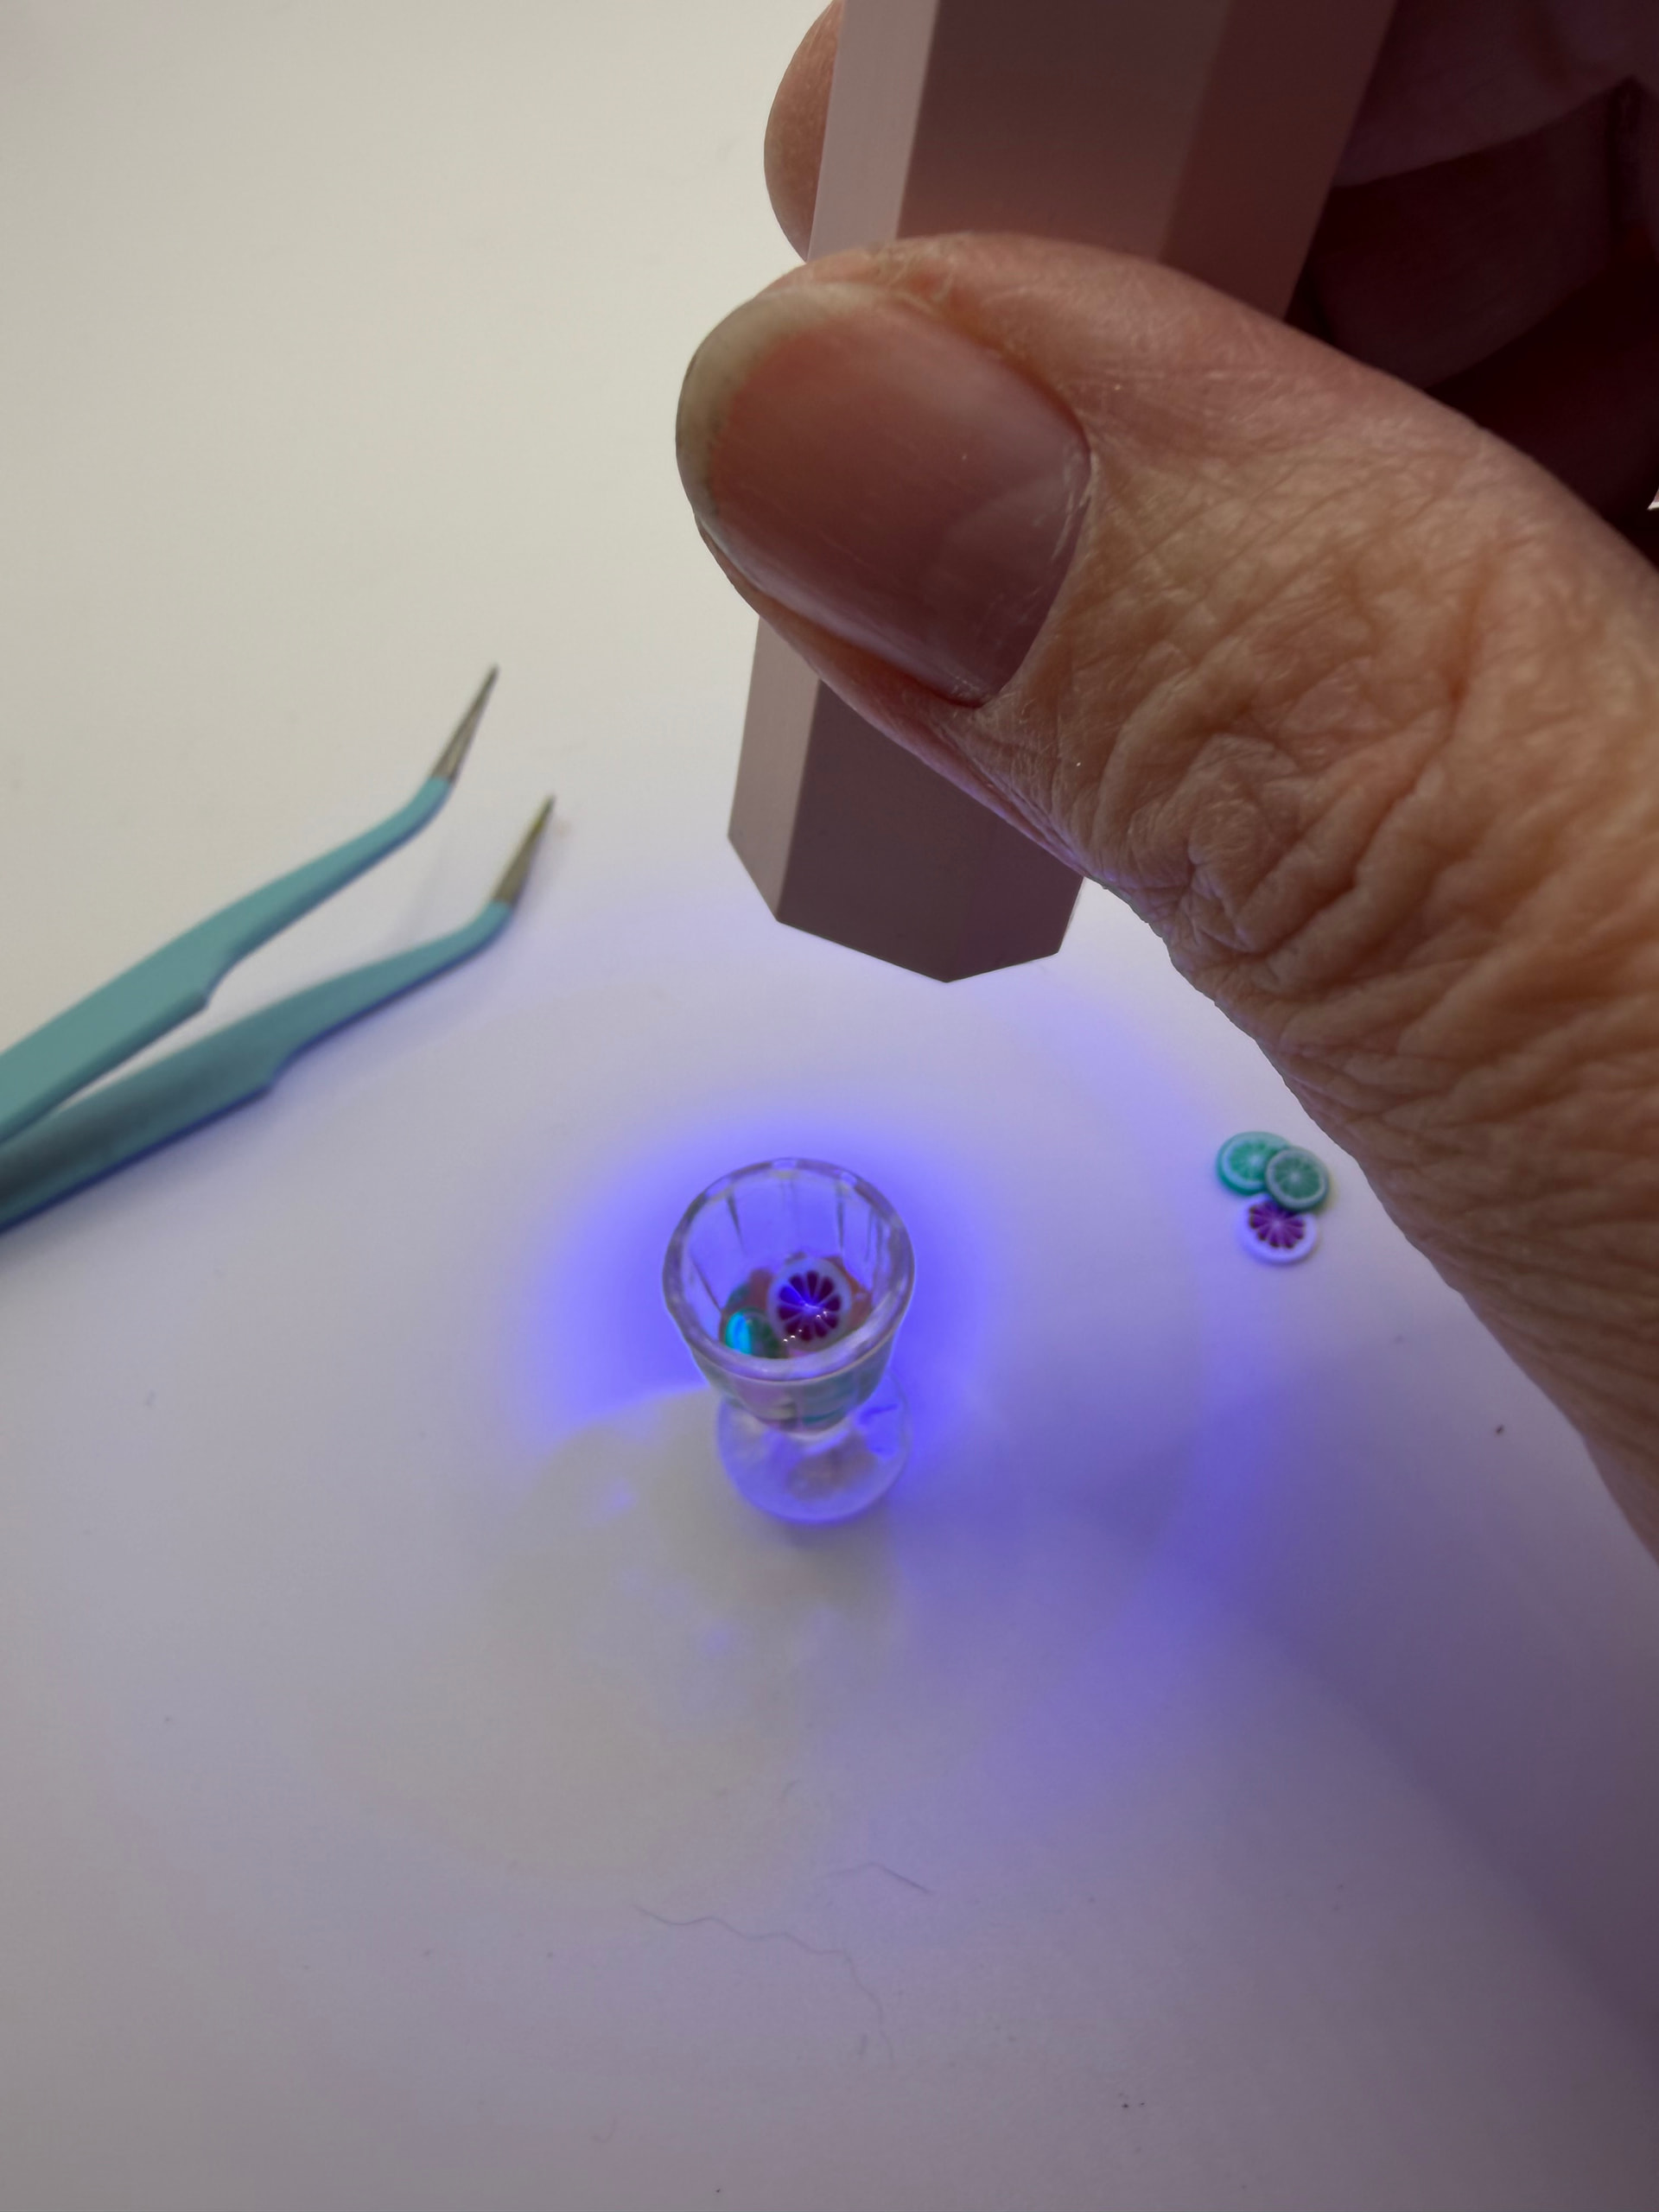
I cured the resin in small layers using a tiny UV light. One thing that surprised me the first time I worked with UV resin was that it can get slightly warm while curing. That’s completely normal, especially in a small enclosed piece like a miniature glass or jar.
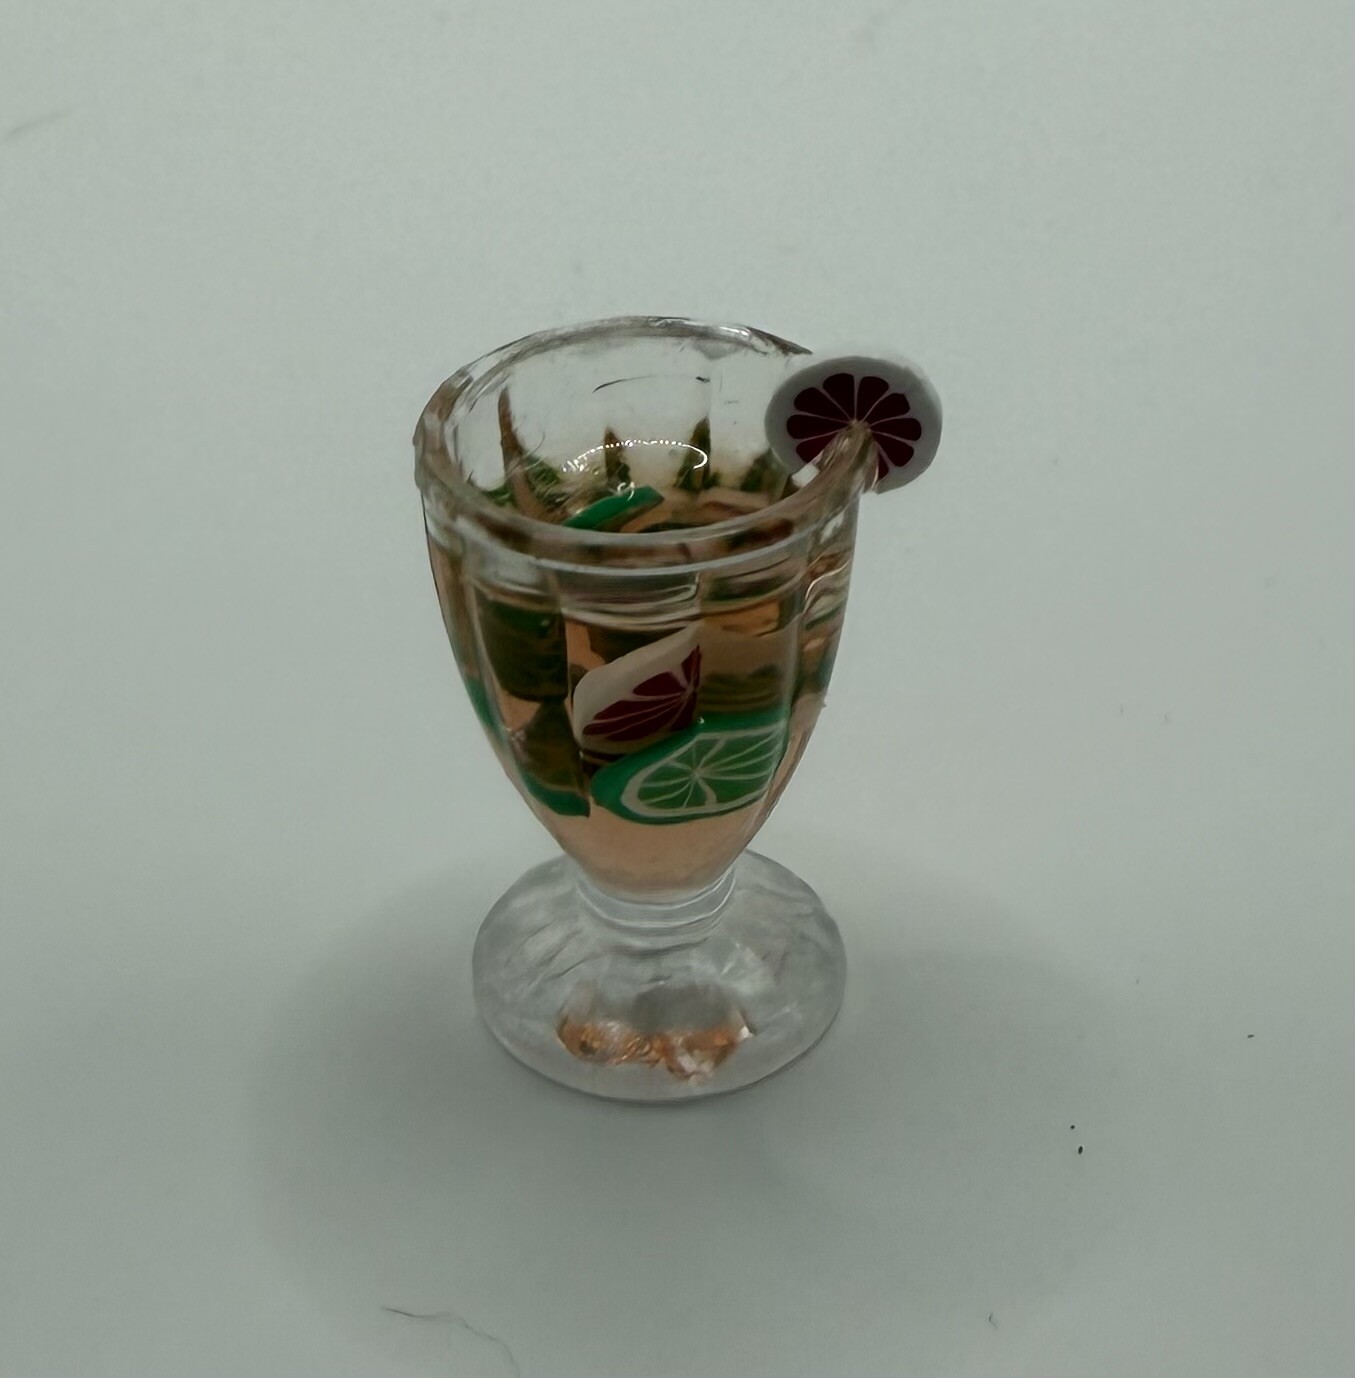
For the final touch, I cut one of the fruit slices into a little wedge shape, dipped the edge into resin, and cured it onto the rim of the glass like a garnish. It ended up being one of my favorite details because it made the whole piece look more like an actual miniature drink.
I also noticed a few tiny bubbles while working with the resin. I popped the ones I saw with a toothpick before curing, but a couple probably stayed behind. At this scale, though, they almost look like carbonation bubbles in the drink, so I didn’t mind them at all.
If you’ve ever wanted to experiment with resin in miniatures, something tiny like this is actually a great beginner project. You can buy little starter kits that include a small bottle of clear UV resin and a curing light pretty inexpensively, and it doesn’t take much space or equipment to start experimenting.
Have you ever tried adding resin details to a miniature build, or is there another small customization that makes a kit feel more realistic to you?