One Extra Light Made A Big Difference In Rolife Street Scene
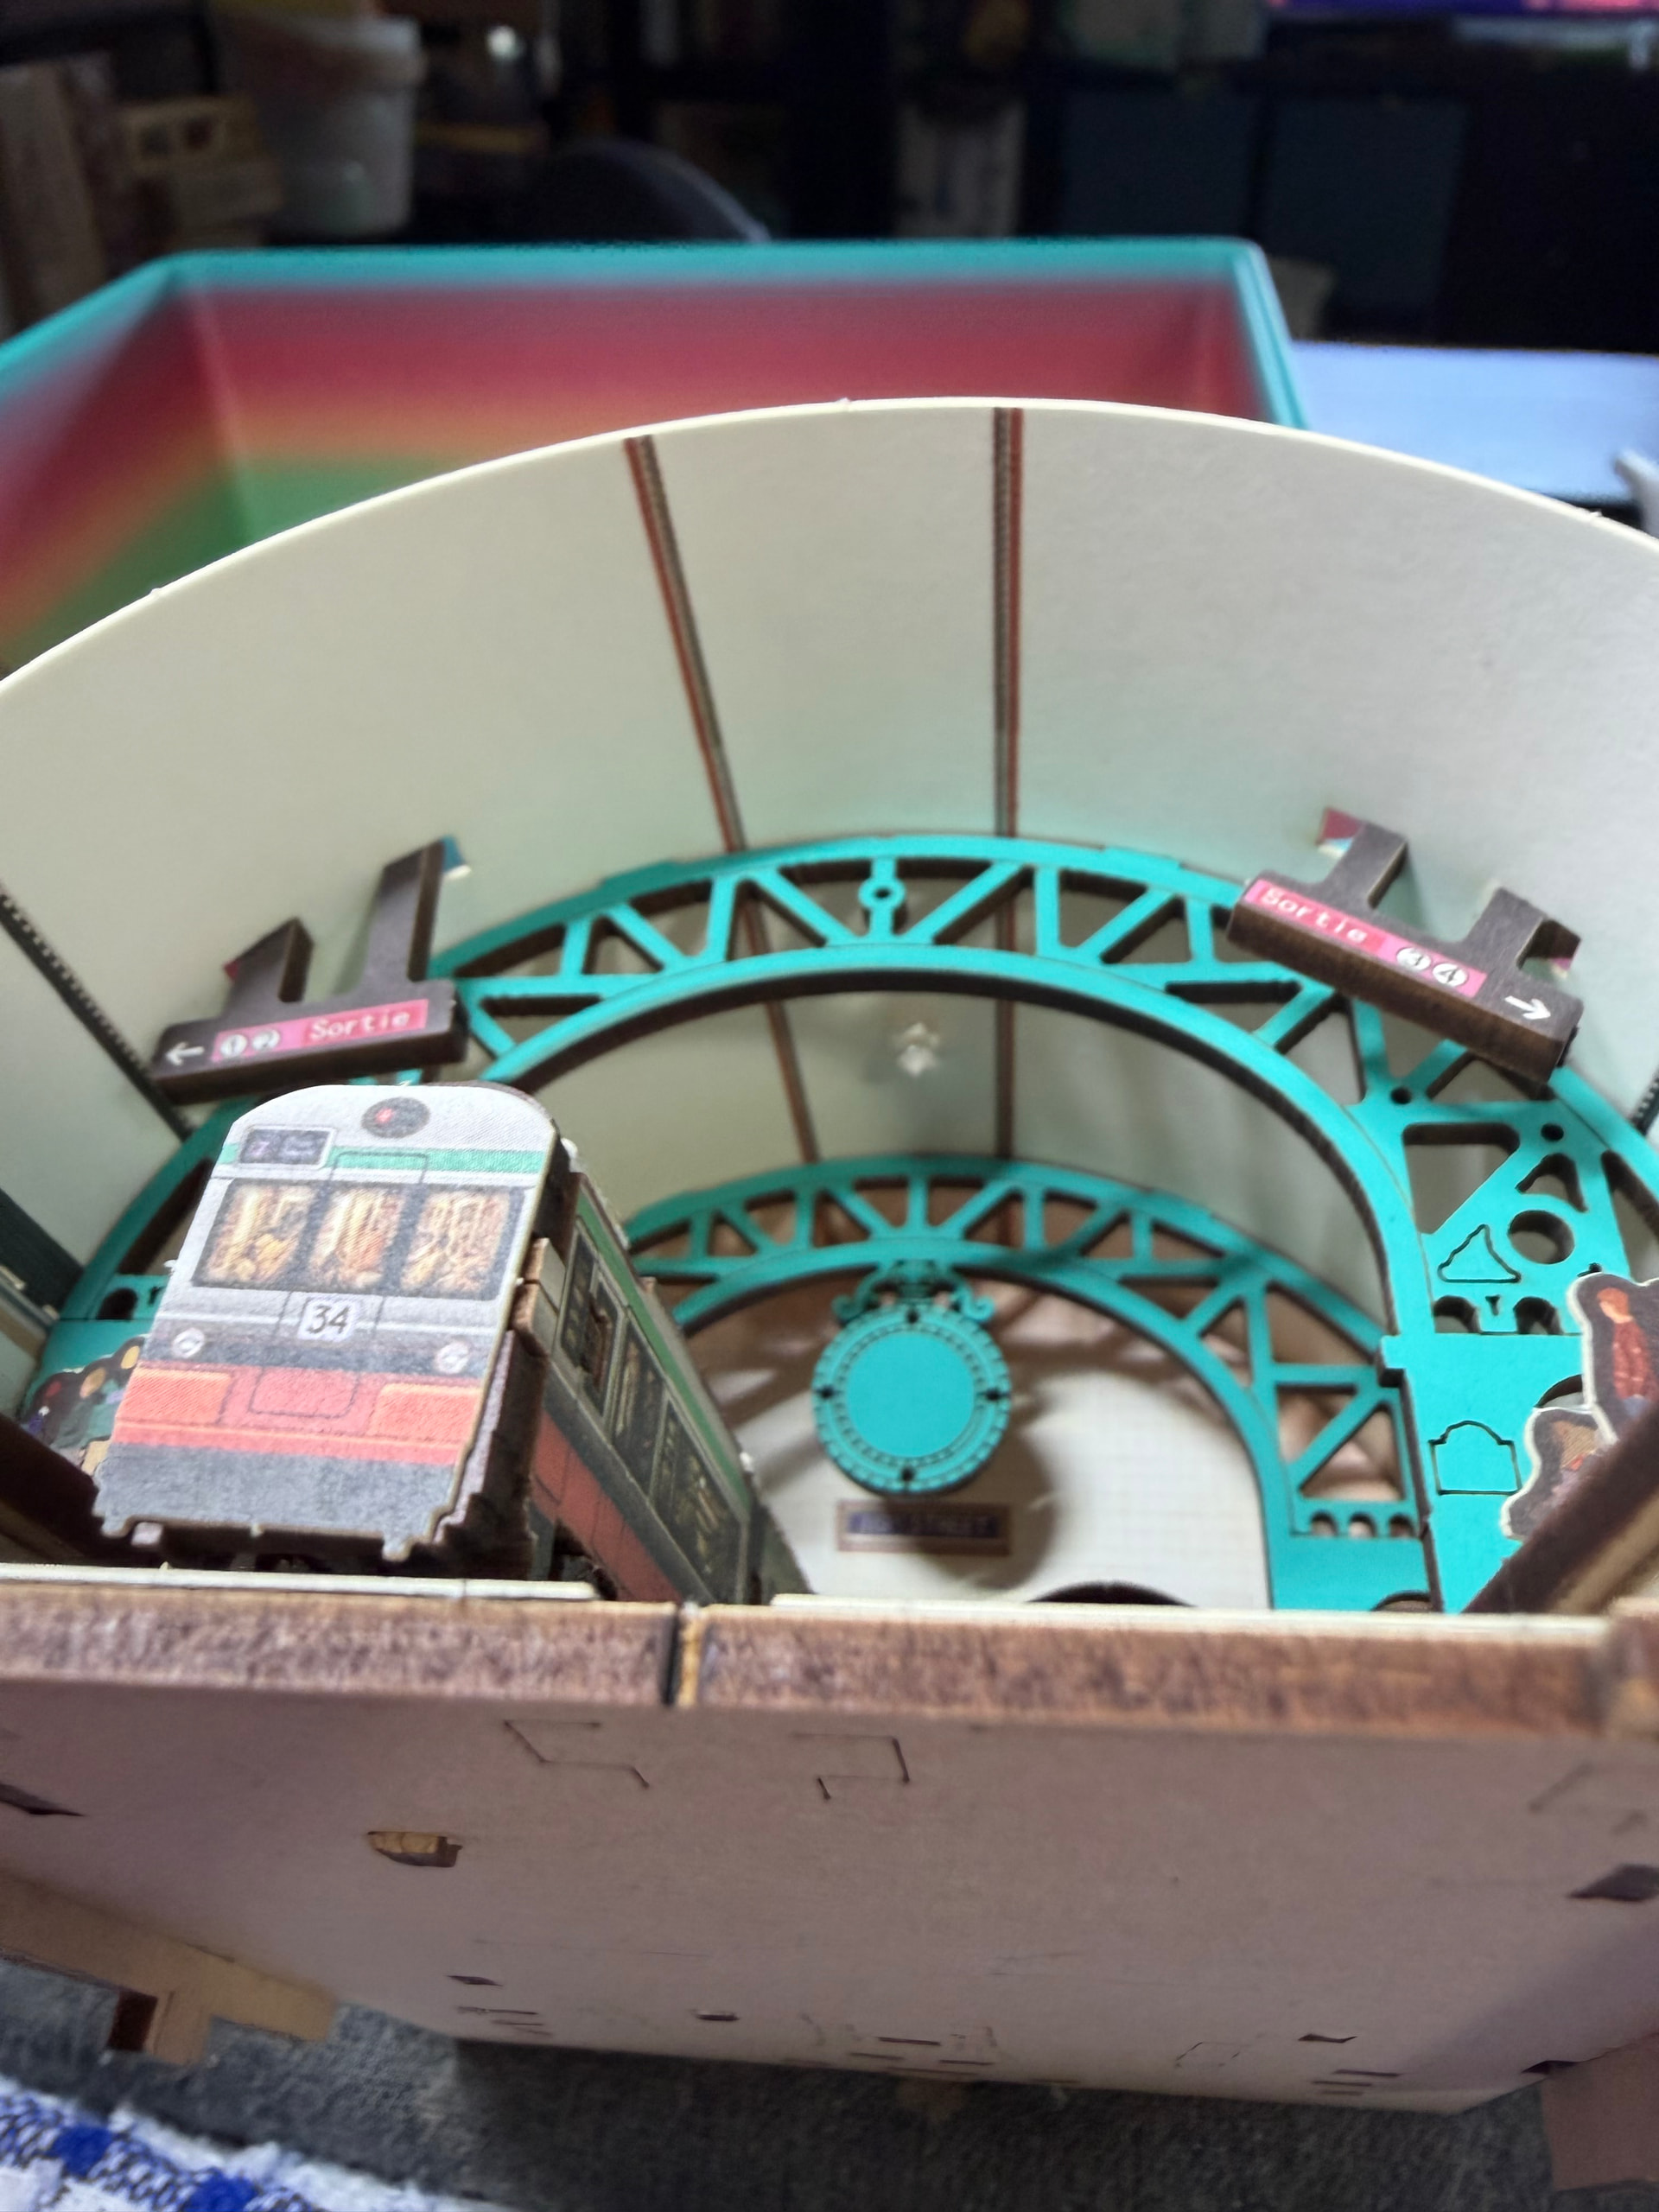
One thing I really appreciate about this community is how willing people are to share their experiences. Most recently, @Tkaplan mentioned that the tunnel in Rolife Street Scene felt pretty dark, and that was exactly the push I needed to make this my next modification. Thank you for the inspiration!
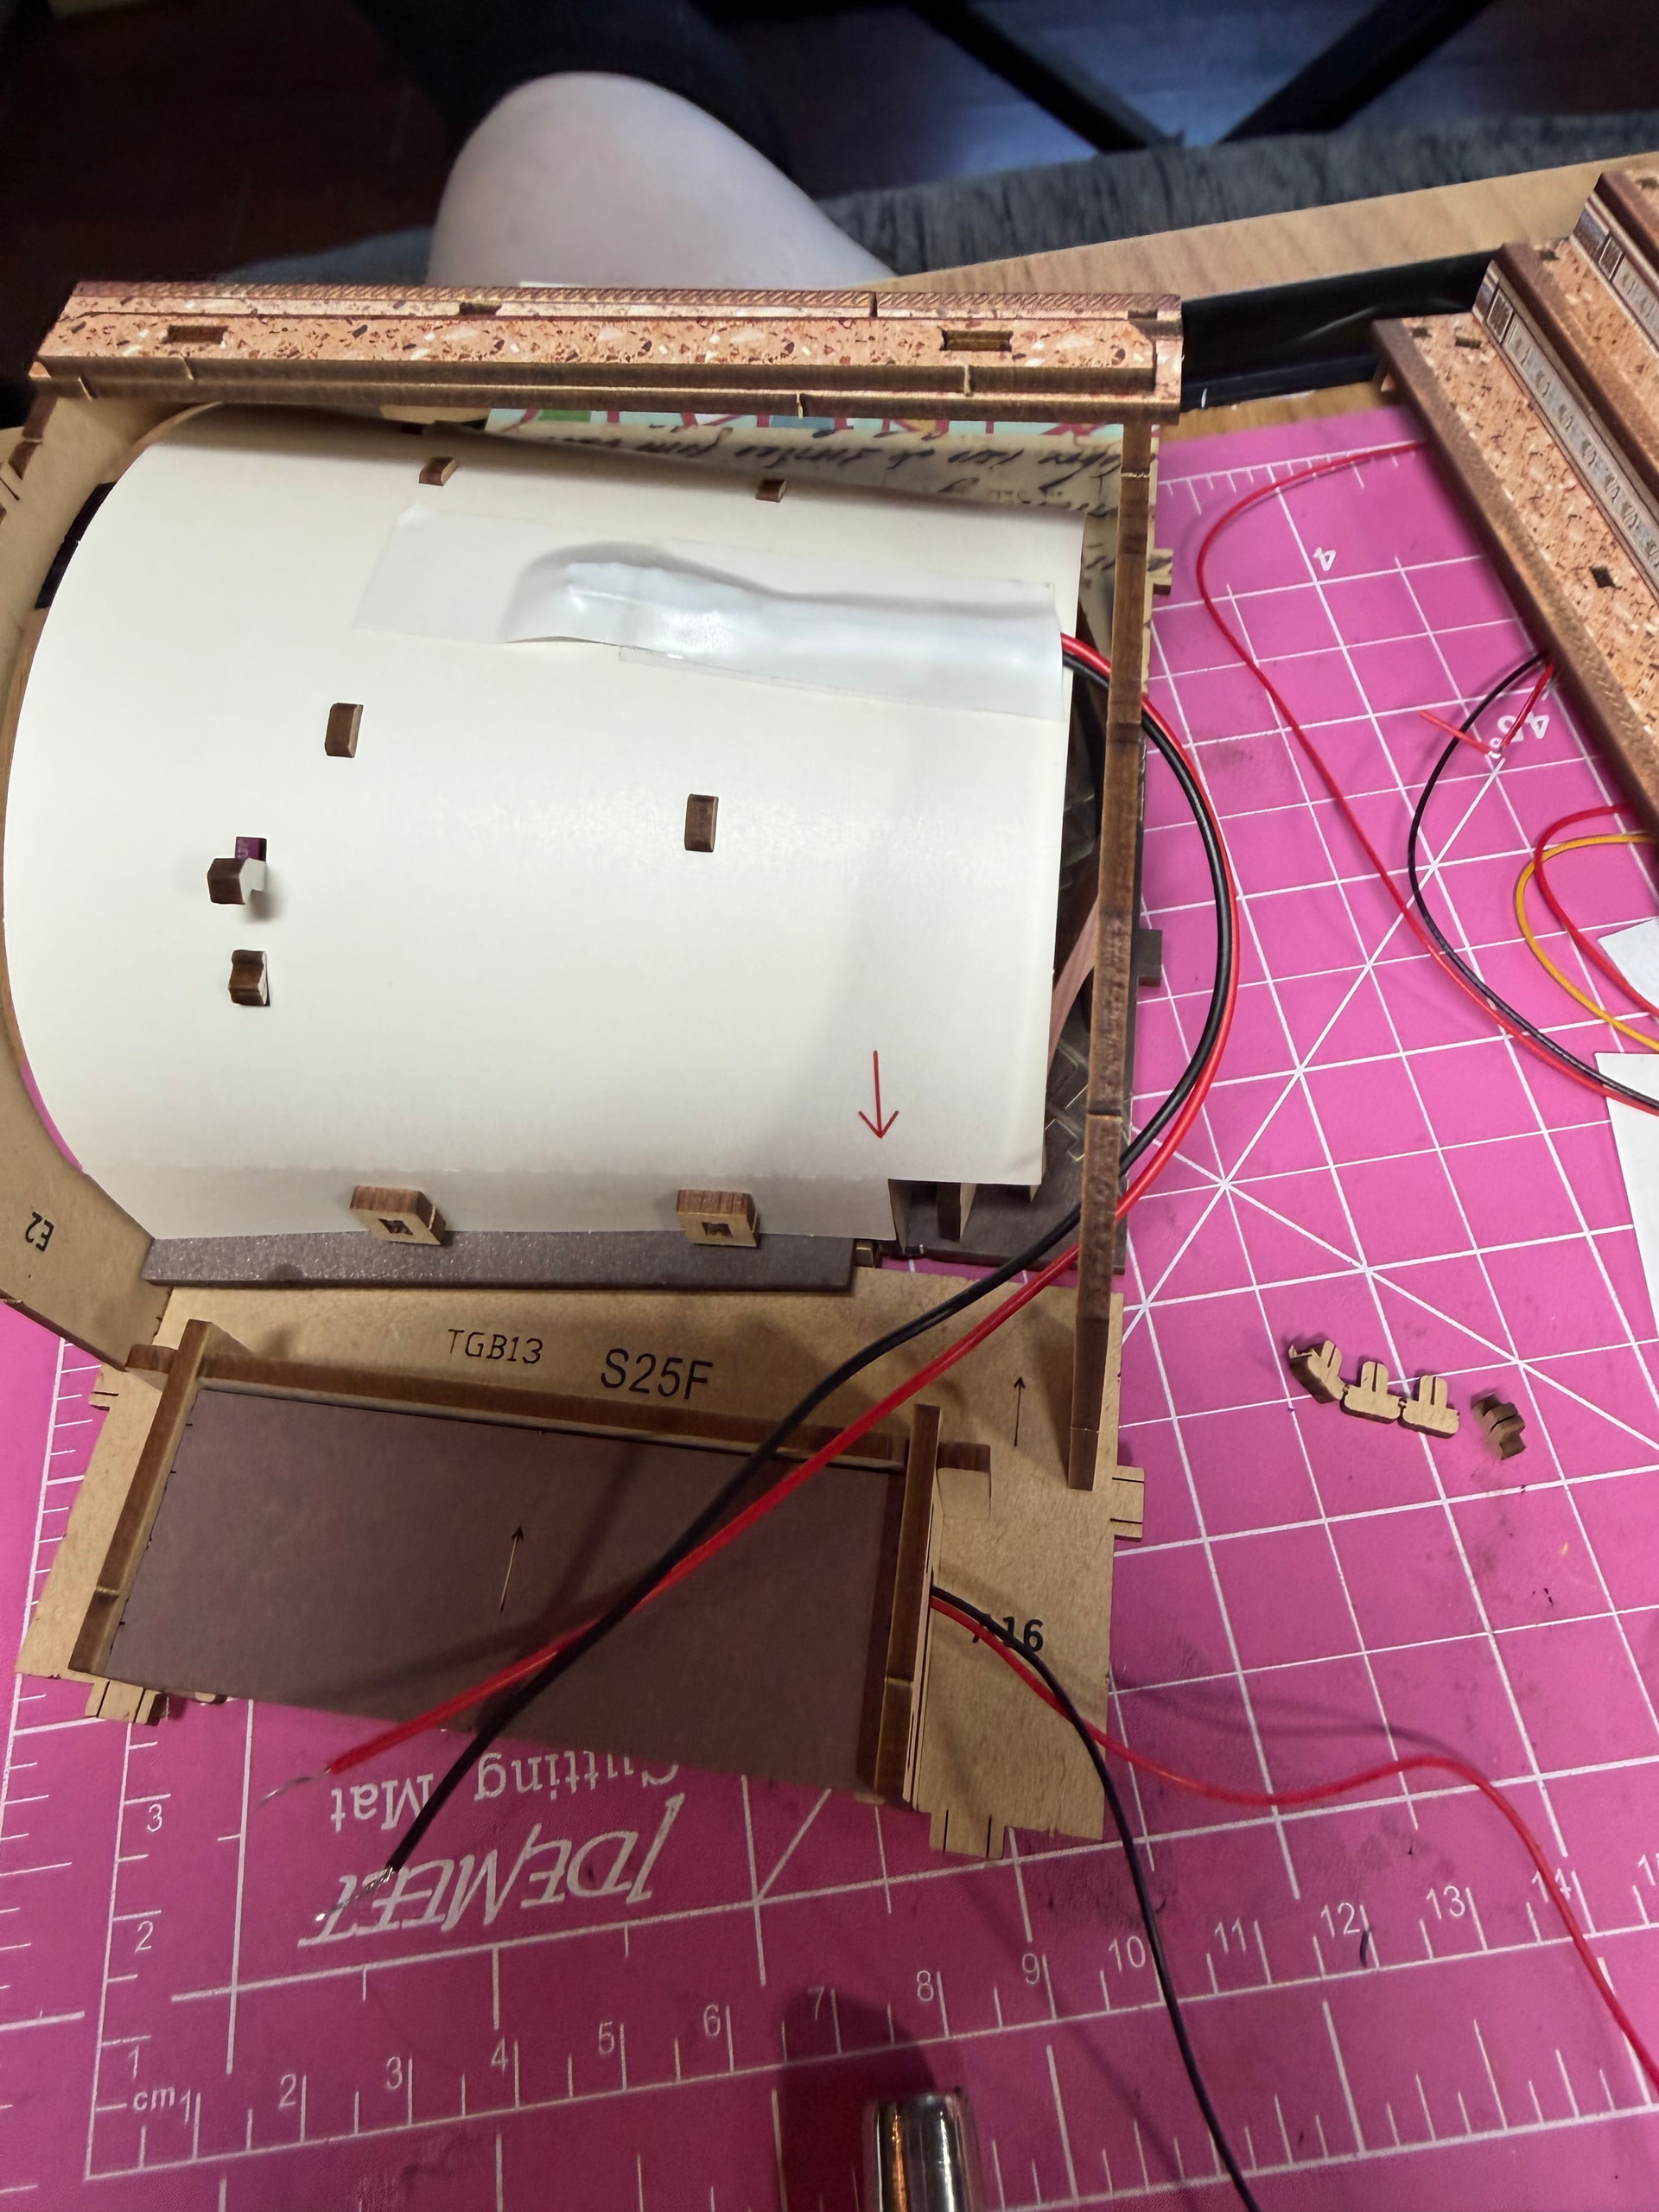
This section of the build happens fairly early, so I had to read ahead in the instructions and decide how I wanted to tackle it before everything was closed up.
This kit has two lighting modes controlled by the touch switch. The first tap turns on one set of lights, the second tap turns on the other set, and then you press and hold to turn everything off. To me, the upper book nook lighting almost suggests daylight, while using only the building lights gives the scene more of a nighttime feel. Since tunnels naturally fit better into a nighttime scene, it made perfect sense to connect my extra tunnel light to the building lights.
The tunnel ceiling is made from a thick cardstock material, which made this a pretty easy modification. I decided I wanted the light near the center of the tunnel. It isn’t perfectly centered, but it’s close enough that I’m happy with it.
I made a very small X where I wanted the light to shine through. I used a pre-wired LED that I purchased on Amazon and bent the LED to about a 90-degree angle.
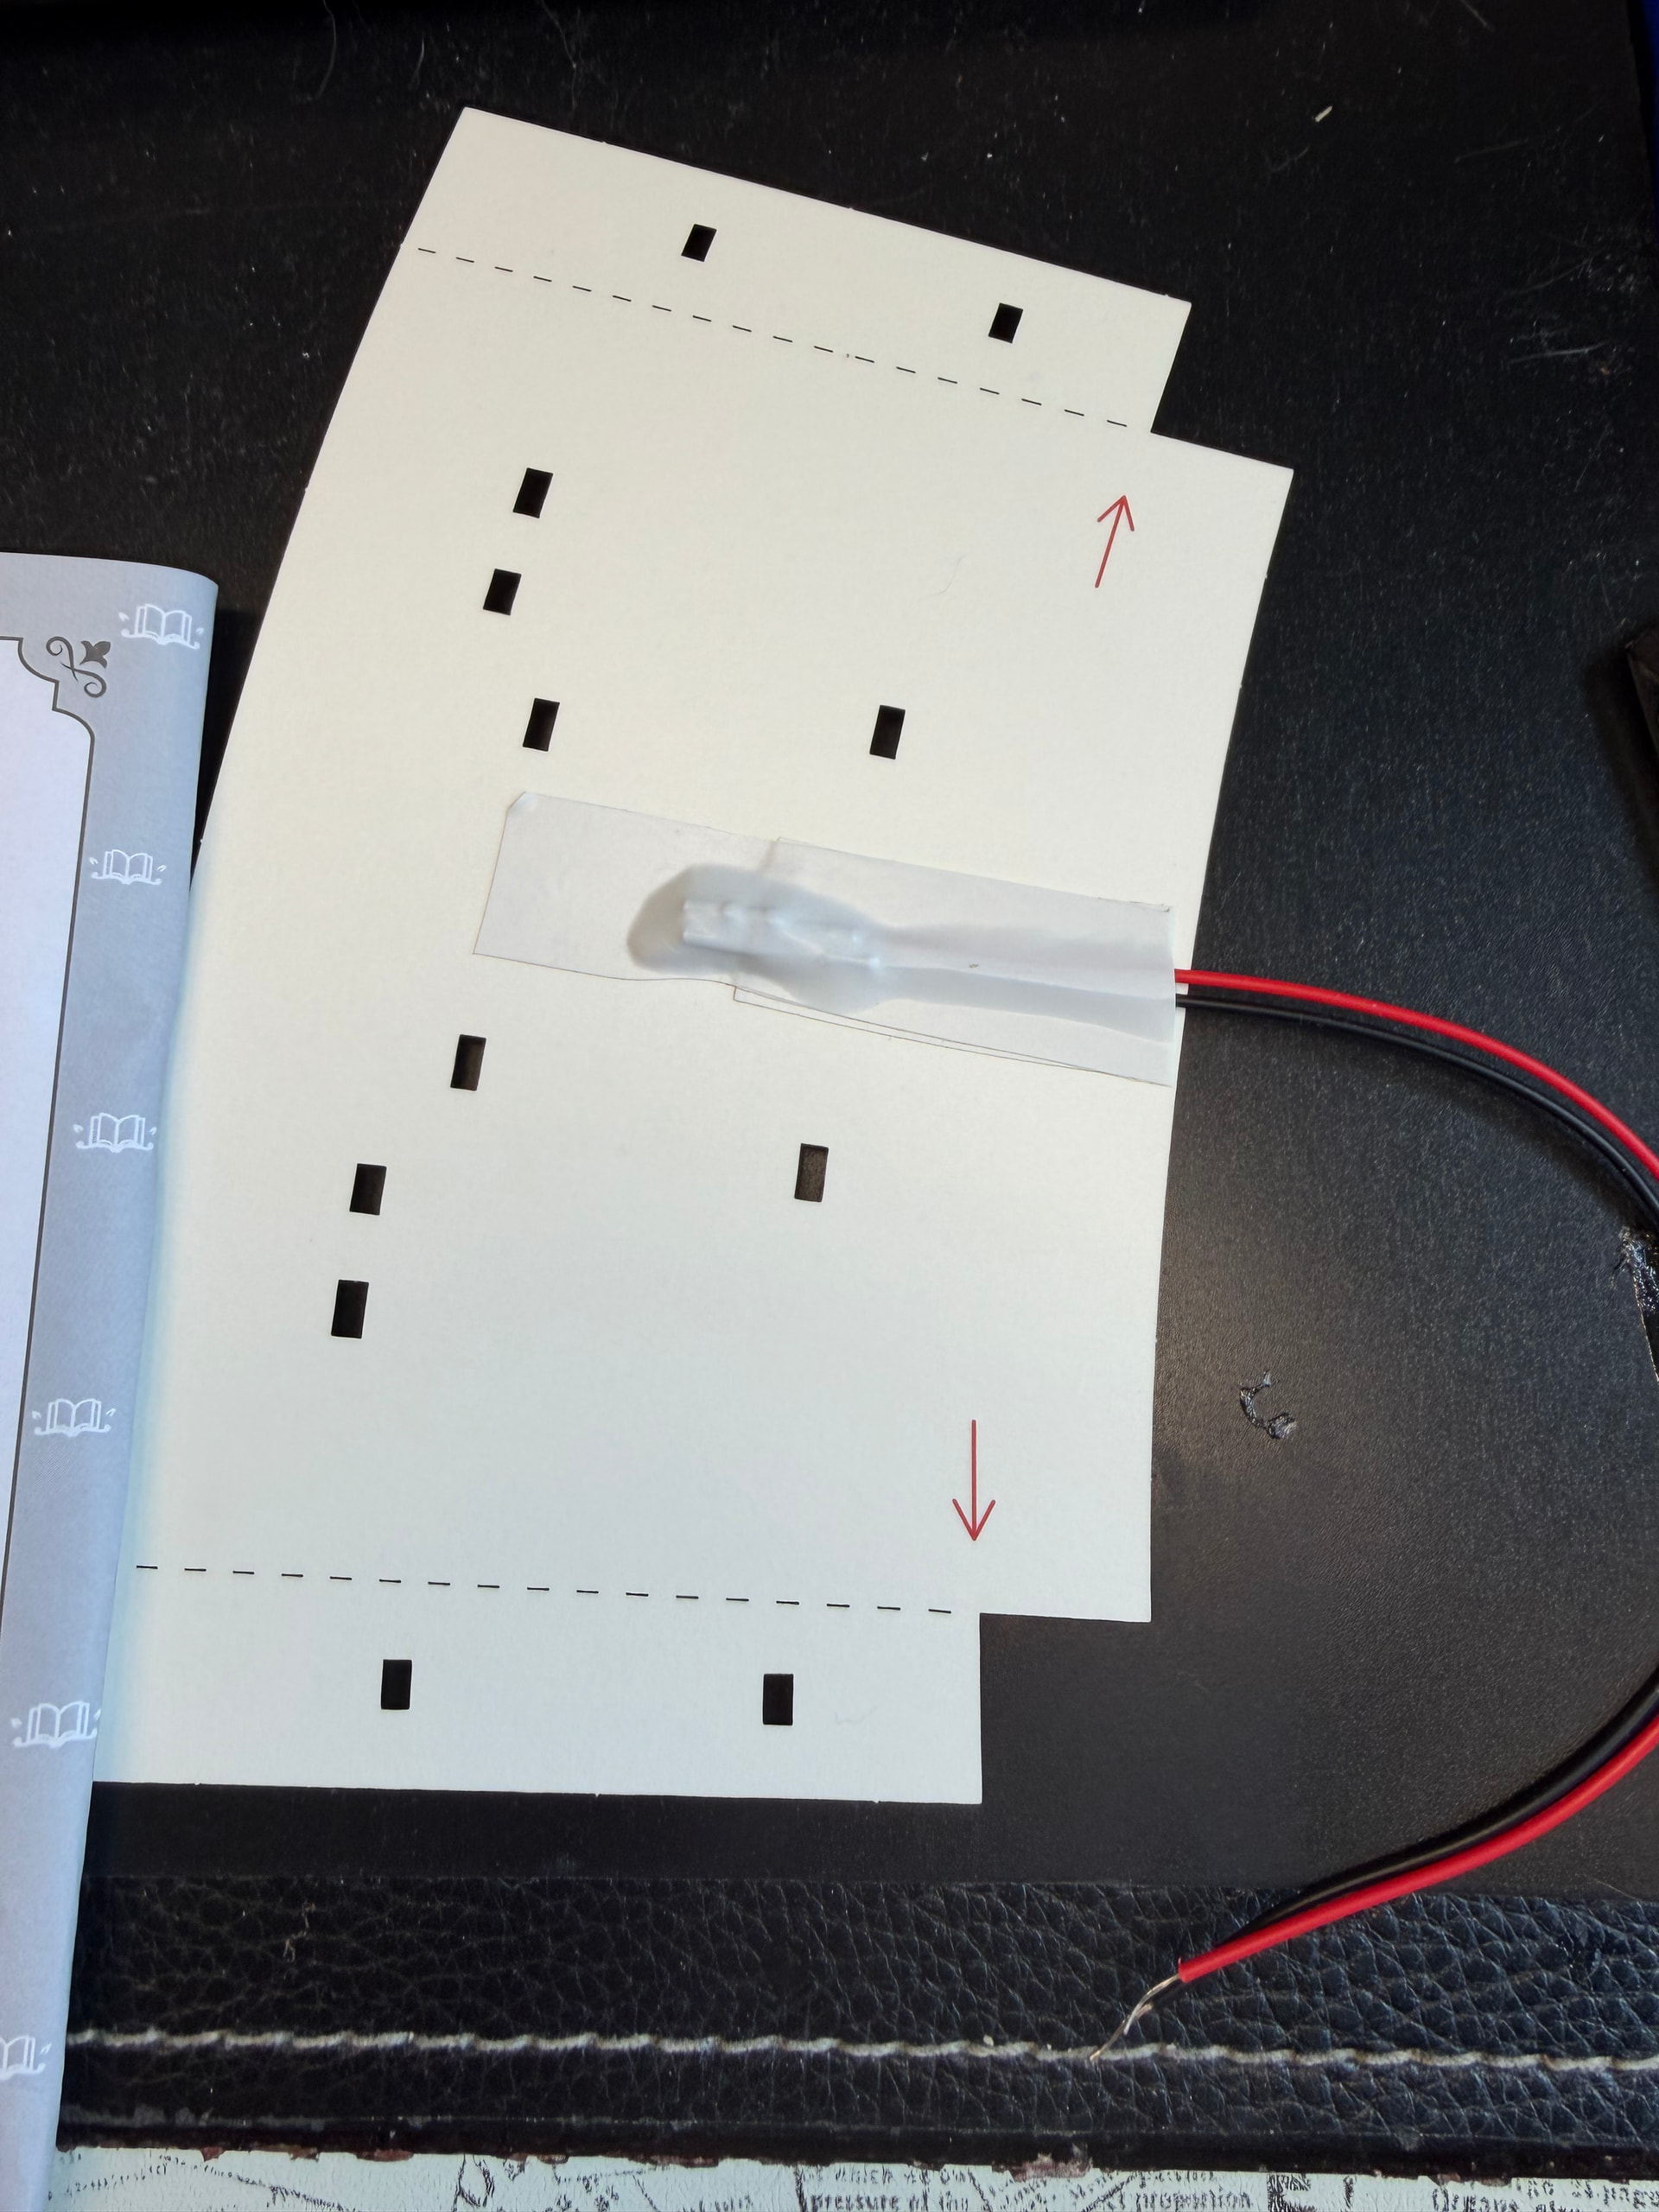
Since this piece is cardstock, I didn’t want the black and red wires showing through. I happened to have a package of multicolored electrical tape that included white, so I laid down a strip of white electrical tape first.
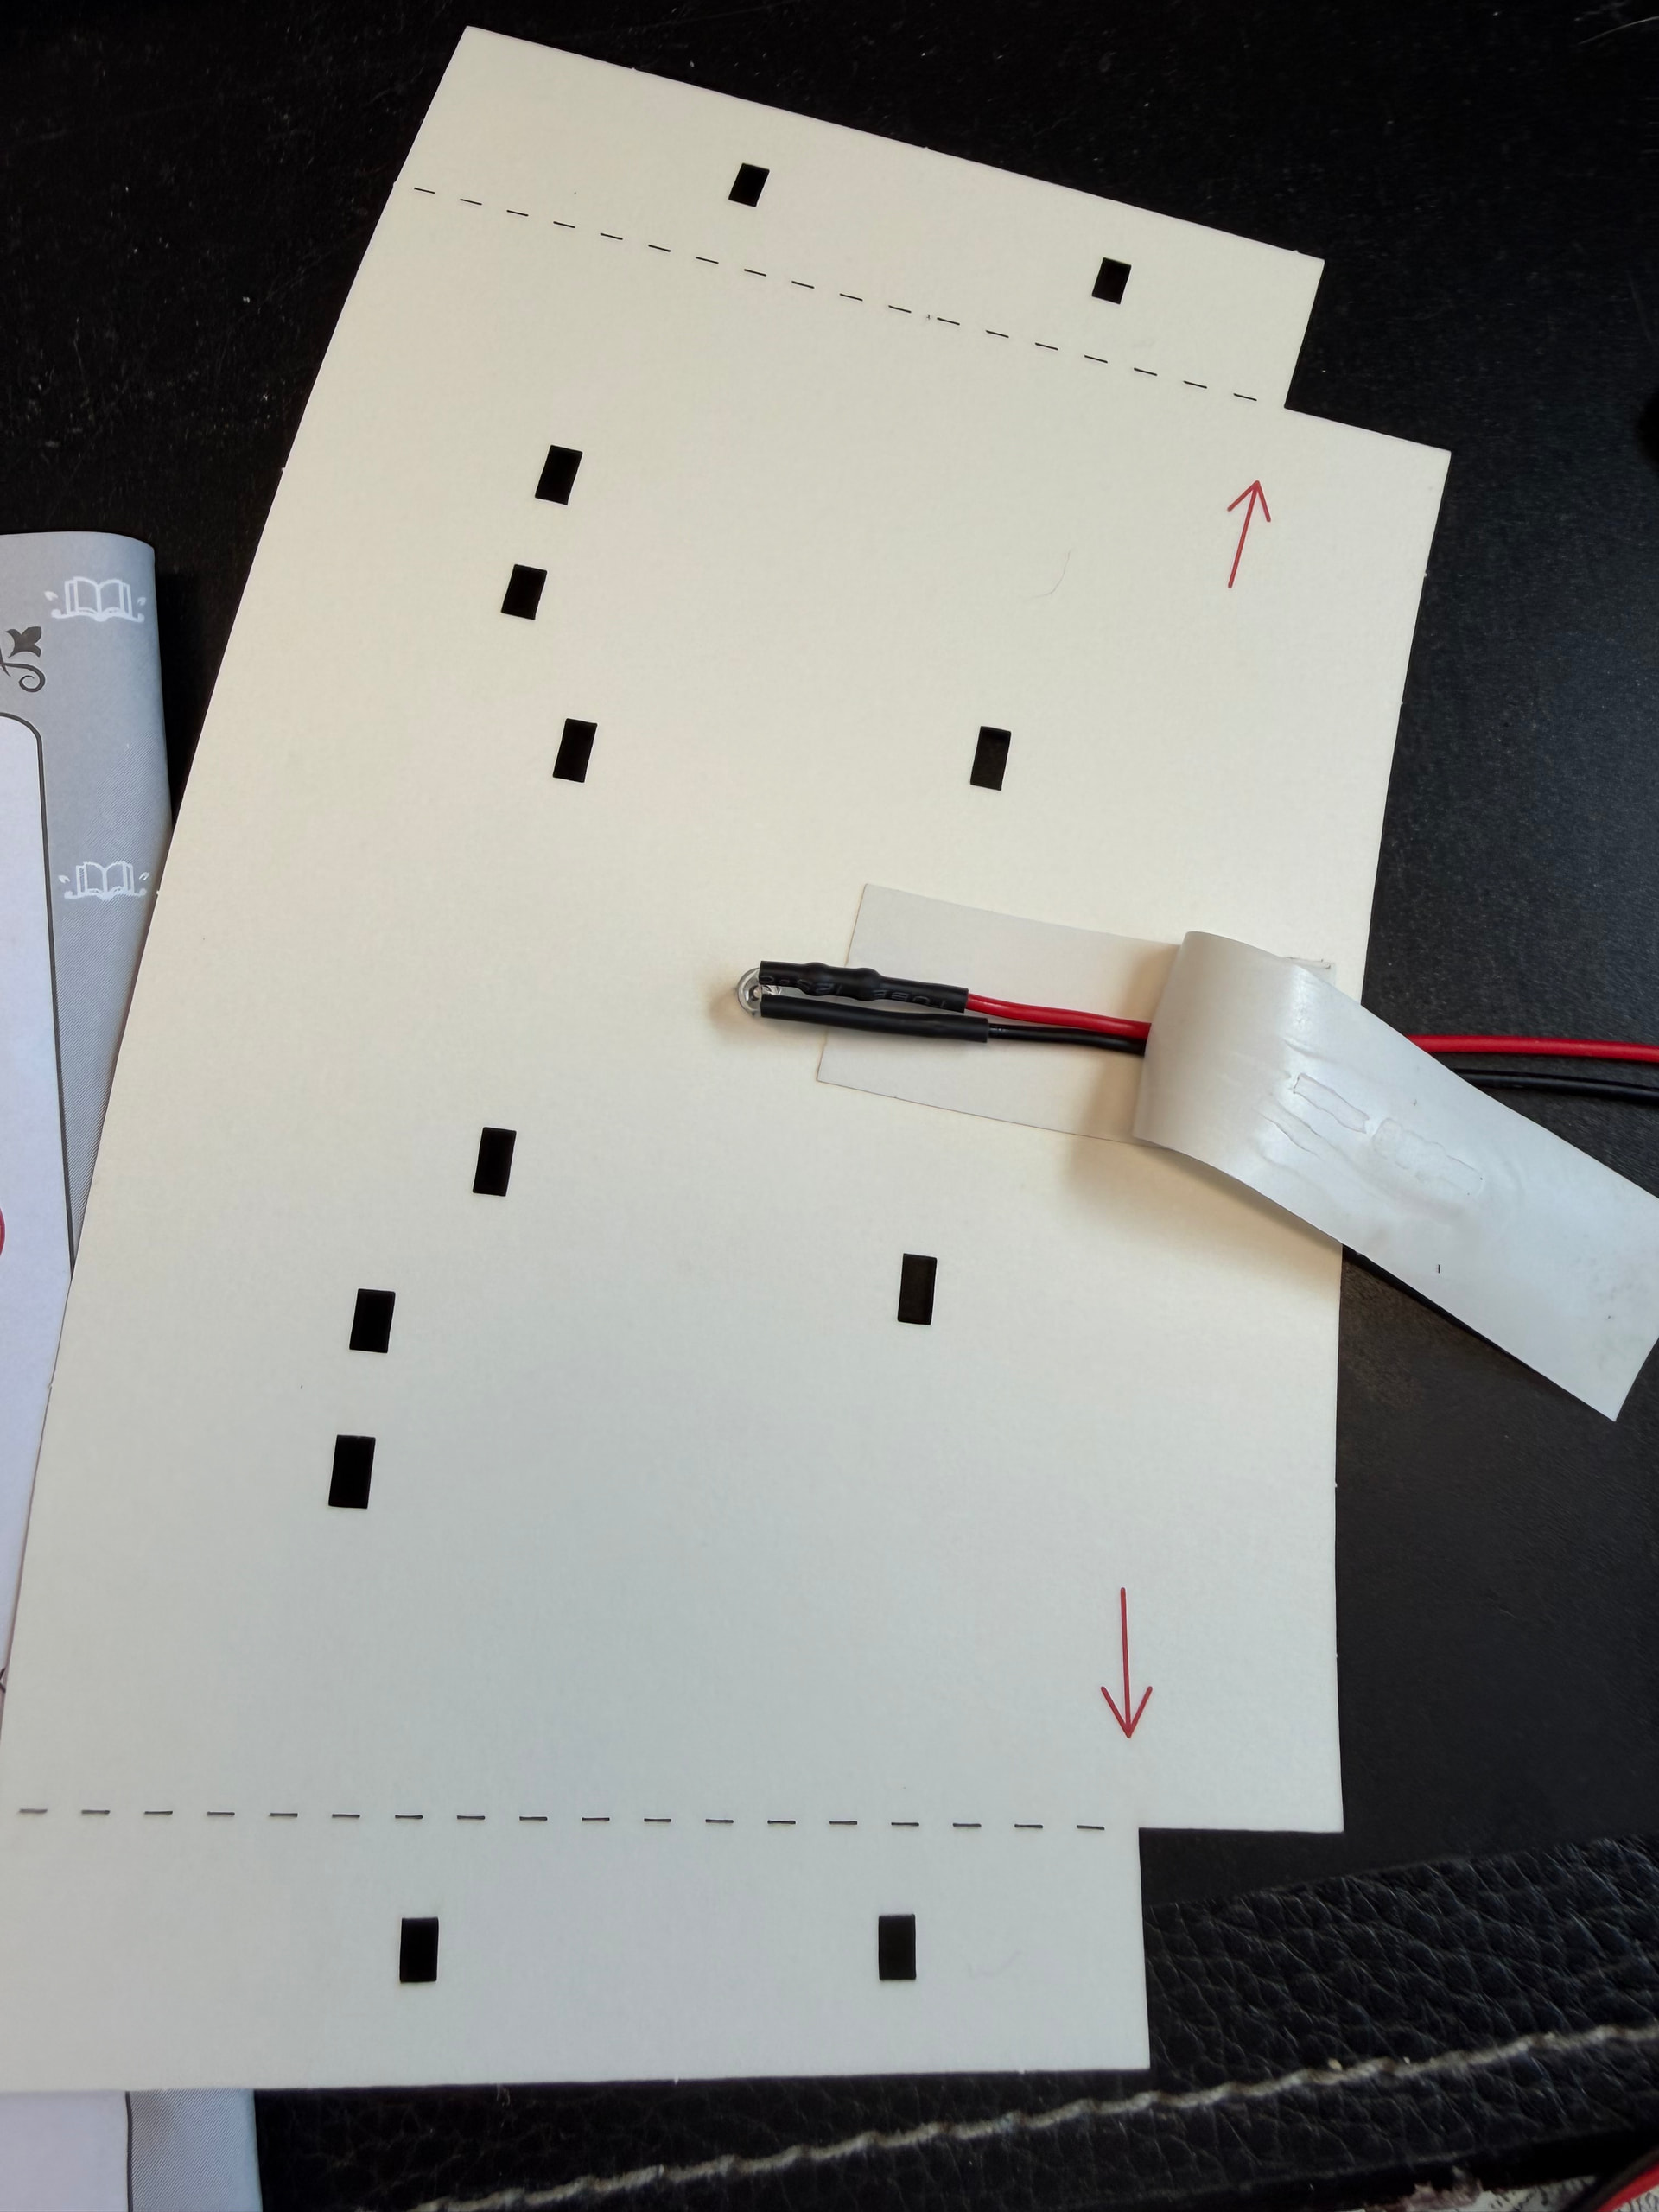
Then I pushed the LED through the small X opening. Making an X instead of a hole helped hold it in place. After that, I added another strip of white electrical tape over the top to secure everything.
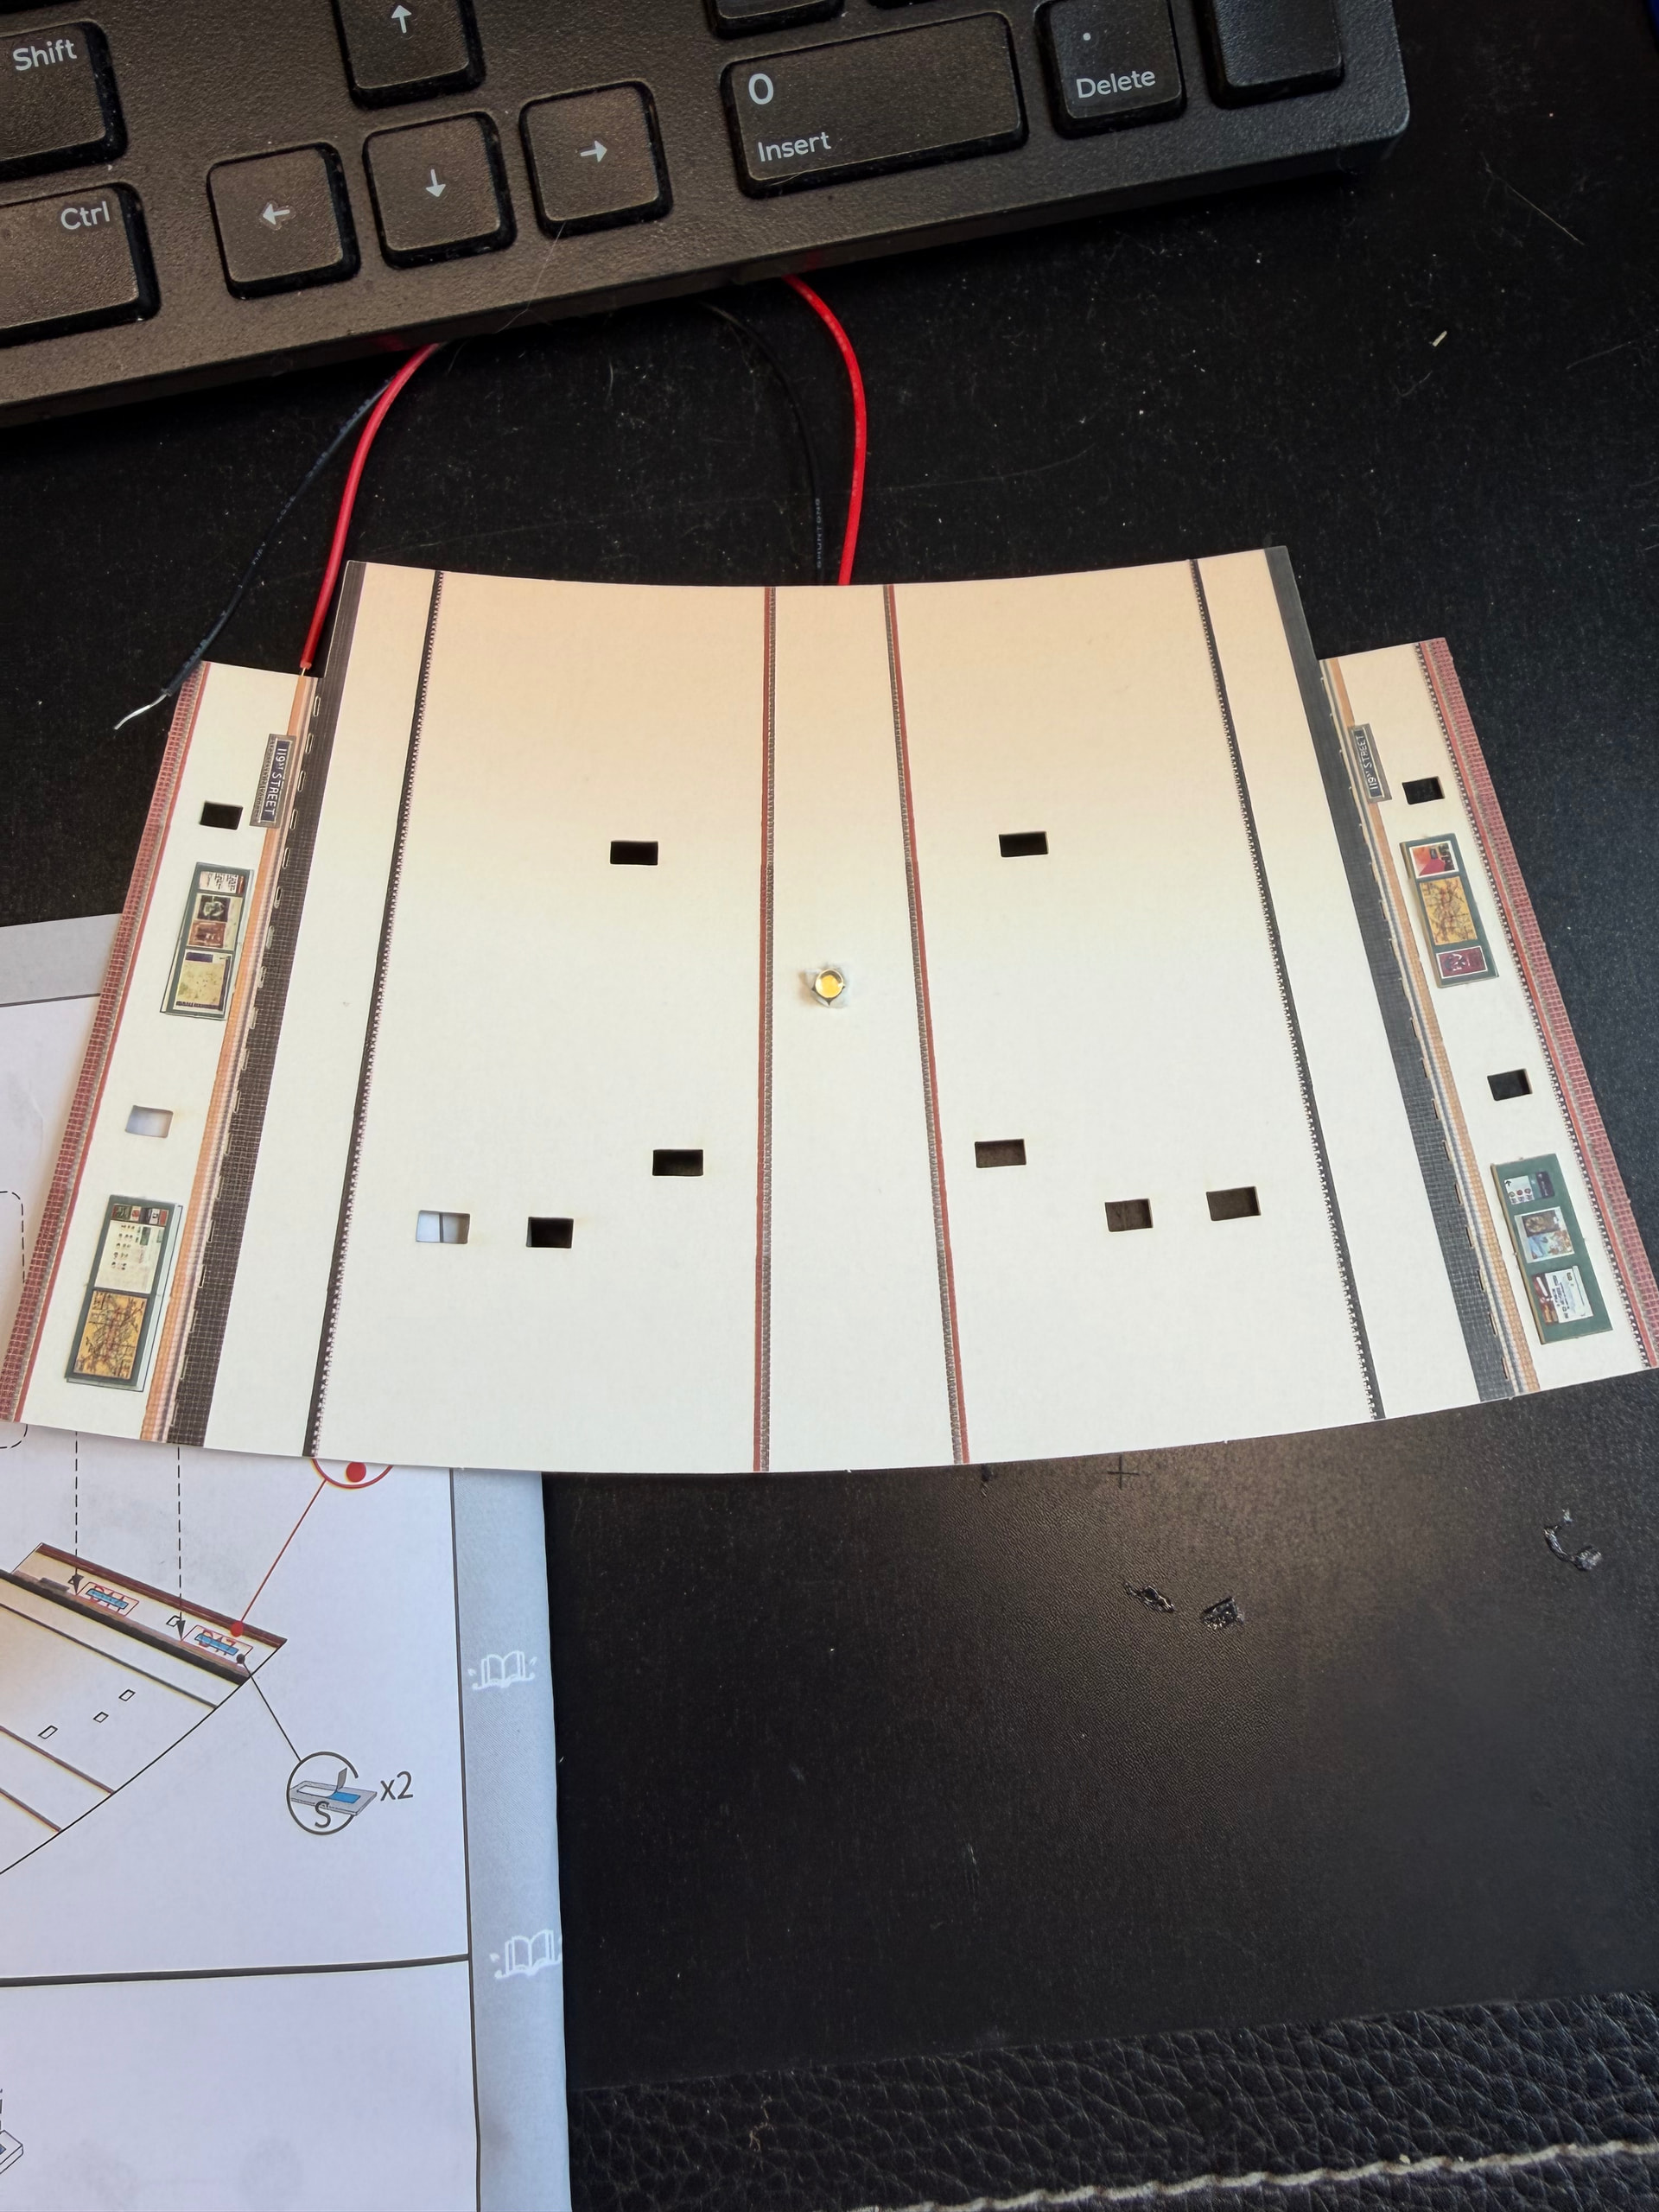
Before moving on, I did a power test to make sure it worked. In hindsight, I probably should have tested it before installing it, but at least I caught it before the entire structure was assembled.
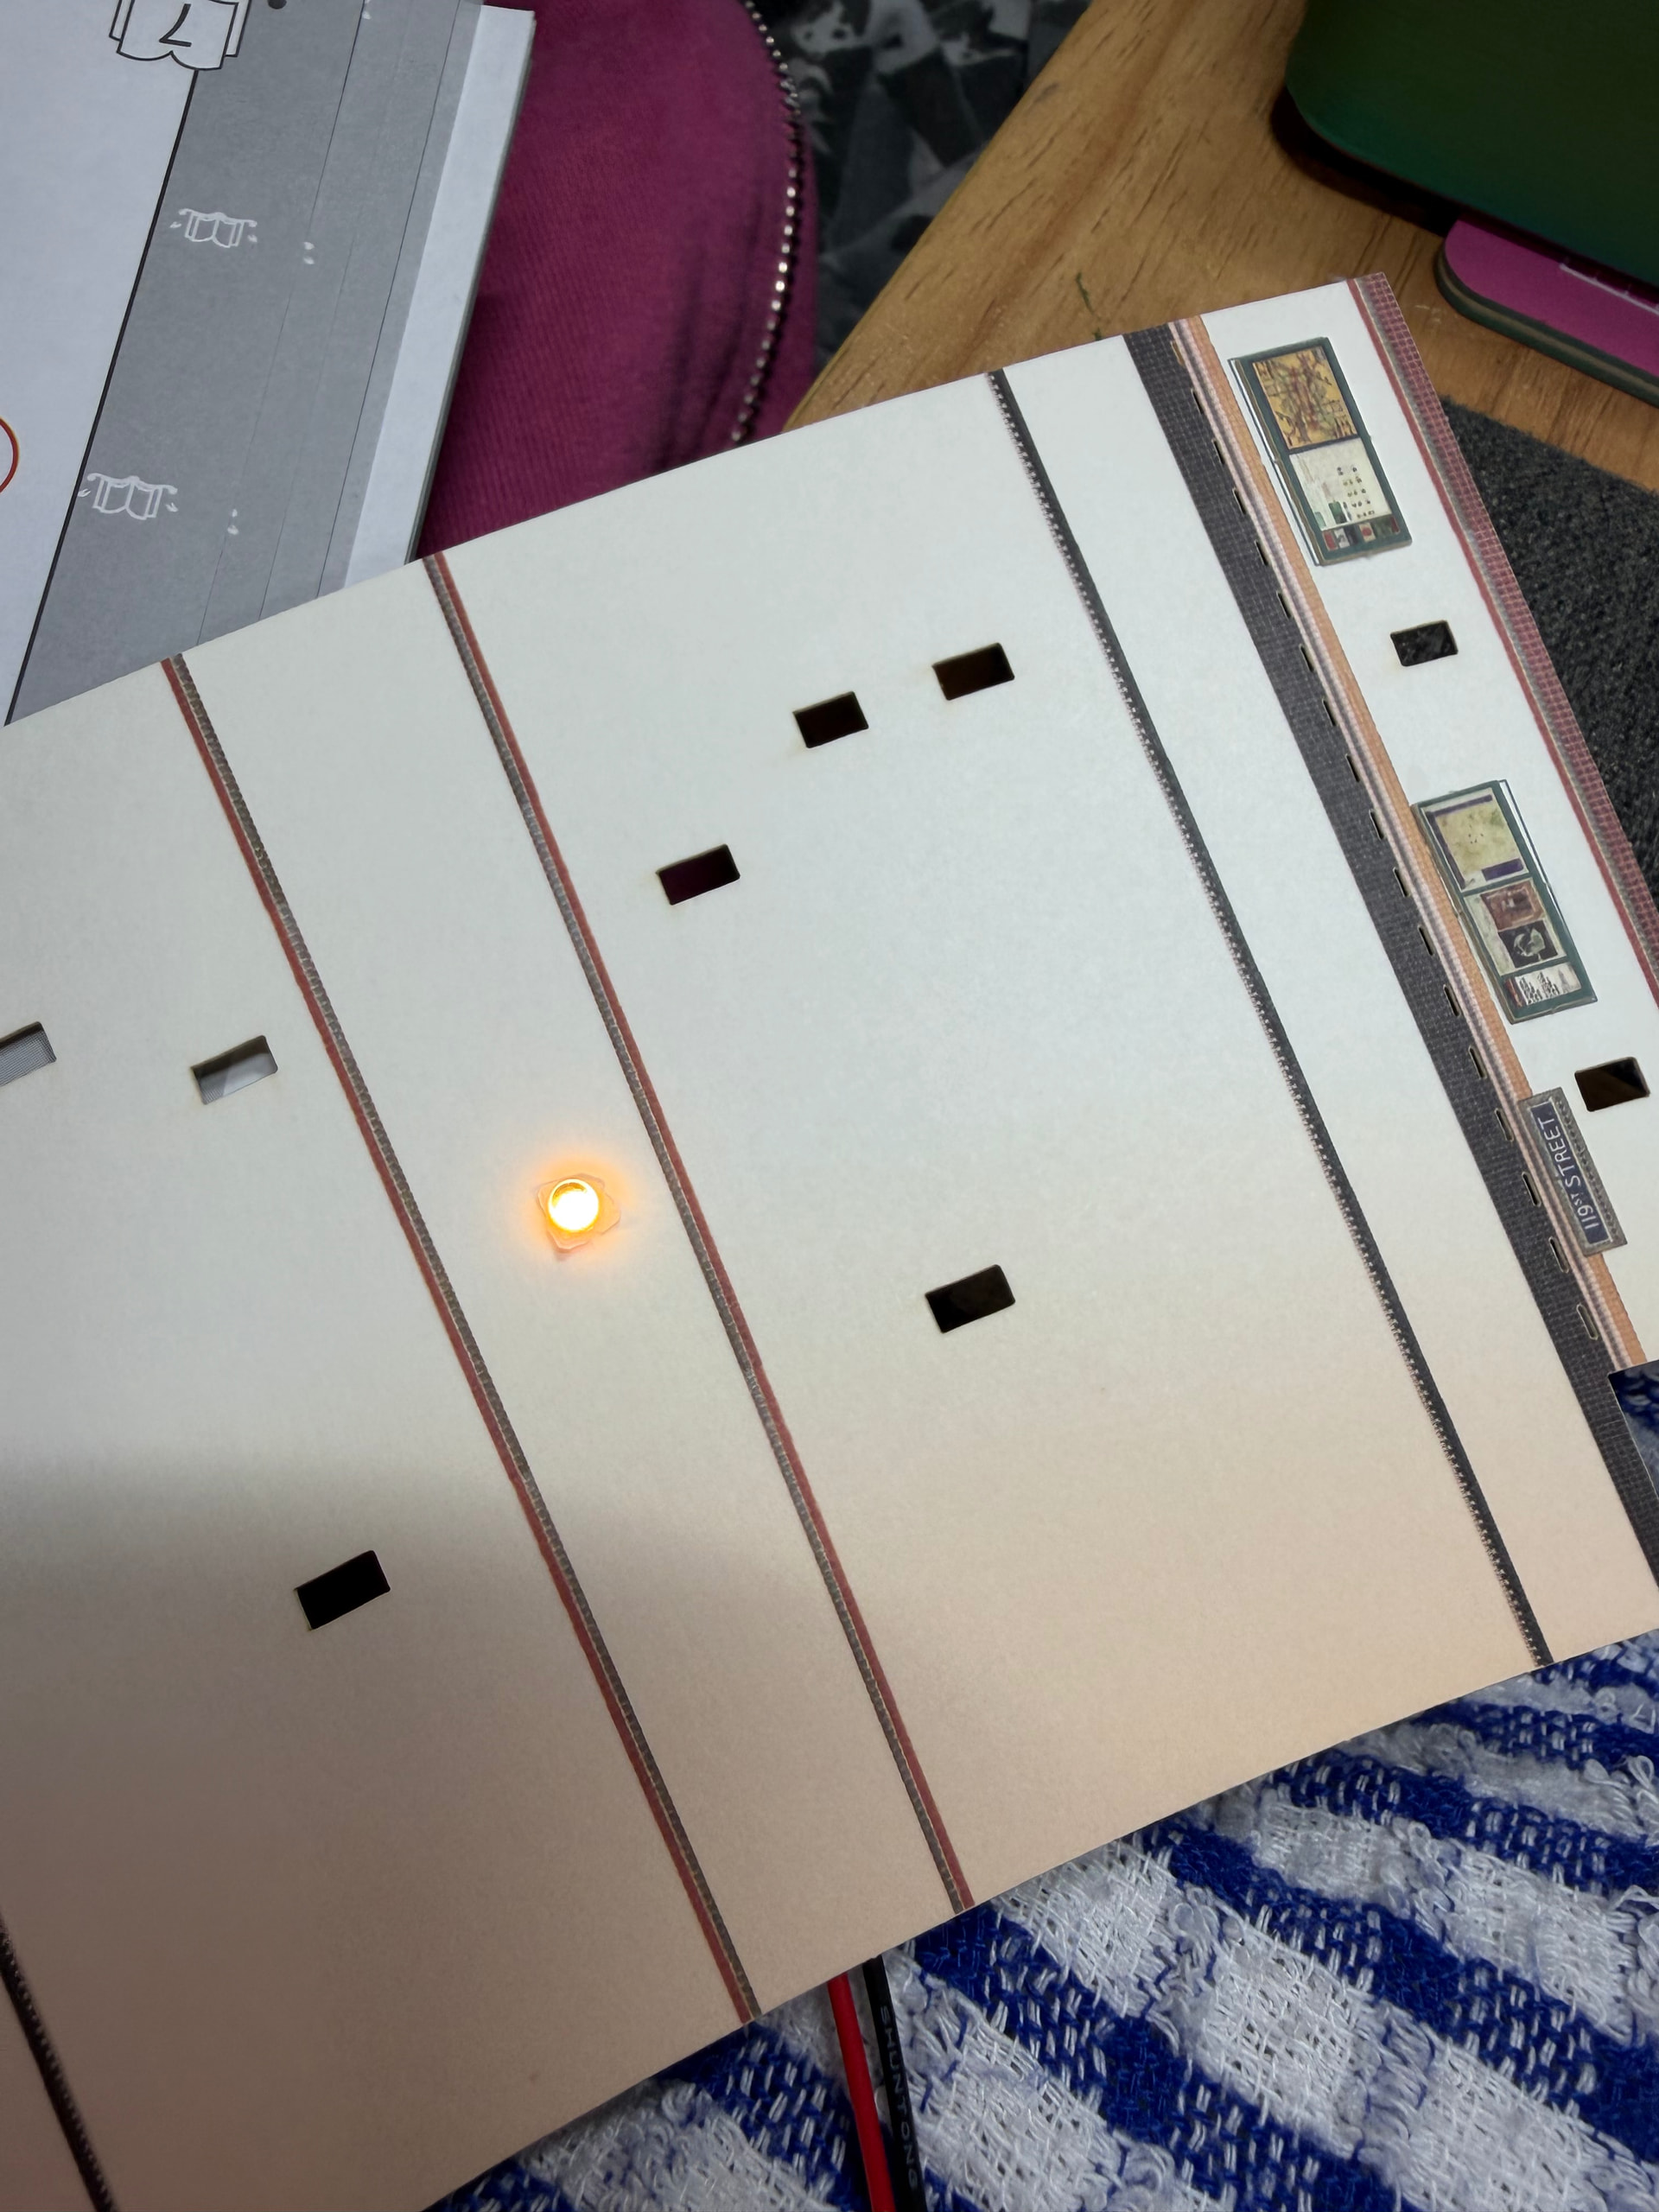
The difference was immediately noticeable.
This build is still in progress, but I already love the extra depth this adds to the tunnel area.


These last two photos really show why I wanted to do this. With the extra light on, so many more details become visible instead of disappearing into the shadows.
I love when one simple suggestion from another builder turns into a modification that completely changes how I experience a kit.
Have you ever added your own lighting to a kit, or anything similar?