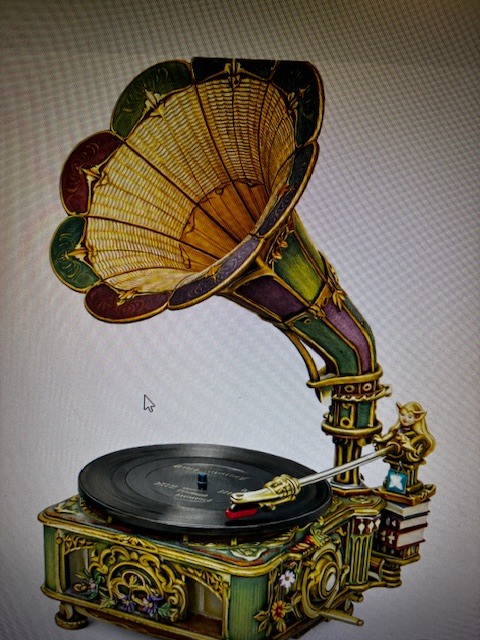
As promised I finished building the ROKR Gramophone was one of the most time consuming and rewarding DIY projects I’ve ever taken on. It wasn’t a smooth “snap-it-together” kind of model. It was an adventure at every stage — but that’s exactly why finishing it felt so satisfying.
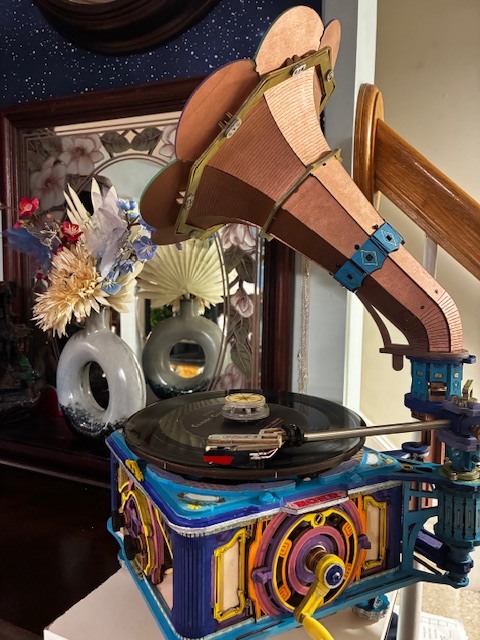
 ROKR Gramophone Build Experience

Inspiration Paint Idea the speaker parts.
Place that small Bluetooth speaker inside and you are good.

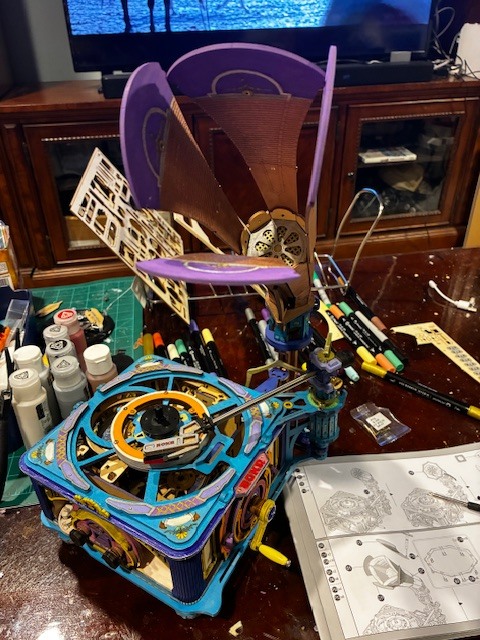
A lot of small painting and touches of expression
It fits perfectly here and I can let it play any song from my phone.
The Warped Wood Struggle
The biggest challenge right from the start was some of the base wood was warped and I had to steam and make flatter. On a decorative model, that might not matter much — but on a mechanical build where gears, shafts, and rotating plates must align precisely, even tiny deviations make a difference.
There were moments where I had to carefully sand edges, gently bend panels back into shape, and dry-fit components multiple times before committing with glue. Alignment became everything. If one gear sat even slightly off, the whole drive system would grind or stall.
It wasn’t impossible — just painstaking. Also note, I bought this on FB marketplace and the seller could of stored it in a humid area etc.
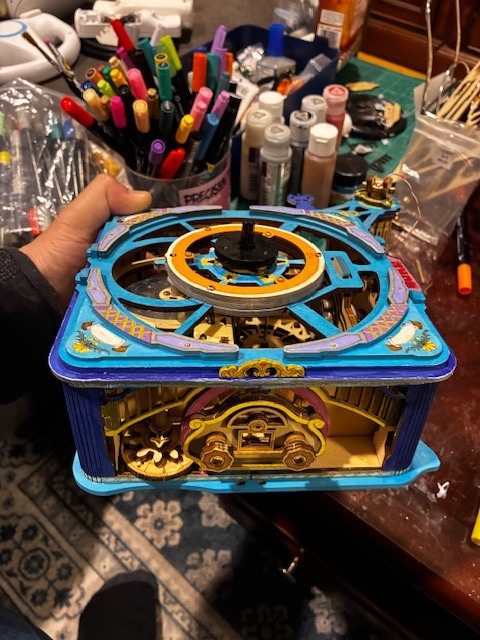
Hours of Painting & Fine Detailing
I also decided to paint parts of the gramophone to give it a more realistic antique finish. That added hours to the build. Between priming, layering color, letting pieces dry, and carefully avoiding mechanical contact points, the project stretched far longer than the manual estimated.
But honestly, the painting was part of the fun. Watching plain plywood transform into something that actually resembled a vintage gramophone made the extra effort worthwhile.
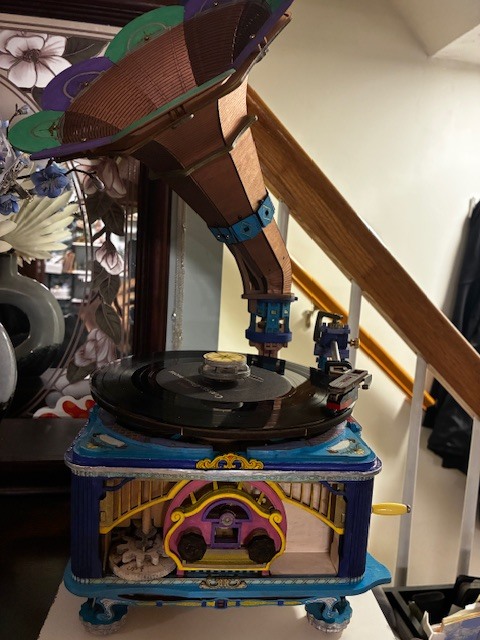
The Alignment Marathon
Getting the turntable and tonearm system aligned correctly was probably the most delicate part of the build. Everything depends on smooth rotation:
-
Gear mesh tension
-
Belt alignment
-
Turntable balance
-
Needle pressure
It took multiple test spins and micro-adjustments before everything ran consistently. There were definitely moments of “Why is this rubbing?” and “Why did it slow down again?” But once it finally spun smoothly, it felt like cracking a code.
33 RPM vs 45 RPM – A Surprising Discovery
One of the more interesting experiments came when deciding between 33 RPM and 45 RPM speeds.
At 33 RPM, it sounded okay — but slightly soft and less lively. When I adjusted it to 45 RPM, the difference was immediately noticeable. The audio projection felt stronger, clearer, and more energetic. The mechanics simply seemed happier at that speed.
After testing both, 45 RPM just felt right for this build.
This is the ROKR record at 45 vs 33. 33 was too slow. It sounds very good.
- 45 speed

Playing a 10-Inch Record
I honestly didn’t expect much when I first placed a 10-inch record on it. This is, after all, a wooden mechanical model — not a high-fidelity audio system.
But when the singing voices came through clearly, I was genuinely surprised.
The vocals were crisp and far more defined than I anticipated. There’s something magical about hearing music amplified mechanically, without electricity doing the heavy lifting. It felt raw and authentic — like stepping back in time
- Improved Version

- Final Fantasy without improvement but still beautiful.

The Autoplay Feature – A Total Game Changer
The biggest upgrade — and in my opinion, absolutely essential — is the auto play kit.
Using the manual hand crank works… but it’s inconsistent. Maintaining steady speed by hand is harder than it sounds. You’ll inevitably fluctuate, and that affects pitch and sound quality.
The autoplay mechanism completely changes the experience:
-
Consistent rotation speed
-
Smoother sound output
-
No constant cranking
-
More enjoyable listening
It transforms the gramophone from a novelty you demonstrate briefly into something you can actually sit back and enjoy.
Honestly? I wouldn’t recommend anyone buy this kit without the auto play addition. It elevates the entire build from “cool mechanical model” to “functional and fun conversation piece.”
The Secret Improvement
If you were wondering, all I did was add a blue tooth speaker inside and choosing the songs that match your records. I know it cheap but it serves it purpose and creates the effect I wanted. It can also play other songs of your choice and you will need to keep the volume off/low and it works fine.
https://www.amazon.com/dp/B0BPNYY61M?ref=ppx_yo2ov_dt_b_fed_asin_title
In conclusion, make this kit but get the autoplay addition and take care of the inner balance as any misalignment will stop the wheel from turning.
Best,
Peter
PS: Its 2:30AM here and I need rest……