Thanks @Tricia12. I tried to keep it as simple as possible. I did pick up a few wiring tips from an ex who was an electrician and while a miniature is a lot smaller scale, it’s not that different to wiring in a new power socket .
2 Likes
It is so nice to see the vision finally becoming real. 
1 Like
There are some really good blog articles about it on the Book Nook workshop website.
1 Like
Thankyou, I’ll need to have a read through them
1 Like
Yes sir! Know electrical but not the painting side hahaha
1 Like
Ị am planning to add more lights to my minihouse. I think it will look very nice but I can’t find the suitable lights.
1 Like
My my. Discovering more about our Hawaiian charmer. A wild child at heart, knows her way around trade tools and a great bargain hunter. Next thing you know we will find out you used to surf and climb volcanoes. 
1 Like
What’s the model? I’m happy to take a look see if I can identify them.
Magic Kiki emporium. I want another light for it.
1 Like
You are amazing Jason. I wouldn’t even know how to add extra lighting myself, so I have a lot of respect for people who do. And I am just amazed at the little I can see of your build.
@Tricia12 That is probably one of the the easiest to add an additional light into, and a great start if you want to learn more. I have it sitting on my shelf complete, but also still with just the one LED that came with it.
There is a great article on Book Nook Workshops website called A Beginners Guide to Adding LED’s https://booknookworkshop.com/2026/07/18/a-beginners-guide-to-adding-extra-leds-to-your-book-nook/. At first glance, it may be a little daunting or overwhelming, but I recommend you check it out. My instructions below should be simple enough for you to follow if all you want to do is add an additional bulb of the same type already in the model.
The most import factor of getting started with adding additional LED’s is bulb size and voltage.
Voltage:
A good rule of thumb. AA and AAA batteries are 1.5 volts each. 2 batteries, means 3 volts, so you need to use 3 volt LED’s
Bulb size:
There are many different sizes, but the most common in our little rolife models are the 3mm bulbs, so lets stick with that. It is also Warm White in colour as apposed to Cool White. Warm White is perfect for indoor lighting in models.
So you need 1 x 3mm 3volt Warm White LED, pre-wired so you dont need to worry about soldering bulbs to wires.
Here are some links to the exact item:
Ebay Australia:
https://ebay.io/m/N9J83f They sell them in packs of 5, 10 or 20.
https://ebay.io/m/puhi9j They sell individually or in packs. Just make sure you select the following in the drop down list on this page:
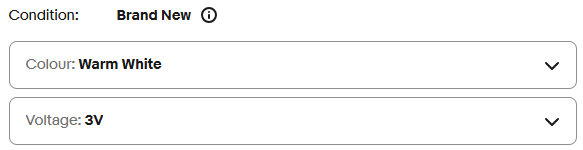
Temu - I could only find 9 volt or 12 volt which you would not be able to run from a AAA or AA 2 battery pack
Amazon Australia:
https://amzn.asia/d/00rcVZbR
If it were me choosing, I would go with thre Amazon one as they are a standard LED closest to the one that comes with this model. As for the ones from EBay, one is ultra bright and may be too bright for this little model, and the other is a diffused light (cloudy bulb) which I have not seen in action before so I dont know how it would look.
So once you have the LED, you just need to work out where you want it to go in the model, and if you want some form of lampshade on it, mount it, run the wires to the battery box like you did with the existing one and attach it to the existing negative/positive wires, exactly like you did with the original one. Ideally soldering is best, but if you have no issues with the way you currently join wires by twisting them together, then just go that. Use some standard electrical tape to wrap around them once joined.
If you need additional wire due to needing more length, just visit an electronics shop (IE Jaycar if there is one near you) and and ask them for red and black wires for 3volt LED’s. They sell it by the meter. It will likely be the thinnest wire they have in stock Its what I used in this customisation. You will also need wire strippers if you need to do this.
The wires on all of these may be a little thicker than the one that came with your model, but they are still compatible.
With my fairyland model, I was running about 13 of these LED’s on the exact same battery box. You just need to keep in mind, the more LED’s you add, the more battery power they will use so 2 batteries running 2 LED’s would likely last half as long as 2 batteries running 1 LED.
I hope this helps. Let me know if you have any questions.
3 Likes
Amazing. Thank you so much @chamelionboy for sharing. i will look into it. a few people have suggested Jaycar but i still haven’t found the right one from it.
1 Like
Jaycar generally don’t sell pre-wired LED’s, so they require soldering to wires and possibly diodes.
You are very welcome. As I said, reach out if you have any questions.
1 Like
thank you for your kindness once again.
1 Like
@chamelionboy I bet … you have worked your socks off … you should be very proud of yourself 
1 Like
Wow, what a cute little spotlight! I wouldn’t have been able to do that.
1 Like
Thanks @Jo1. I am trying to decide if I move straight onto the Christmas customisation next or do a simpler quick build first 
3D printers certainly do come in handy.
1 Like
You’ve been busy @chamelionboy that spotlight looks really cool
1 Like
Thanks @Jill_Francisco. I was very happy to have found them