I’ve been waiting to share this one! I was selected for Rolife’s DH104 Clockwise Clocks product testing. This product testing opportunity is offered to Robotime Brand Ambassadors, and I’m very happy I had the chance to participate.
With 739 pieces and a 54-page instruction book, this is definitely a mixed-type kit with plenty of DIY along with the more familiar assembly. I can usually finish a kit in a day or two, but this one took me eight days from start to finish. Between the different materials, techniques, and all those tiny details, it really did feel Master level while I was building it.
Overall, I really enjoyed the build. The finished result is awesome and absolutely packed with detail. There are clocks everywhere, tiny tools, furniture, watches, cabinets, and so many little things to discover. I especially love the huge clock at the back, and once the lights are on, the whole shop really comes to life.
This kit uses quite a few different building techniques. There’s paper cutting, wire work, tiny beads, and quite a bit of foil work. I had never worked with foil like this before, so that was probably the biggest learning curve for me. Some pieces need to be traced, embossed, and cut from the foil sheet. My first attempts were definitely not my best, but I got much better at it as I went along! I ended up keeping my hand-embossed gold moon on the front because once it was installed, I was pretty happy with it. The kit does provide printed alternatives for some of the foil decorations, which I appreciated.
I understand that cutting out paper pieces is part of the DIY experience, especially in a Master-level kit, but I still wish these had been punched pieces. That was especially true for the clocks. Cutting a perfectly round little circle by hand is not one of my talents, and some of my poor clocks definitely weren’t very round! Thankfully, most of the smaller round clocks are stickers, but there is still quite a bit of paper cutting throughout the build.
One tip I would definitely recommend: there are SO many clocks in this kit, and several look very similar. I started lightly writing the name of each clock on the back in pencil after I made it, such as “Clock A.” That made finding the correct one later so much easier.
There are also a few instruction issues worth making a note of before you build:
- The tools page labels the tweezers as “Sandpaper.”
- The materials list shows J47, but the correct part is P47.
- K33 is one continuous paper piece. Don’t cut the two printed sections apart. I almost did!
- One Roman numeral decoration is shown as IIX. I flipped mine so it reads XII.
- The cabinet/drawer sequence can be confusing because a drawer front needed later looks like an extra piece during an earlier cabinet assembly. I managed to use the later piece early and had glued it much too well to get it back off! I had to make a little adjustment later in the build to work around my mistake.
- One cabinet is printed with “Watch Markers Shop,” which appears to have been intended to say “Watch Makers Shop.”
I had a few parts that didn’t fit quite as expected too. The tiny LUBE can was one example. The instructions have you make small indentations in the plastic for the wire pieces. You could certainly do this carefully with the very fine point of a craft knife as instructed, but I already own one of those tiny hand drills used for working on gaming miniatures, so I used it instead. I drilled the holes all the way through, which made this little assembly much easier for me. I also had to sand the spout wire thinner because none of the supplied beads would fit over it.
And then there was that roof! The large plastic roof was definitely my biggest assembly challenge. The plastic really wanted to spring back into its original shape, and even stronger, wider double-sided tape wasn’t enough to hold mine down. I finally used double-sided tape around the edges and Beacon 3-in-1 in the centers, then clamped the whole thing down with binder clips and reverse-action tweezers. It had to sit that way overnight before I was willing to take the clamps off. That roof was a chore! It worked, though, and I really like how it looks finished.
There were also some assemblies that looked intimidating in the instructions but turned out to be really fun. The little desk chair was one of those, and I absolutely loved making the wall lamp. I also appreciated little packaging decisions like putting two almost-identical lamp pieces in separate bags so they couldn’t easily be mixed up.
And then there were a few little things that I built exactly the way the instructions told me to and put exactly where they told me to…and I still have absolutely no idea what they are supposed to be!  With a clockmaker’s workshop this packed with tiny tools and gadgets, I decided they belonged there whether I could identify them or not.
This is definitely not a quick beginner build, but that’s part of what I enjoyed about it. It kept changing techniques and giving me something different to work on, and there is an incredible amount to look at when it’s finished.
I took around 90 photos while I was building and somehow managed to narrow those down to 52 for this movie compilation. It follows the build from the beginning through the finished Clockwise Clocks, so you can see just how much goes into this one.
Thank you Robotime for giving me the opportunity to participate in the product testing!
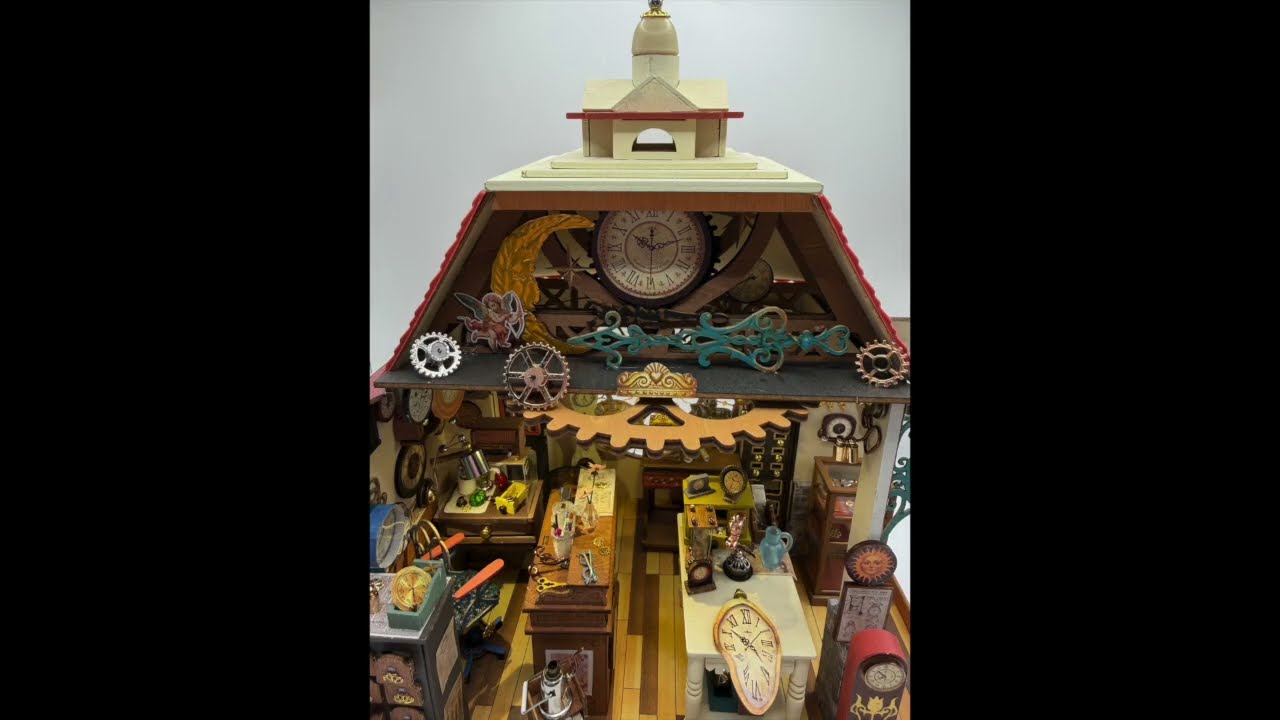
If you have any questions about something you see in the build or the video, just let me know. And what part of Clockwise Clocks catches your eye first—the giant clock, all those tiny clocks inside, the workshop details, or something else?

